
Add customization features to your Etsy store
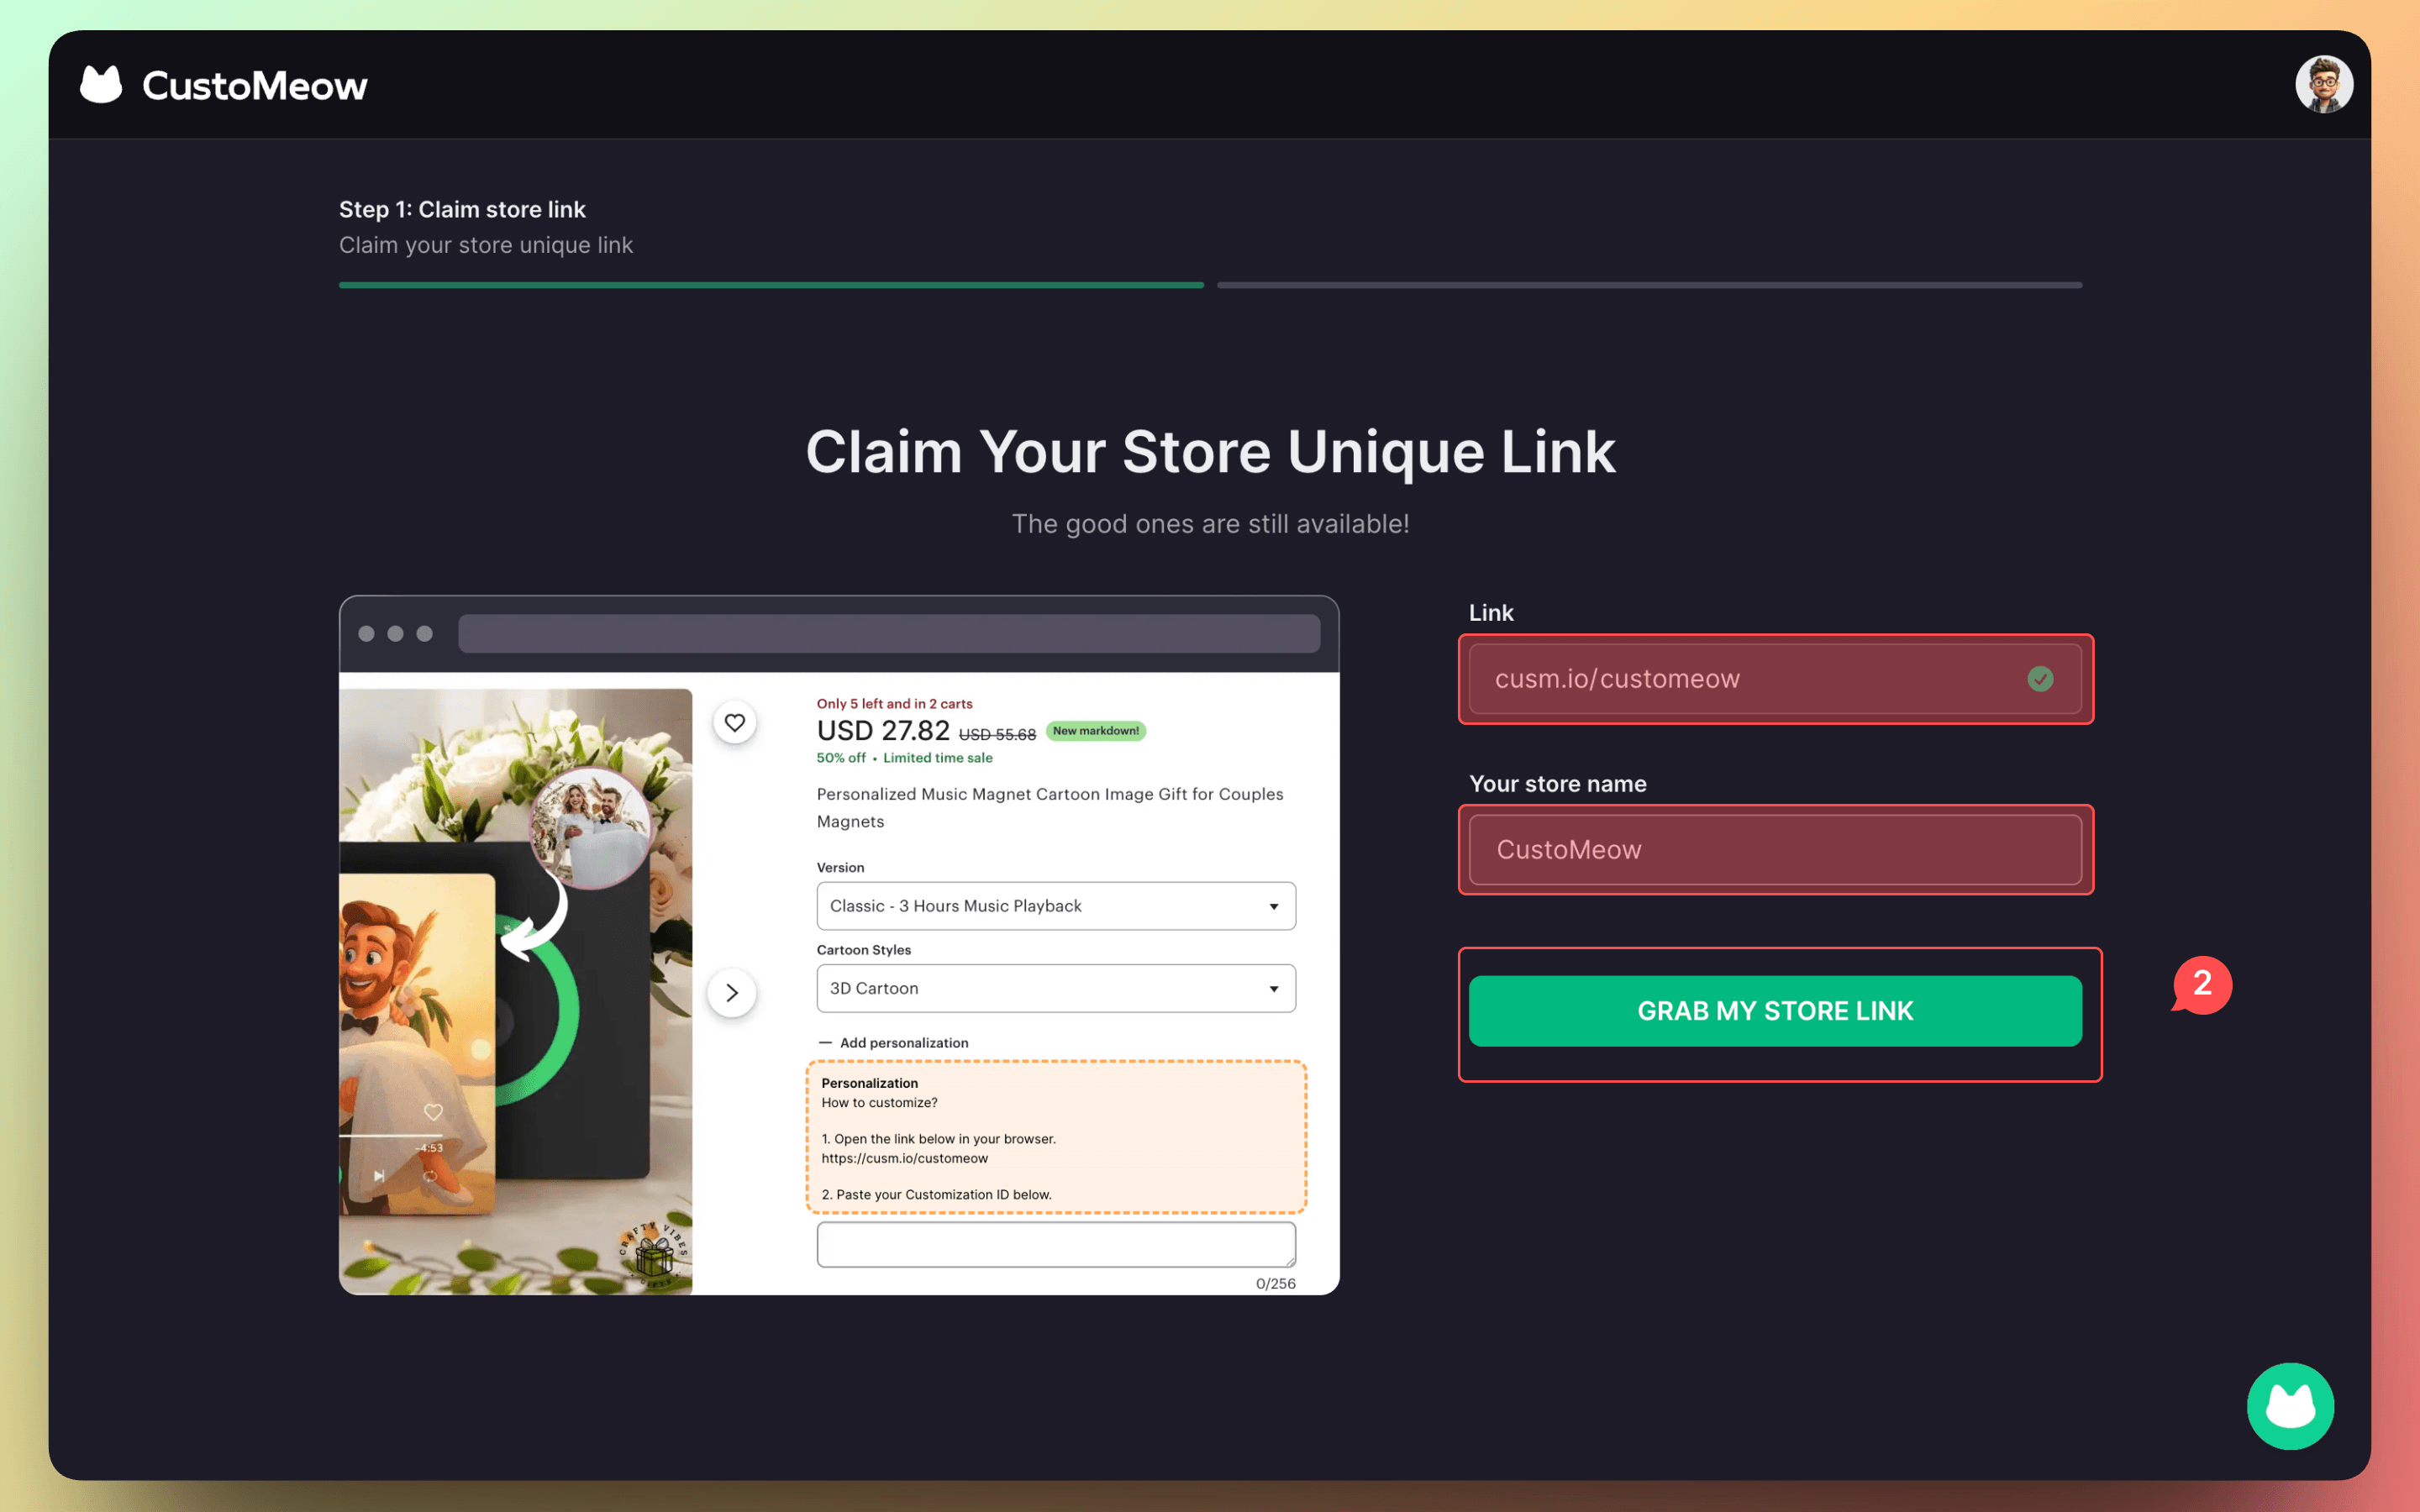
First, add your Etsy store and claim your store customization link. Buyers will use this link to complete online personalization.

For data security reasons, Etsy stores are operated in manual mode. After connecting your store, you need to manually import products and orders.
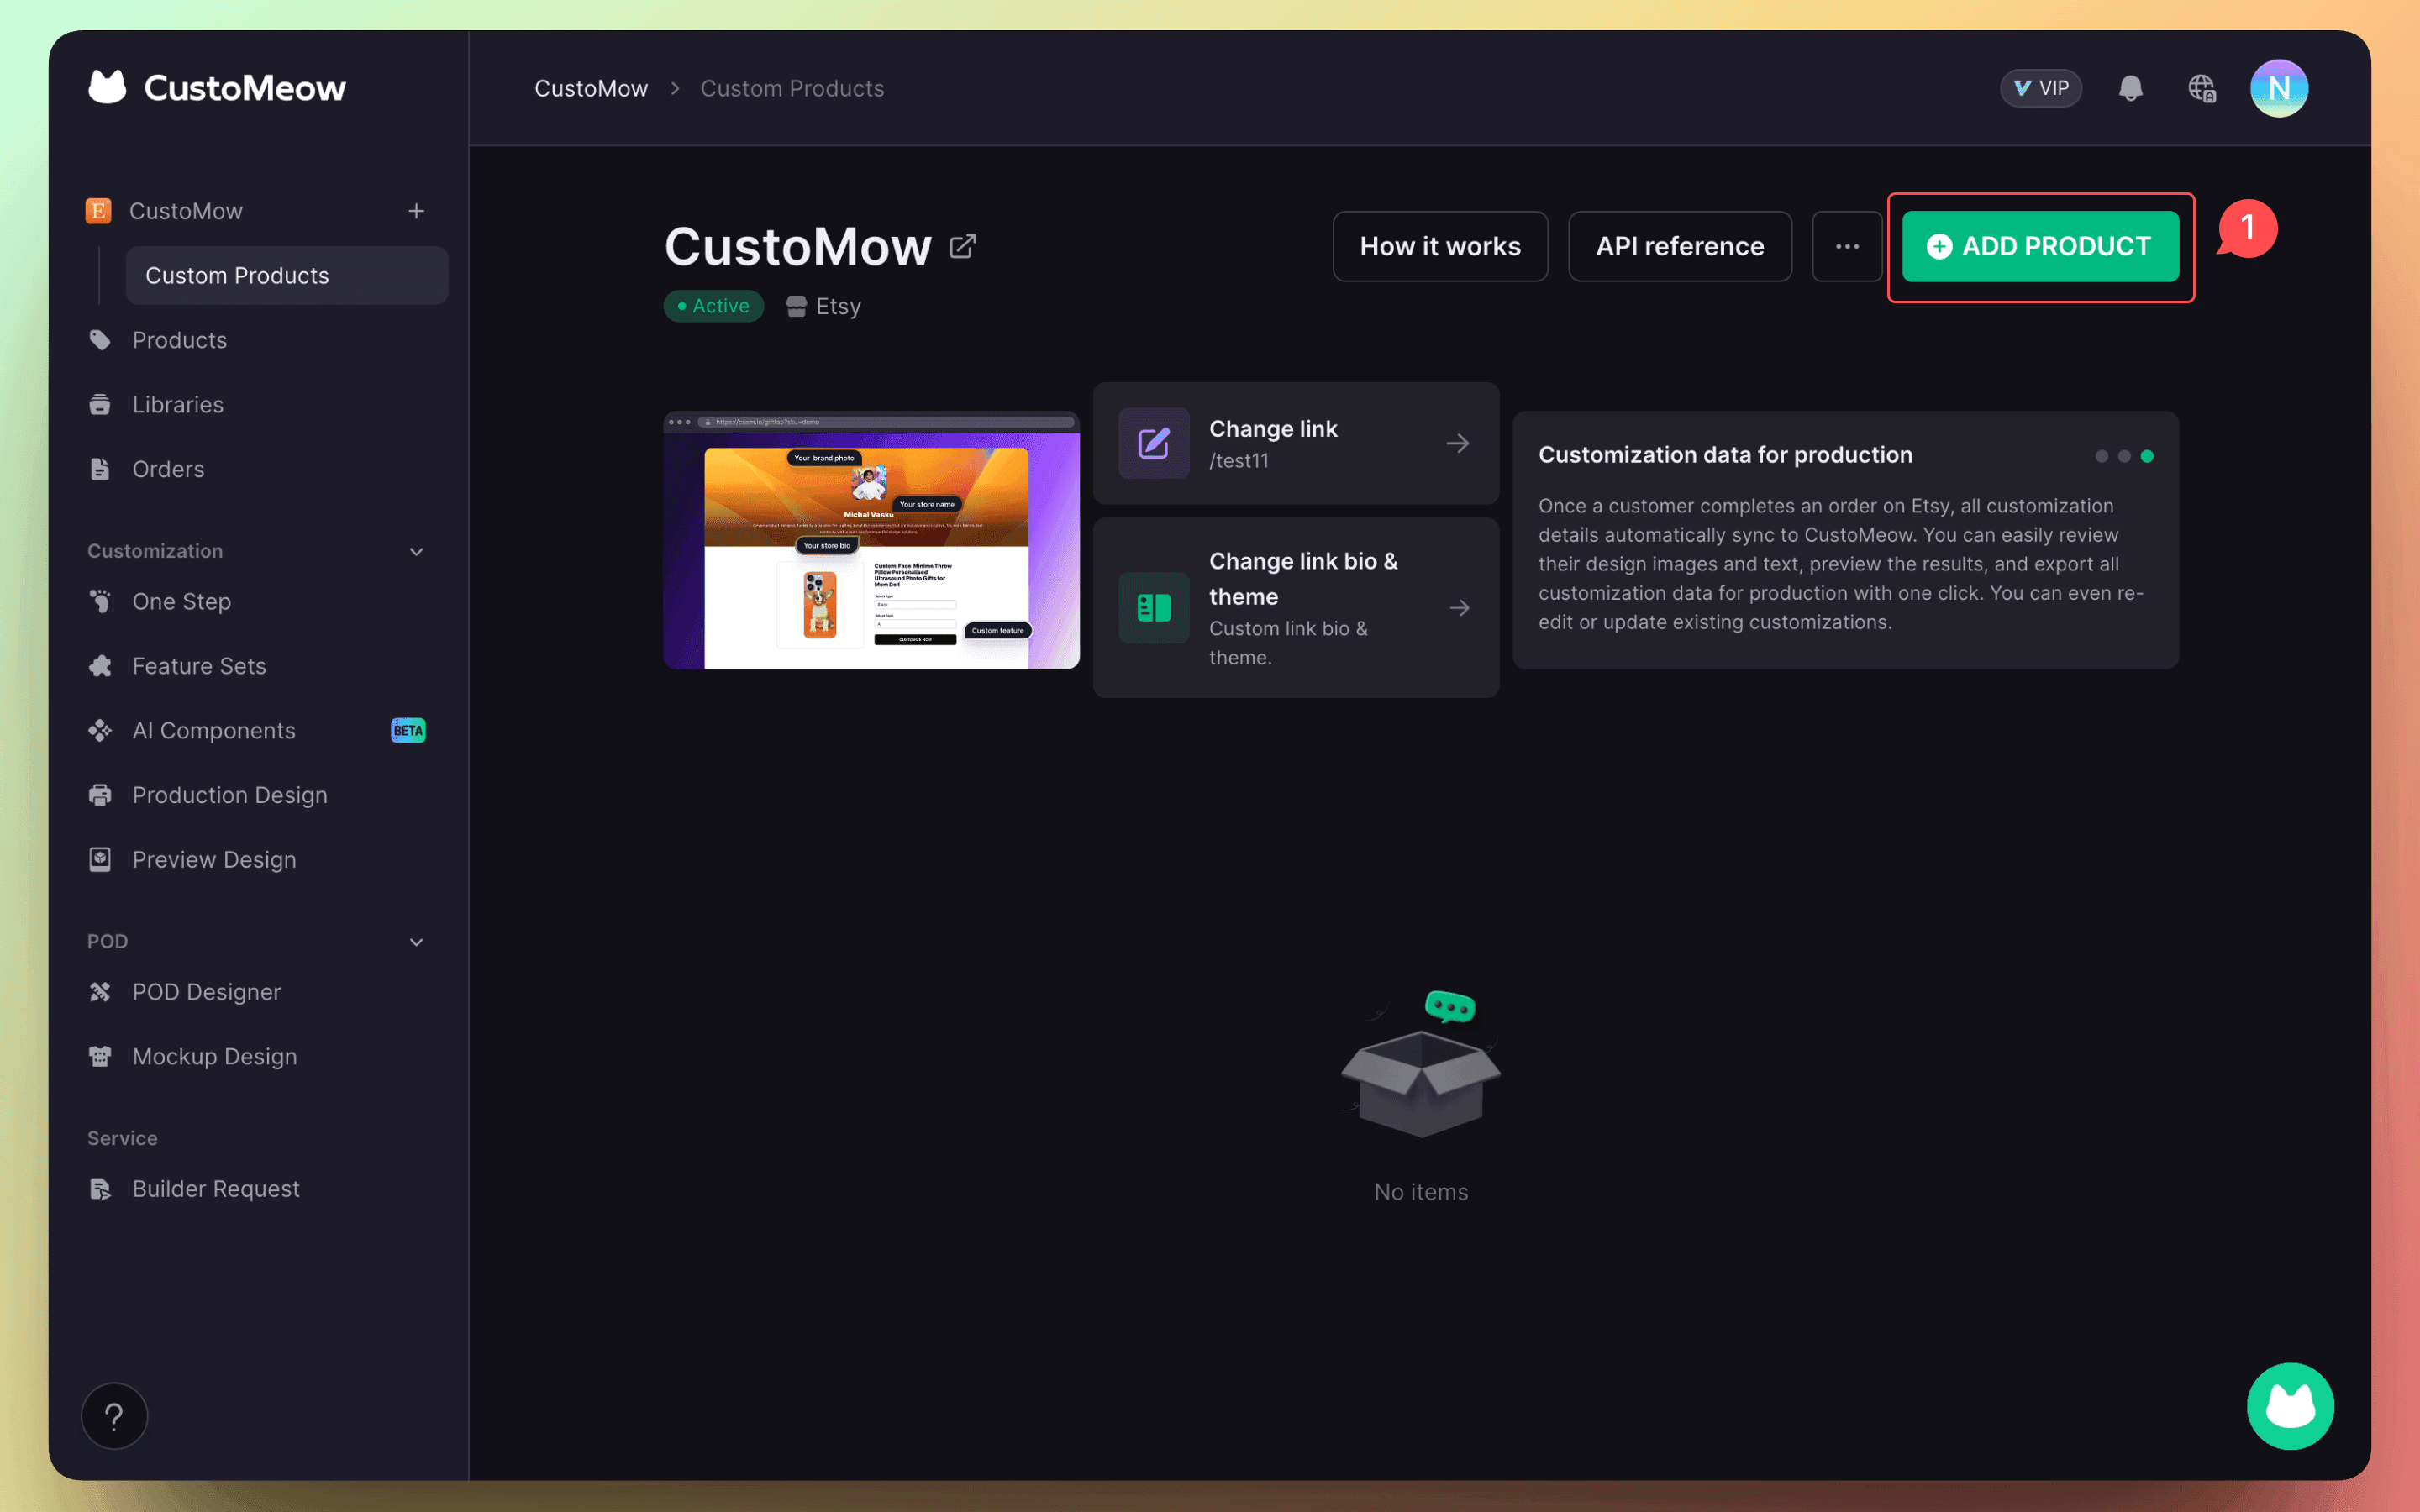
Next, export products from your Etsy store and import them into CustoMeow.
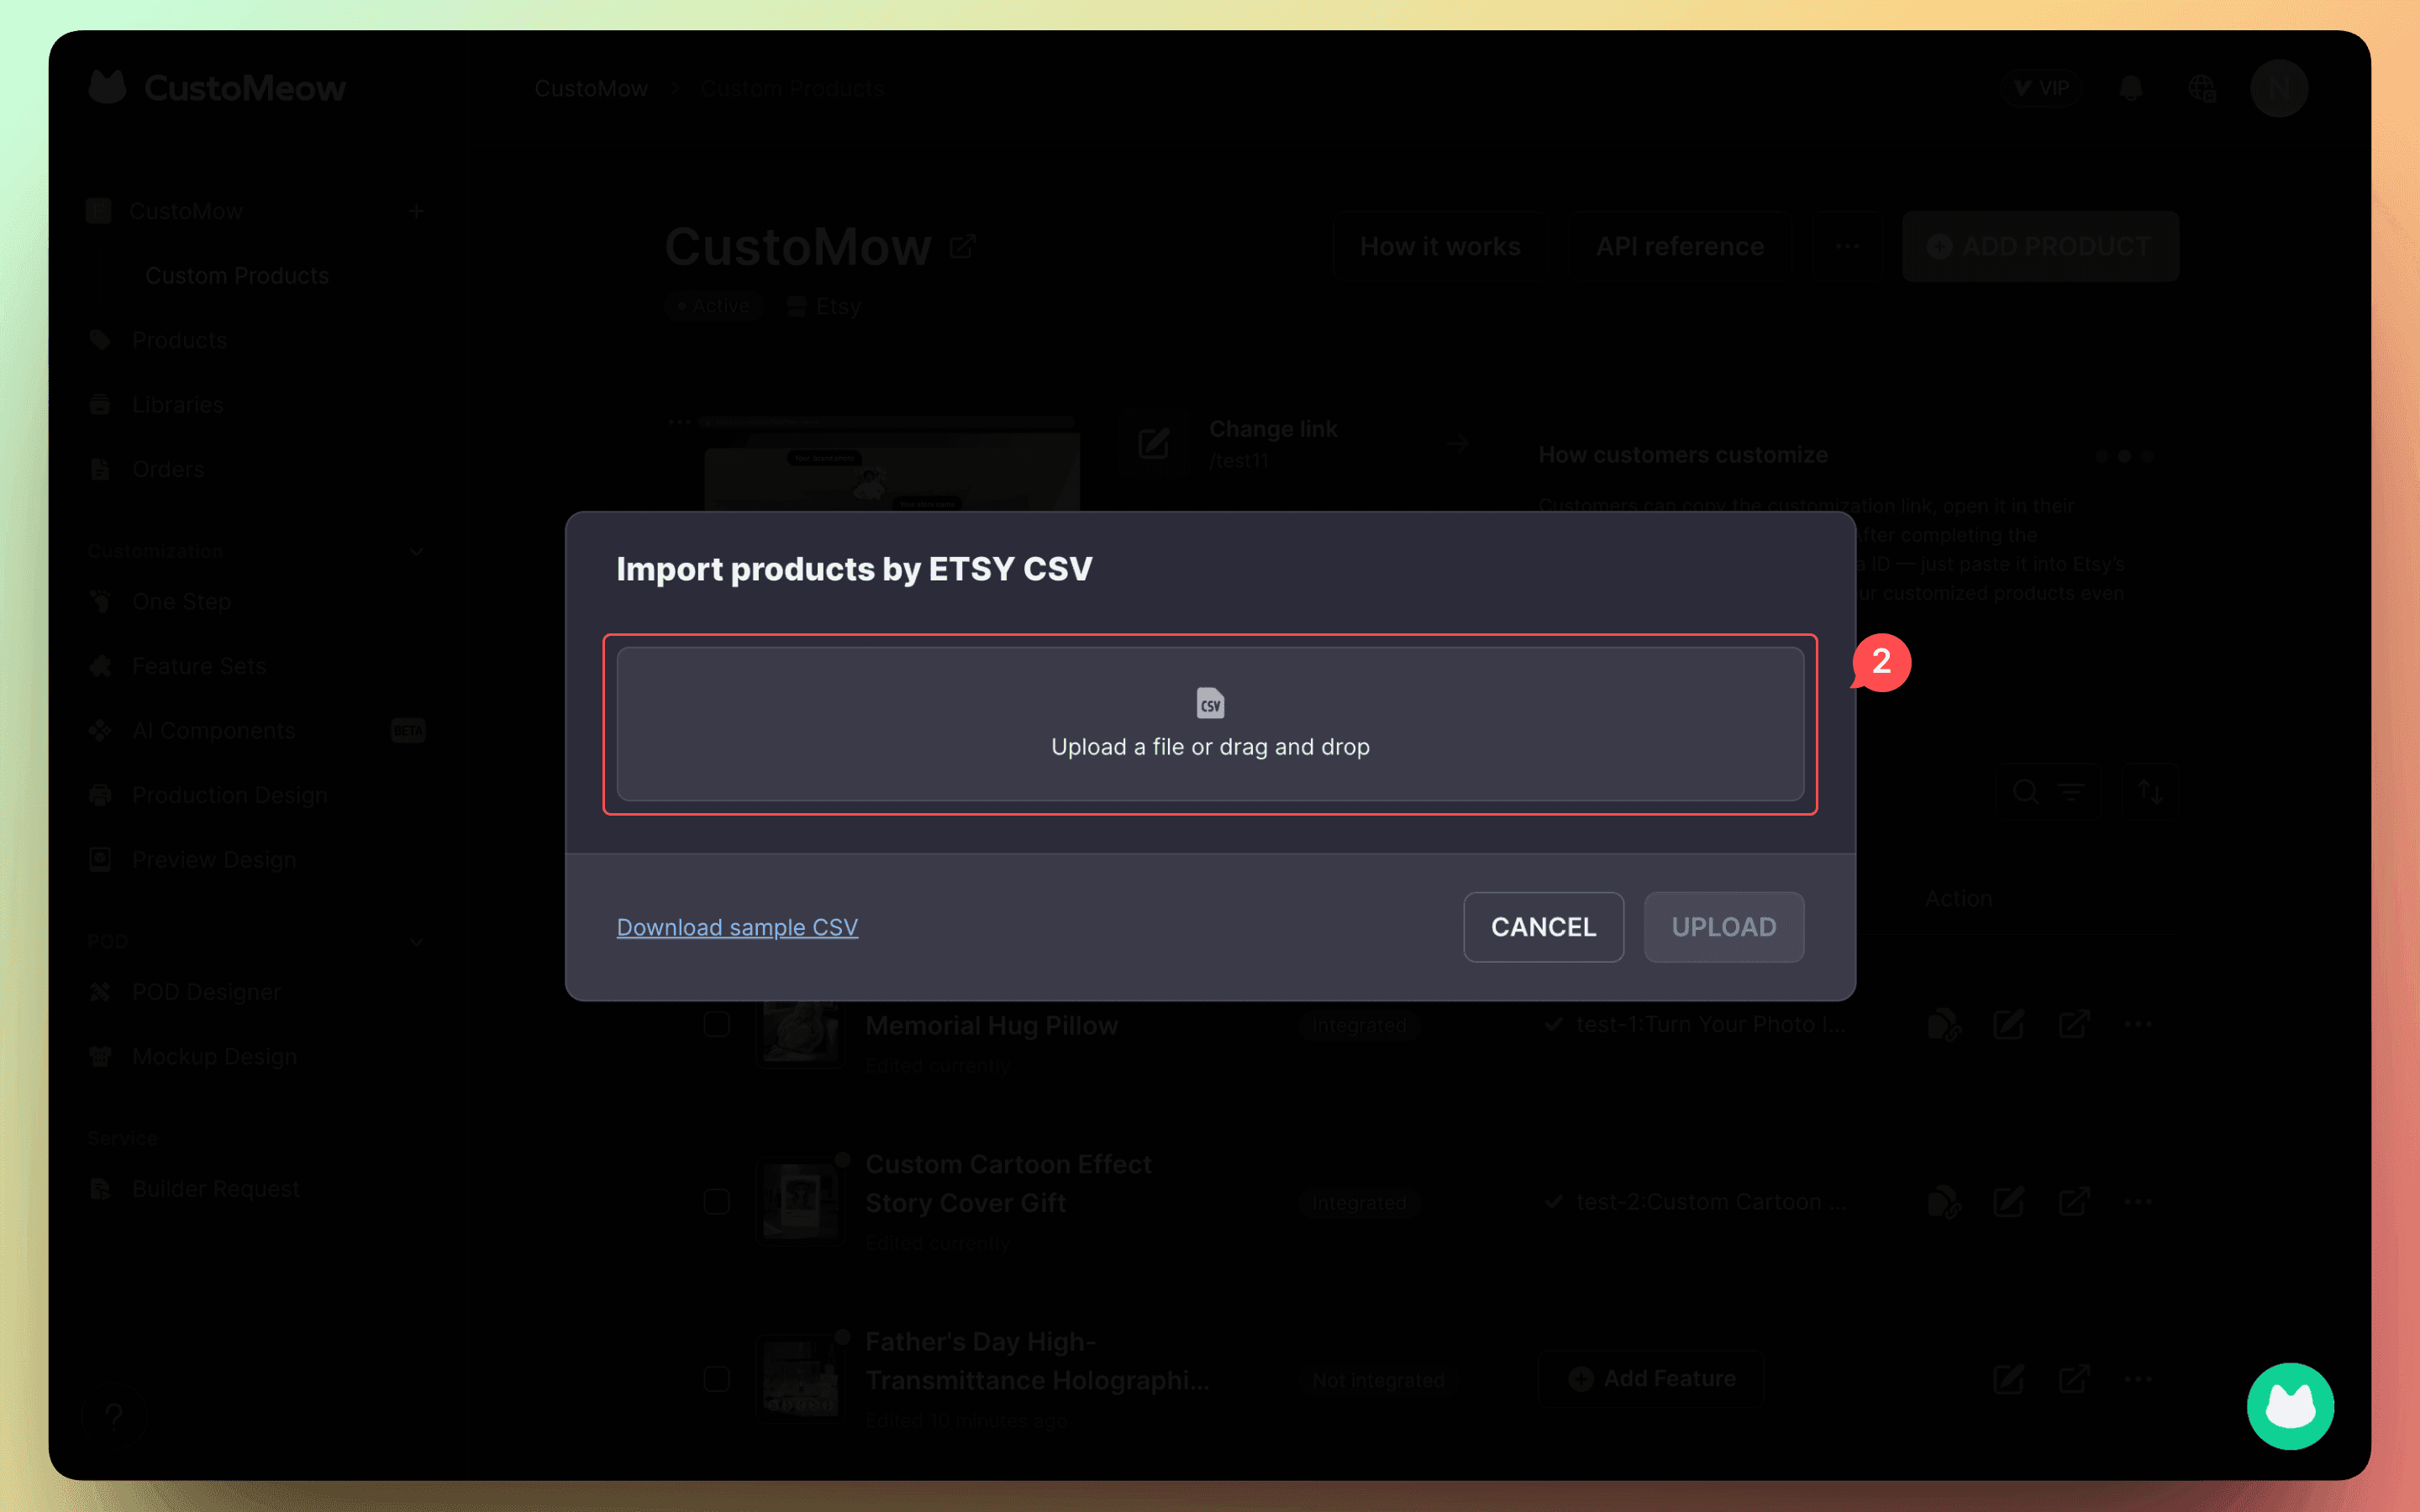
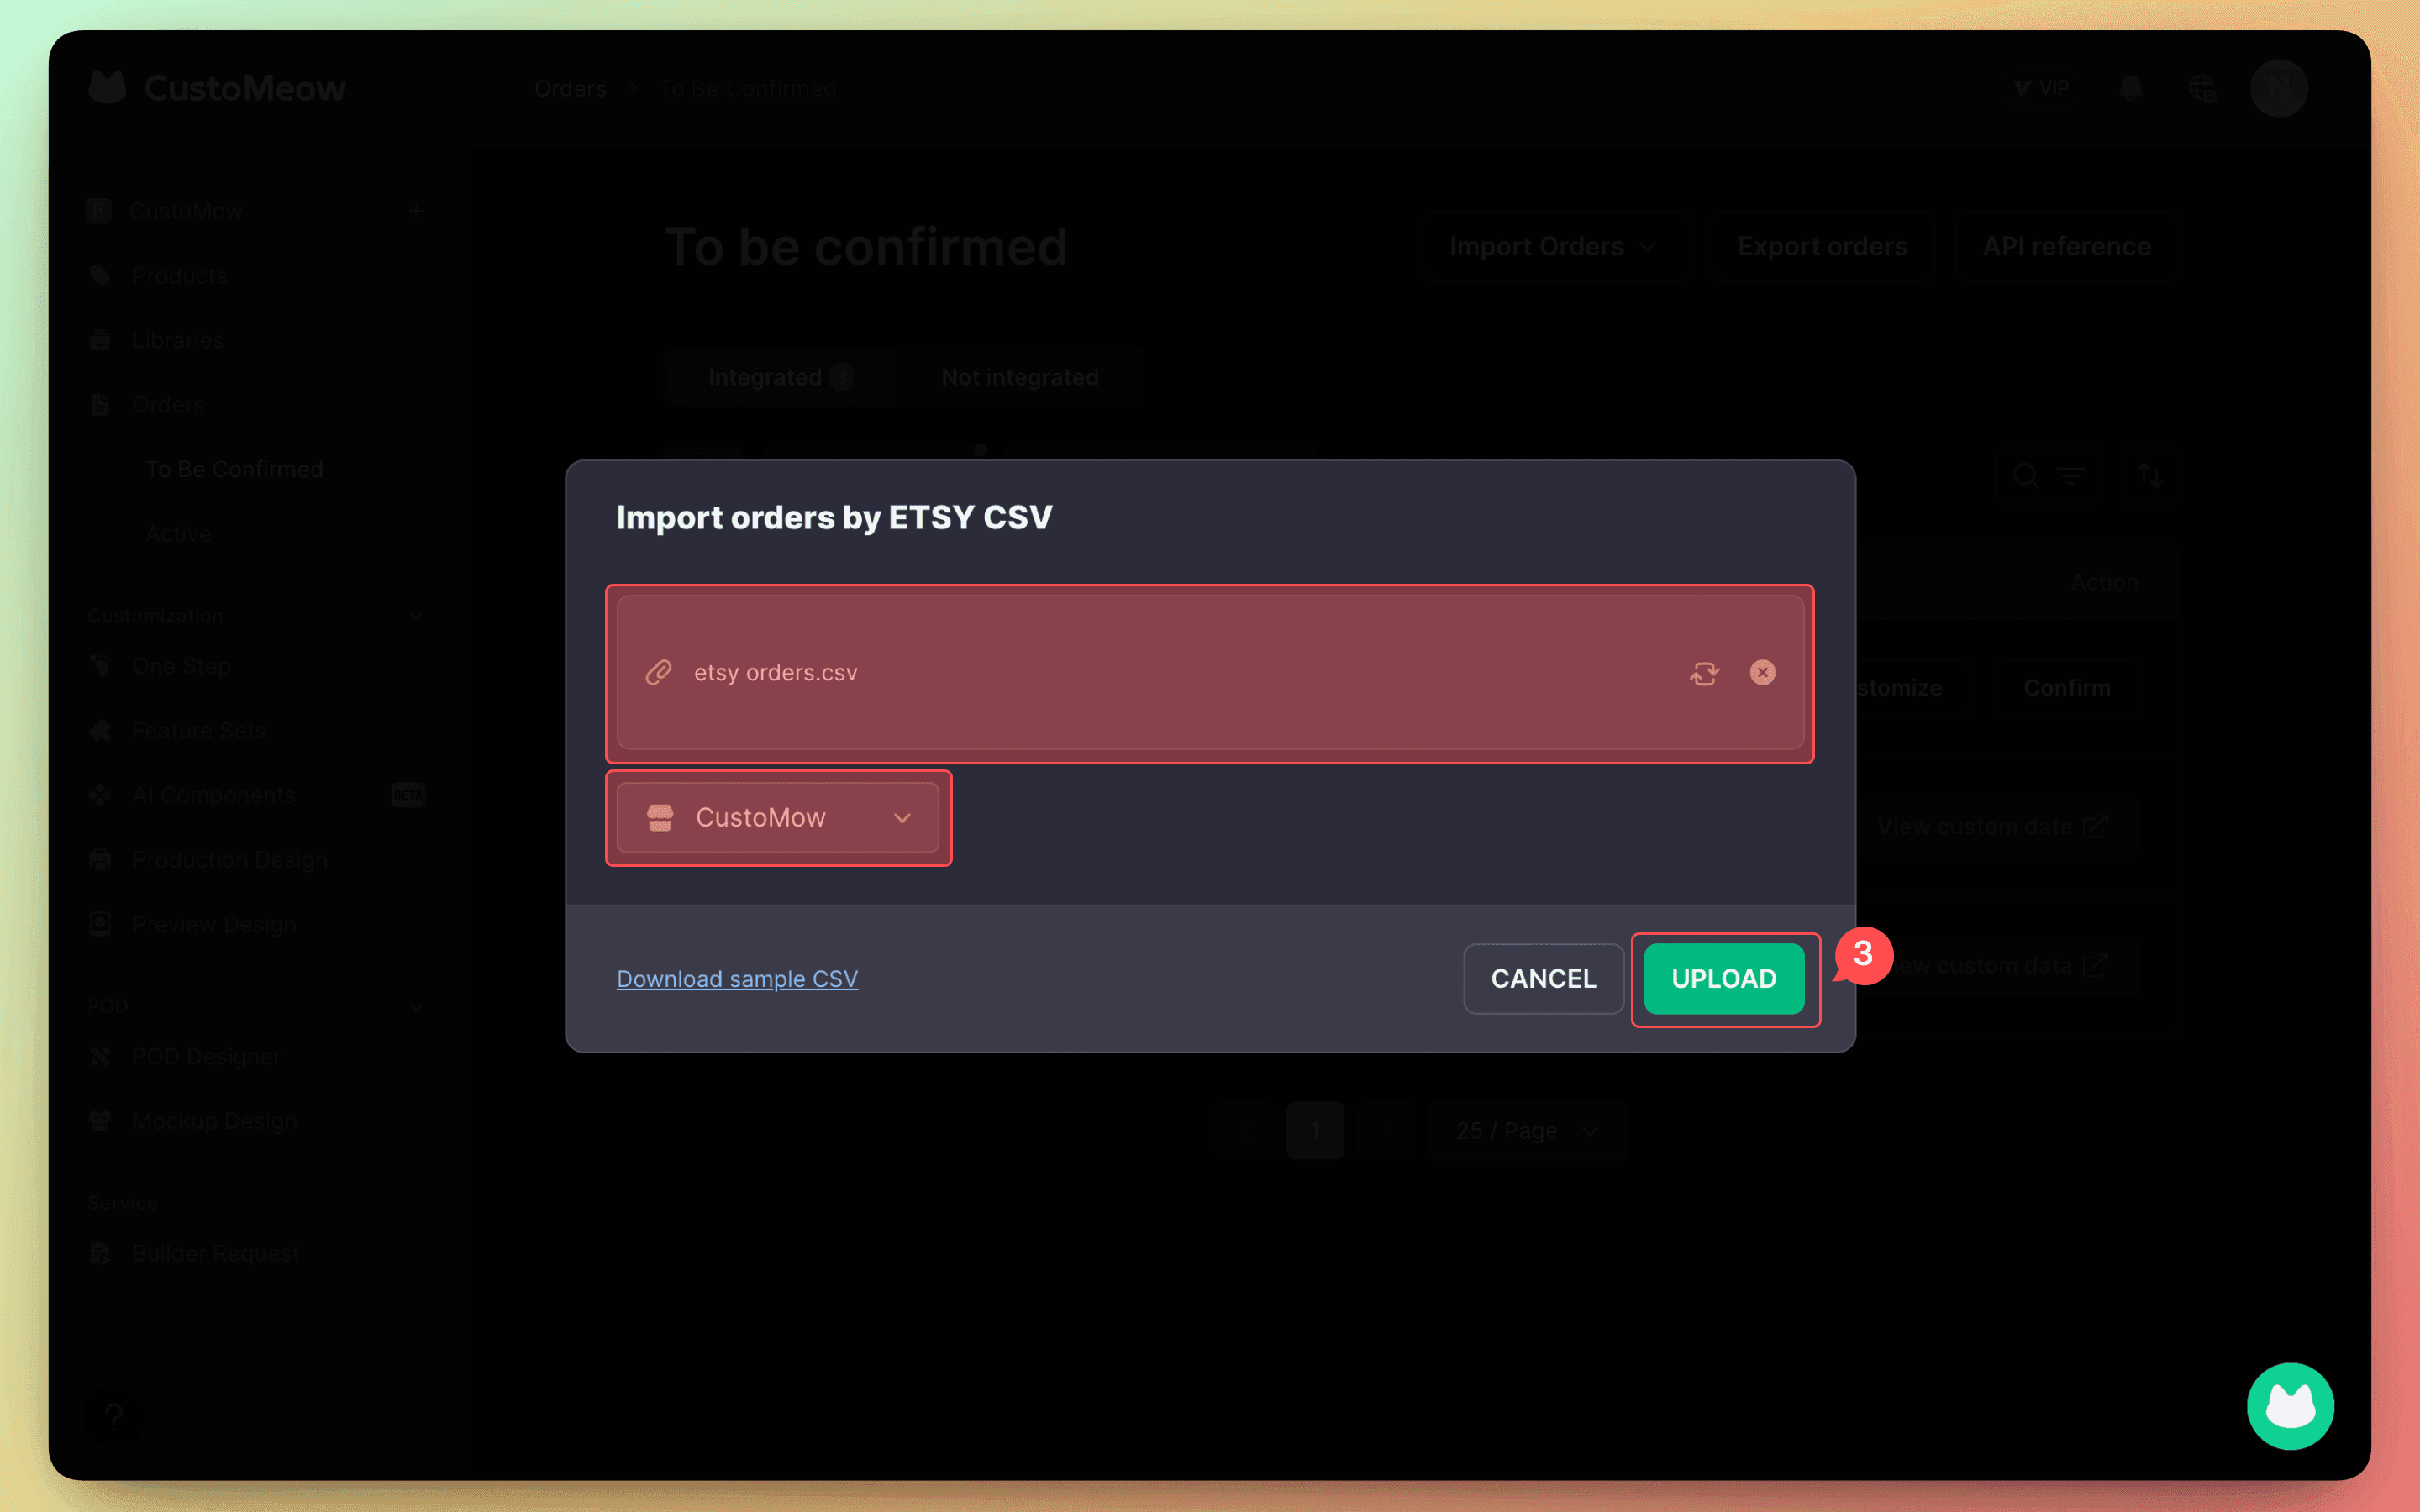
The import file must follow the required format. You can download the sample template to view the standard fields and examples.
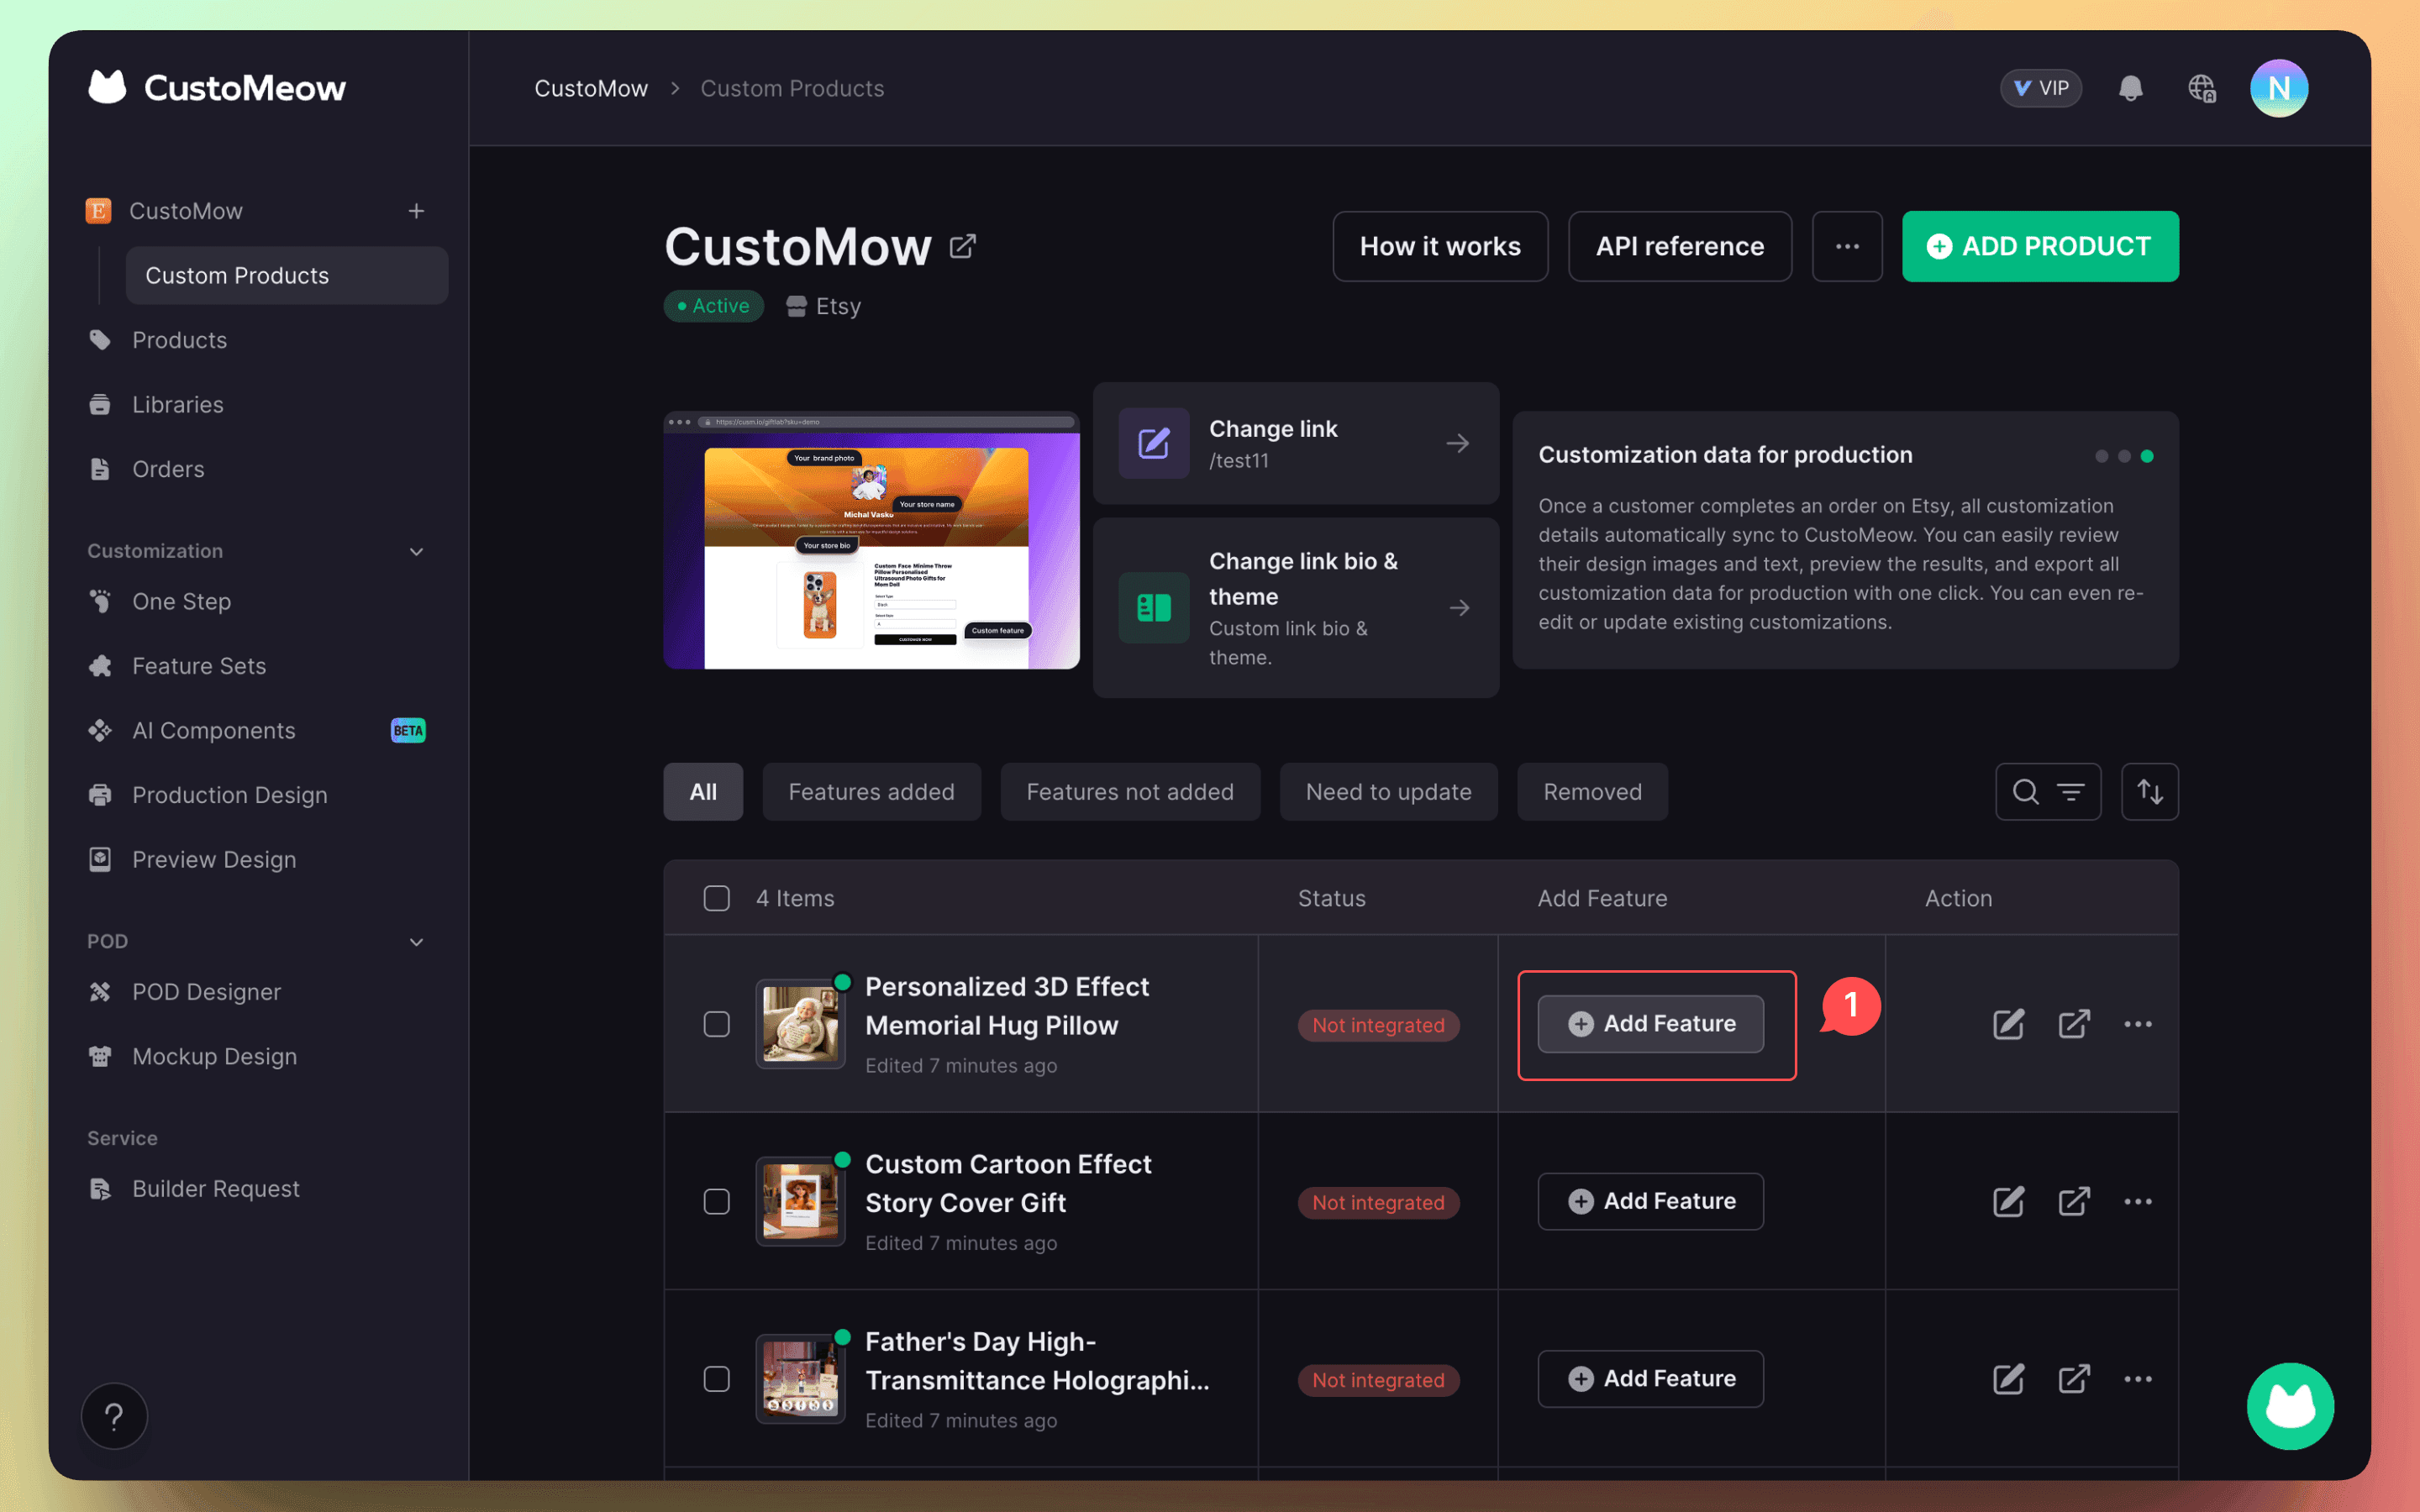
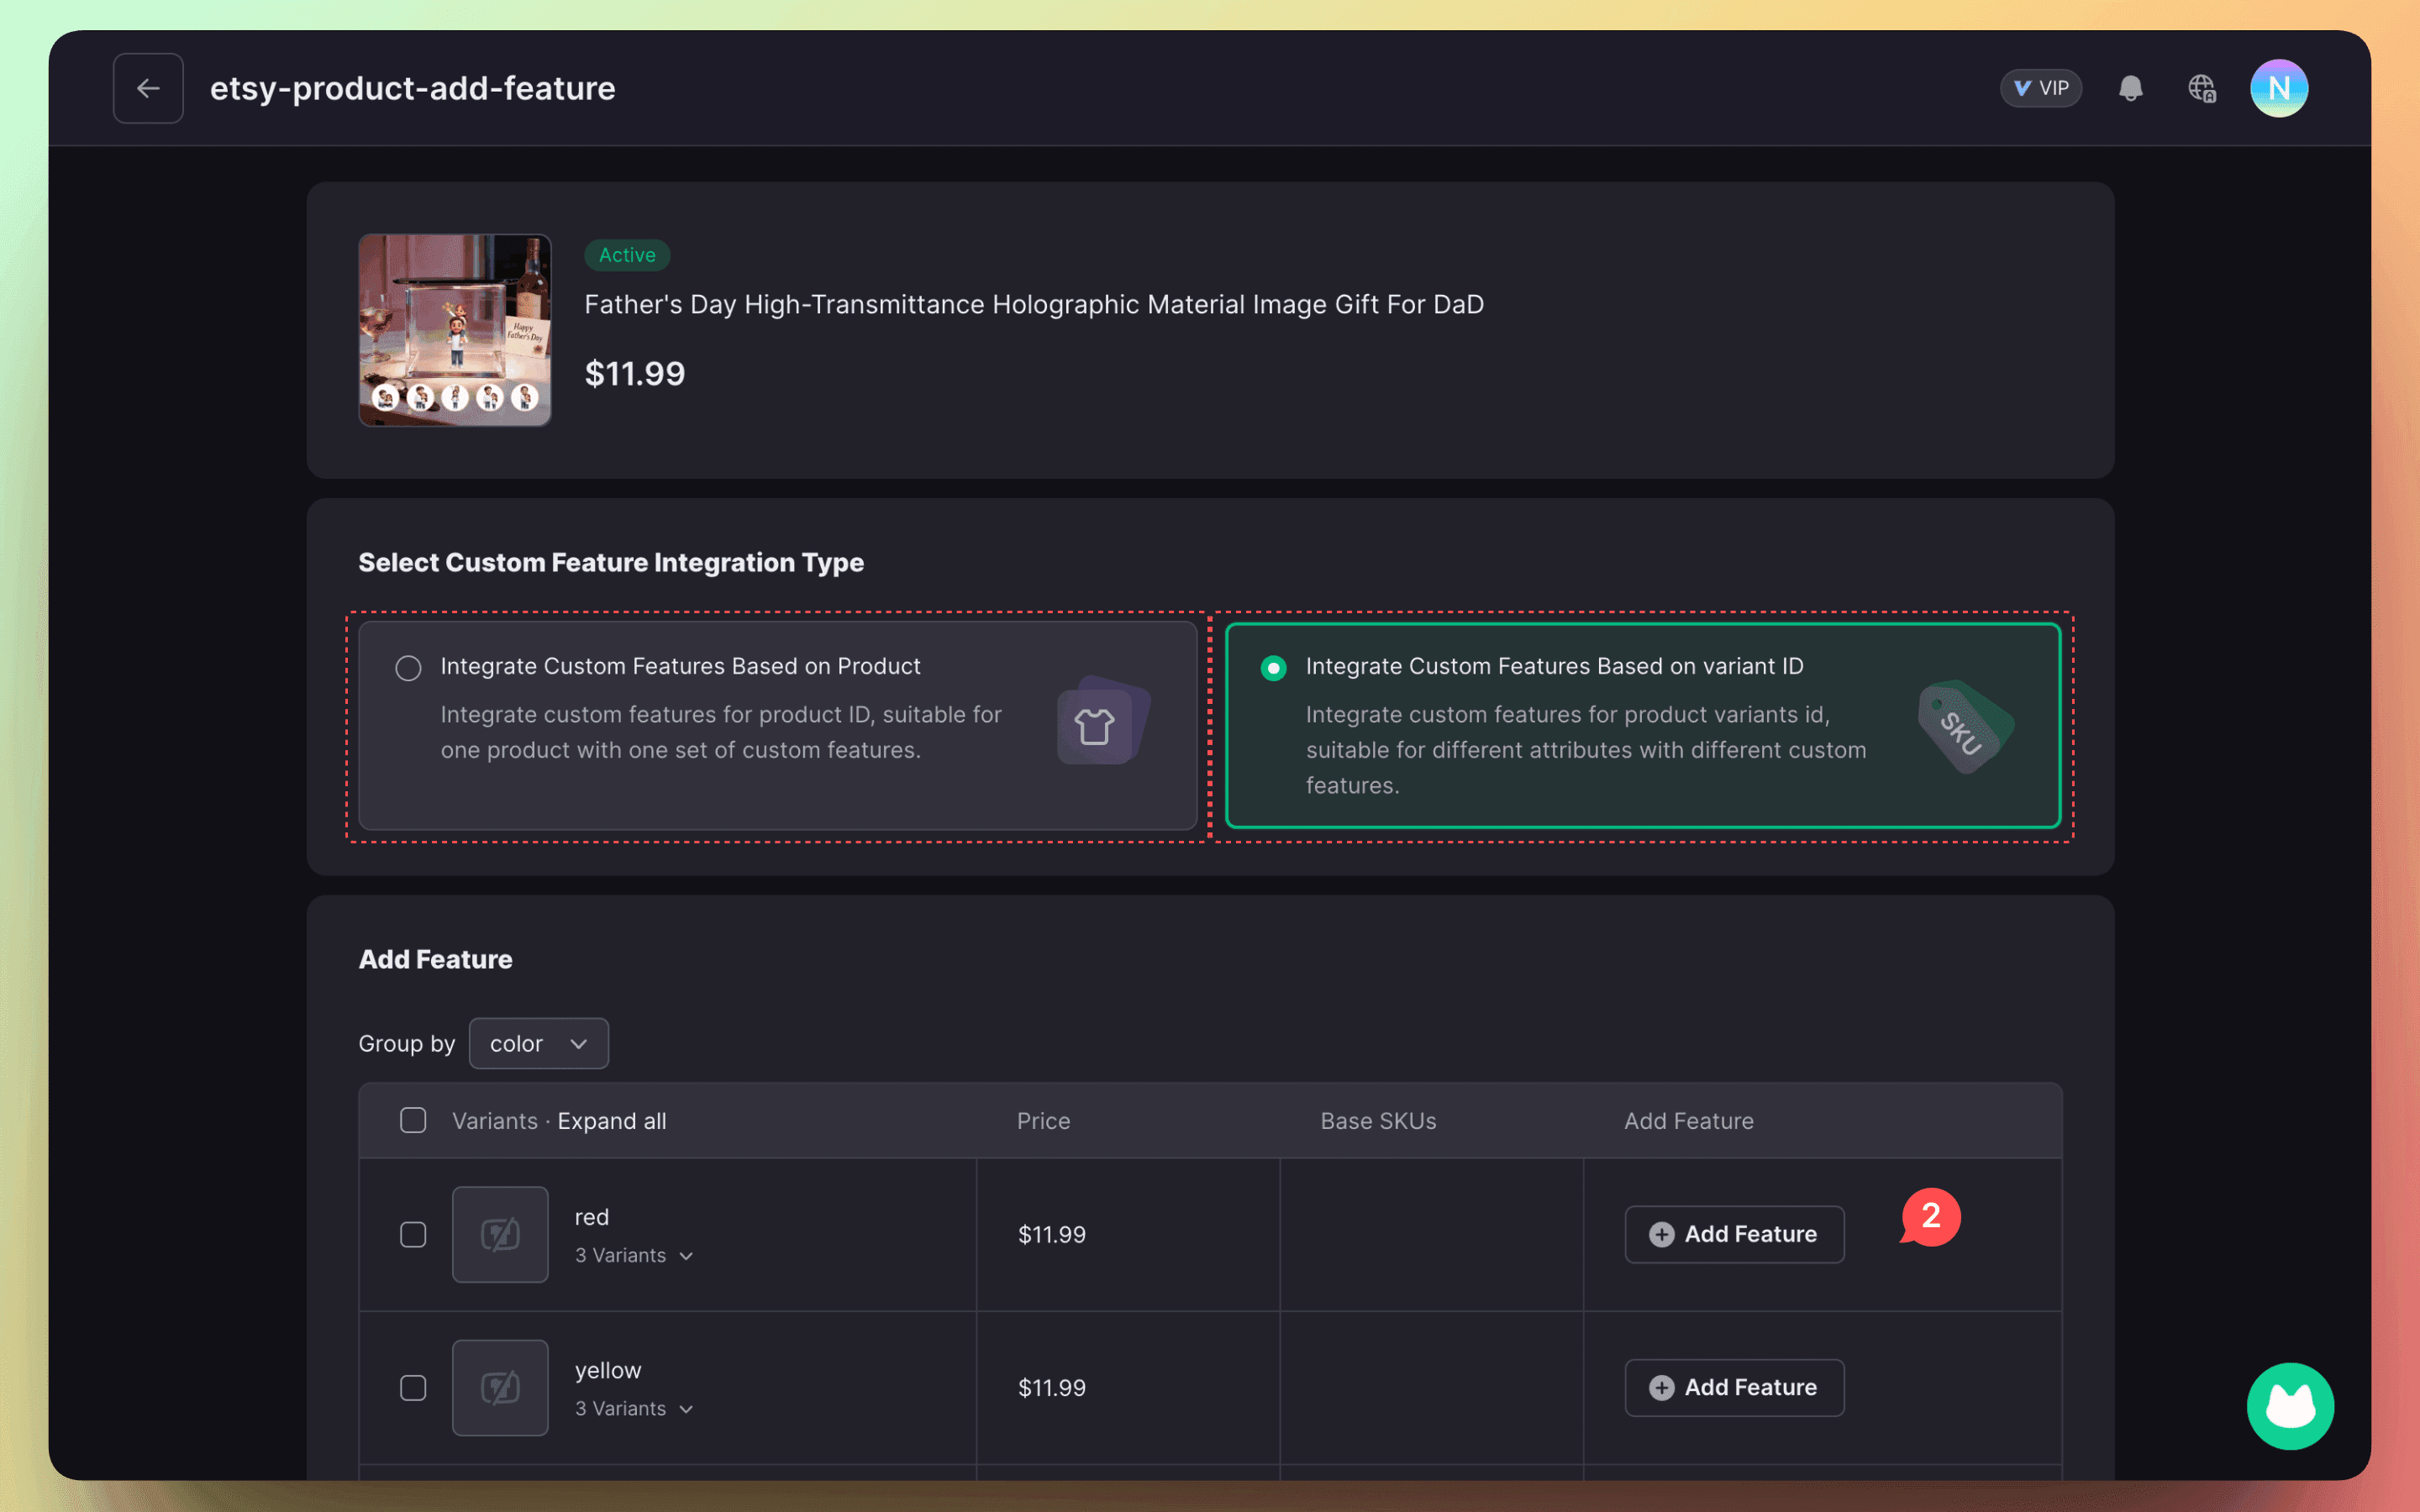
Finally, configure customization settings for each product.CustoMeow supports flexible configuration options. You can apply a unified customization rule to an entire product, or define different customization rules based on product attributes or variants.
How buyers personalize online on Etsy
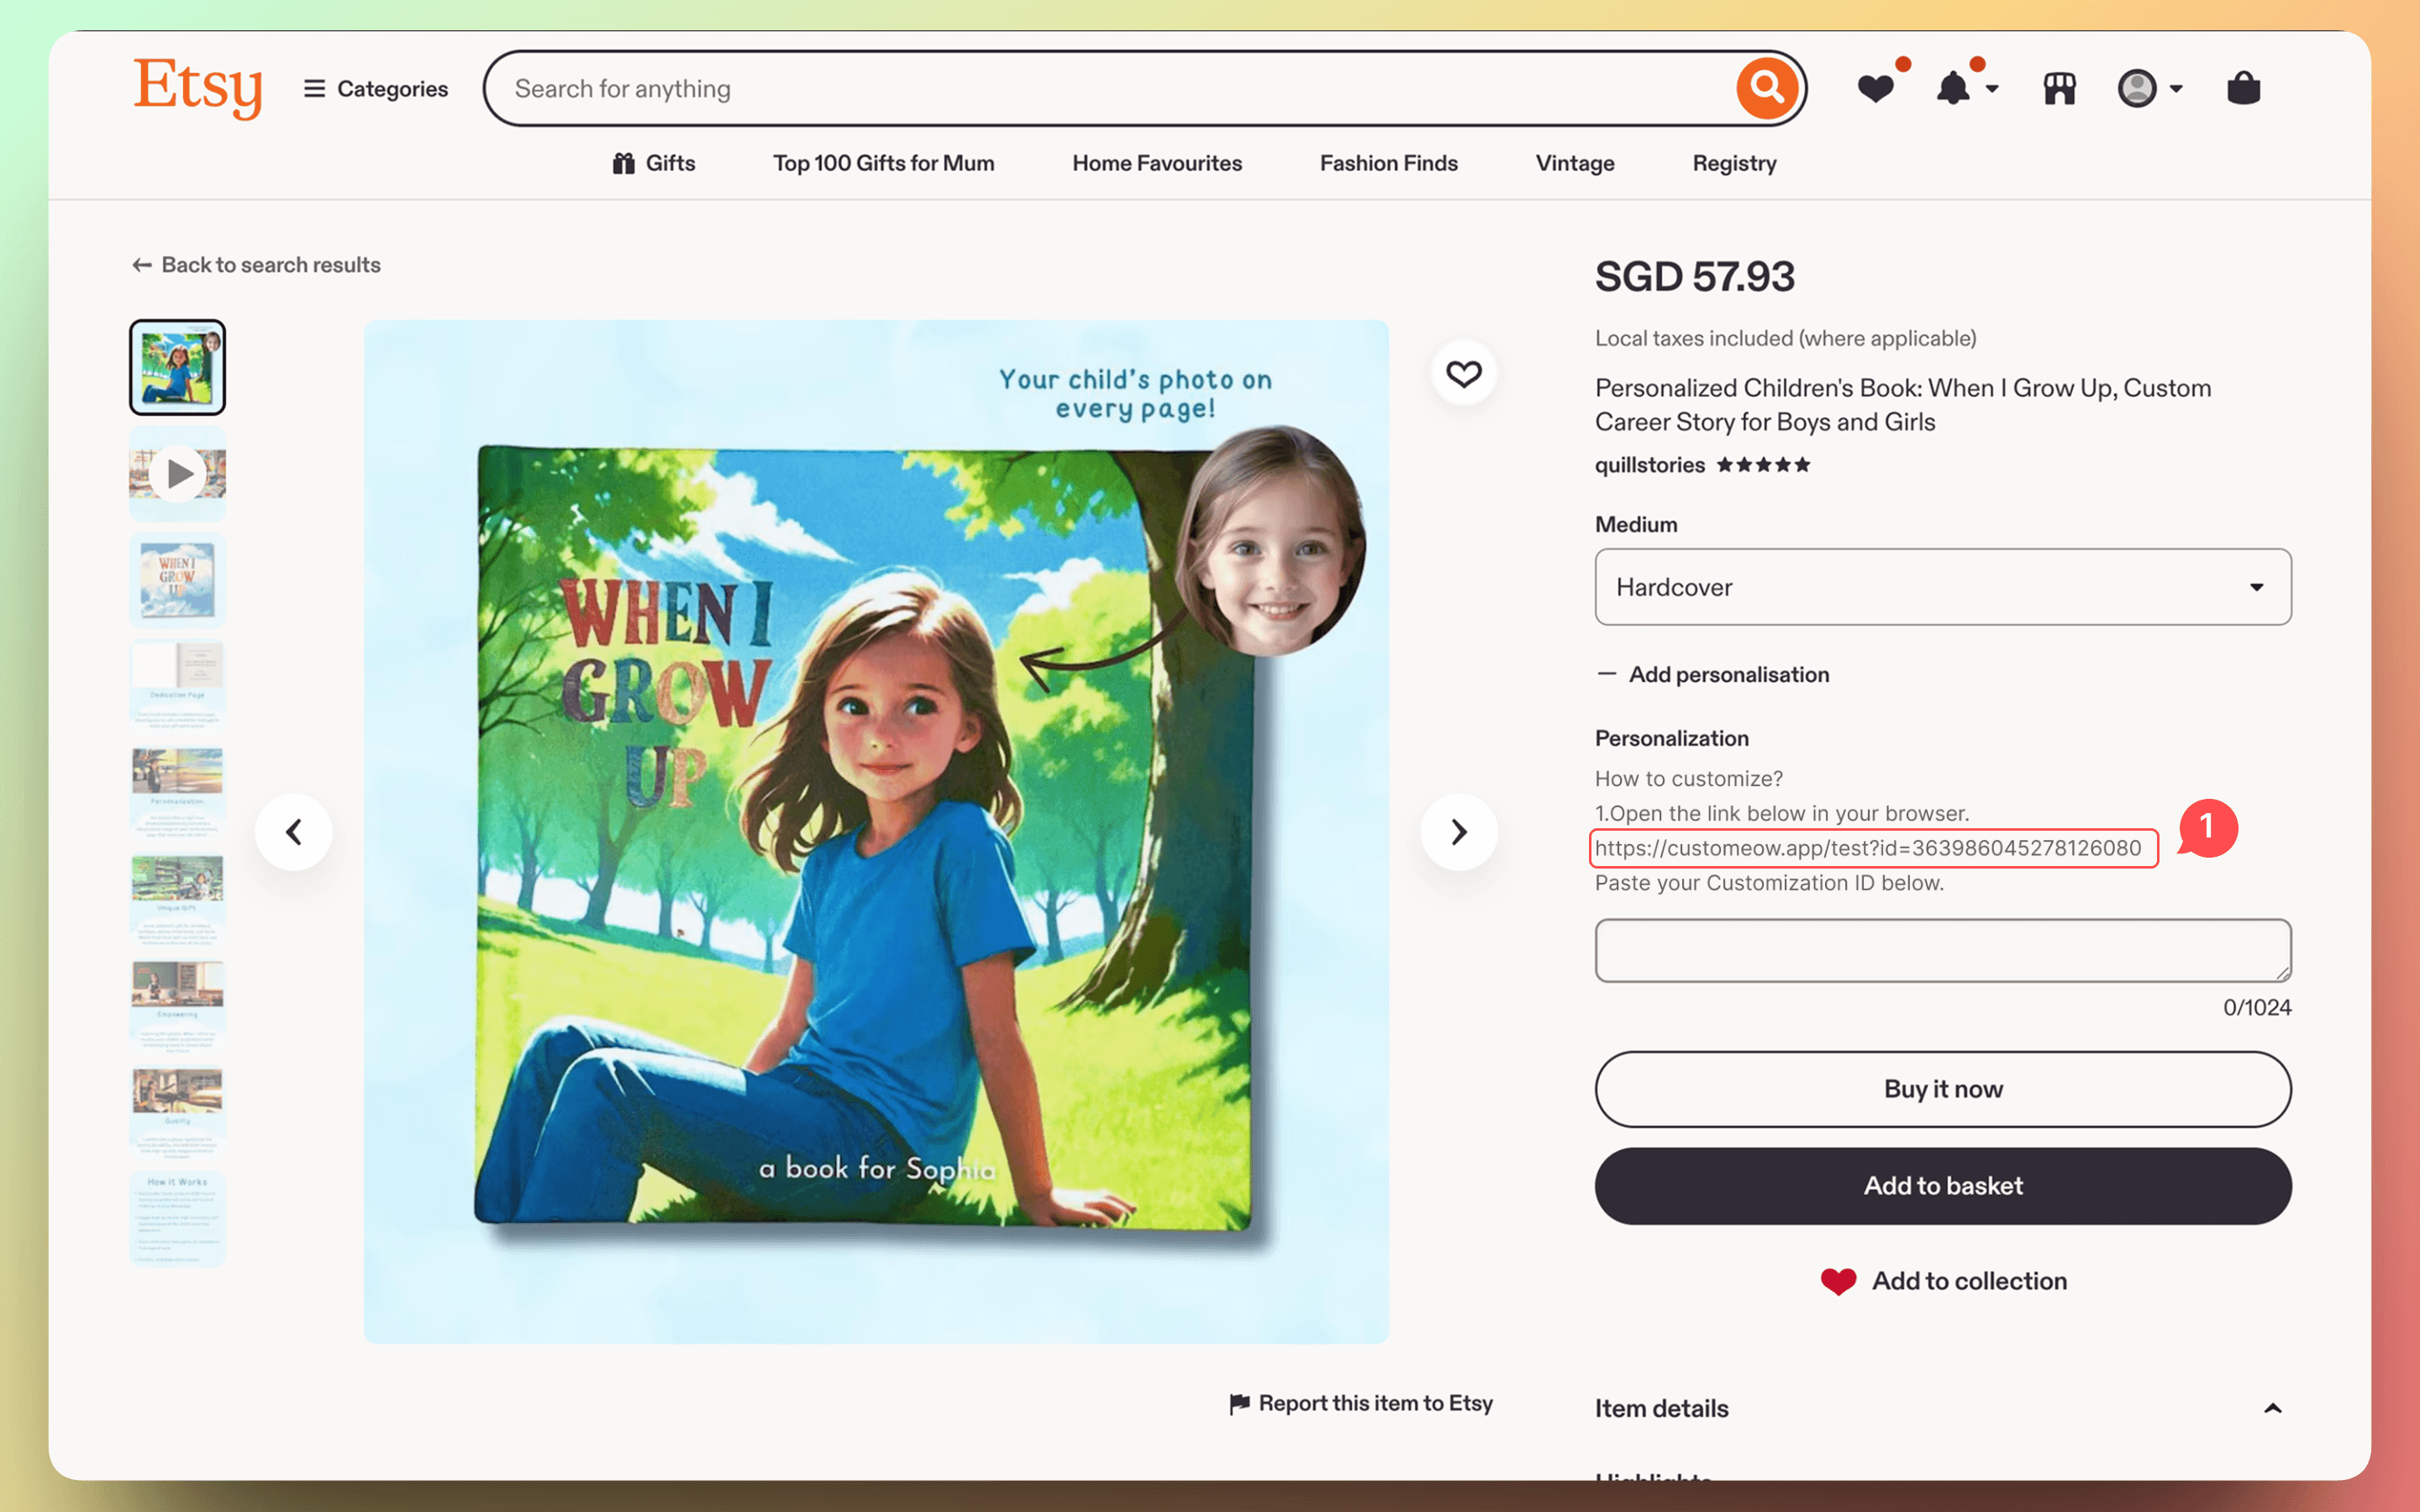
Merchants place the customization link into the Personalization field on the Etsy store.
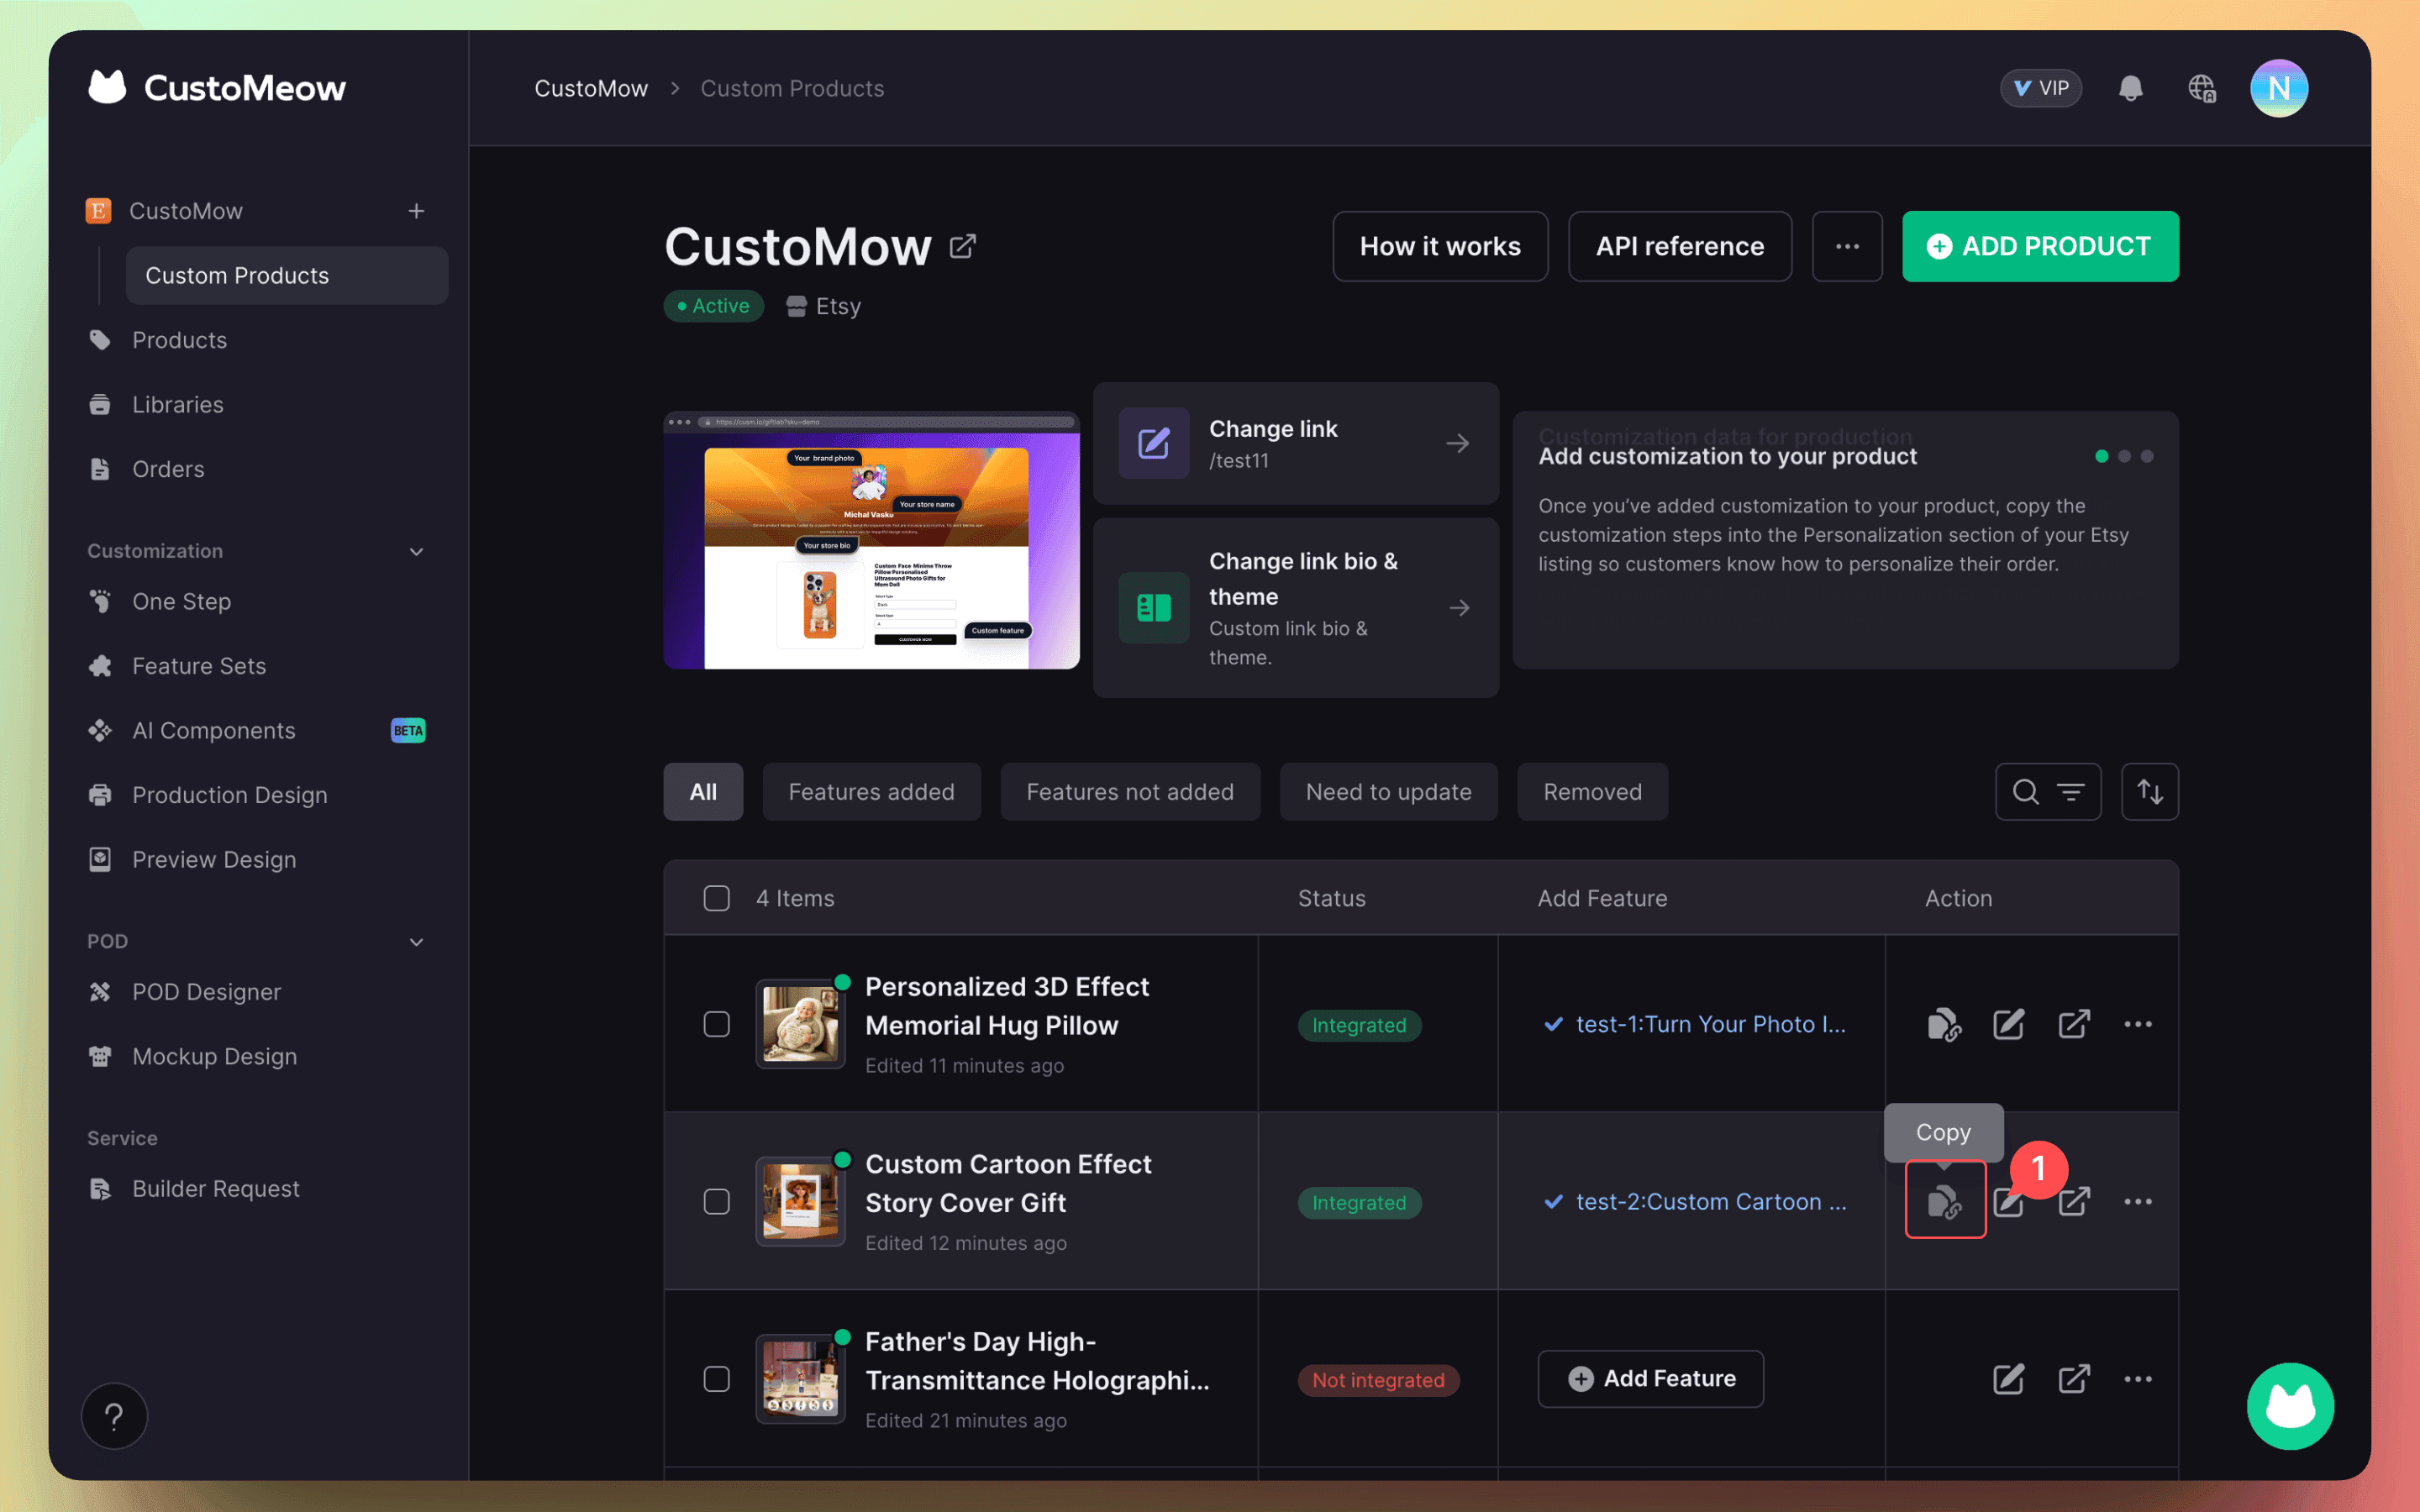
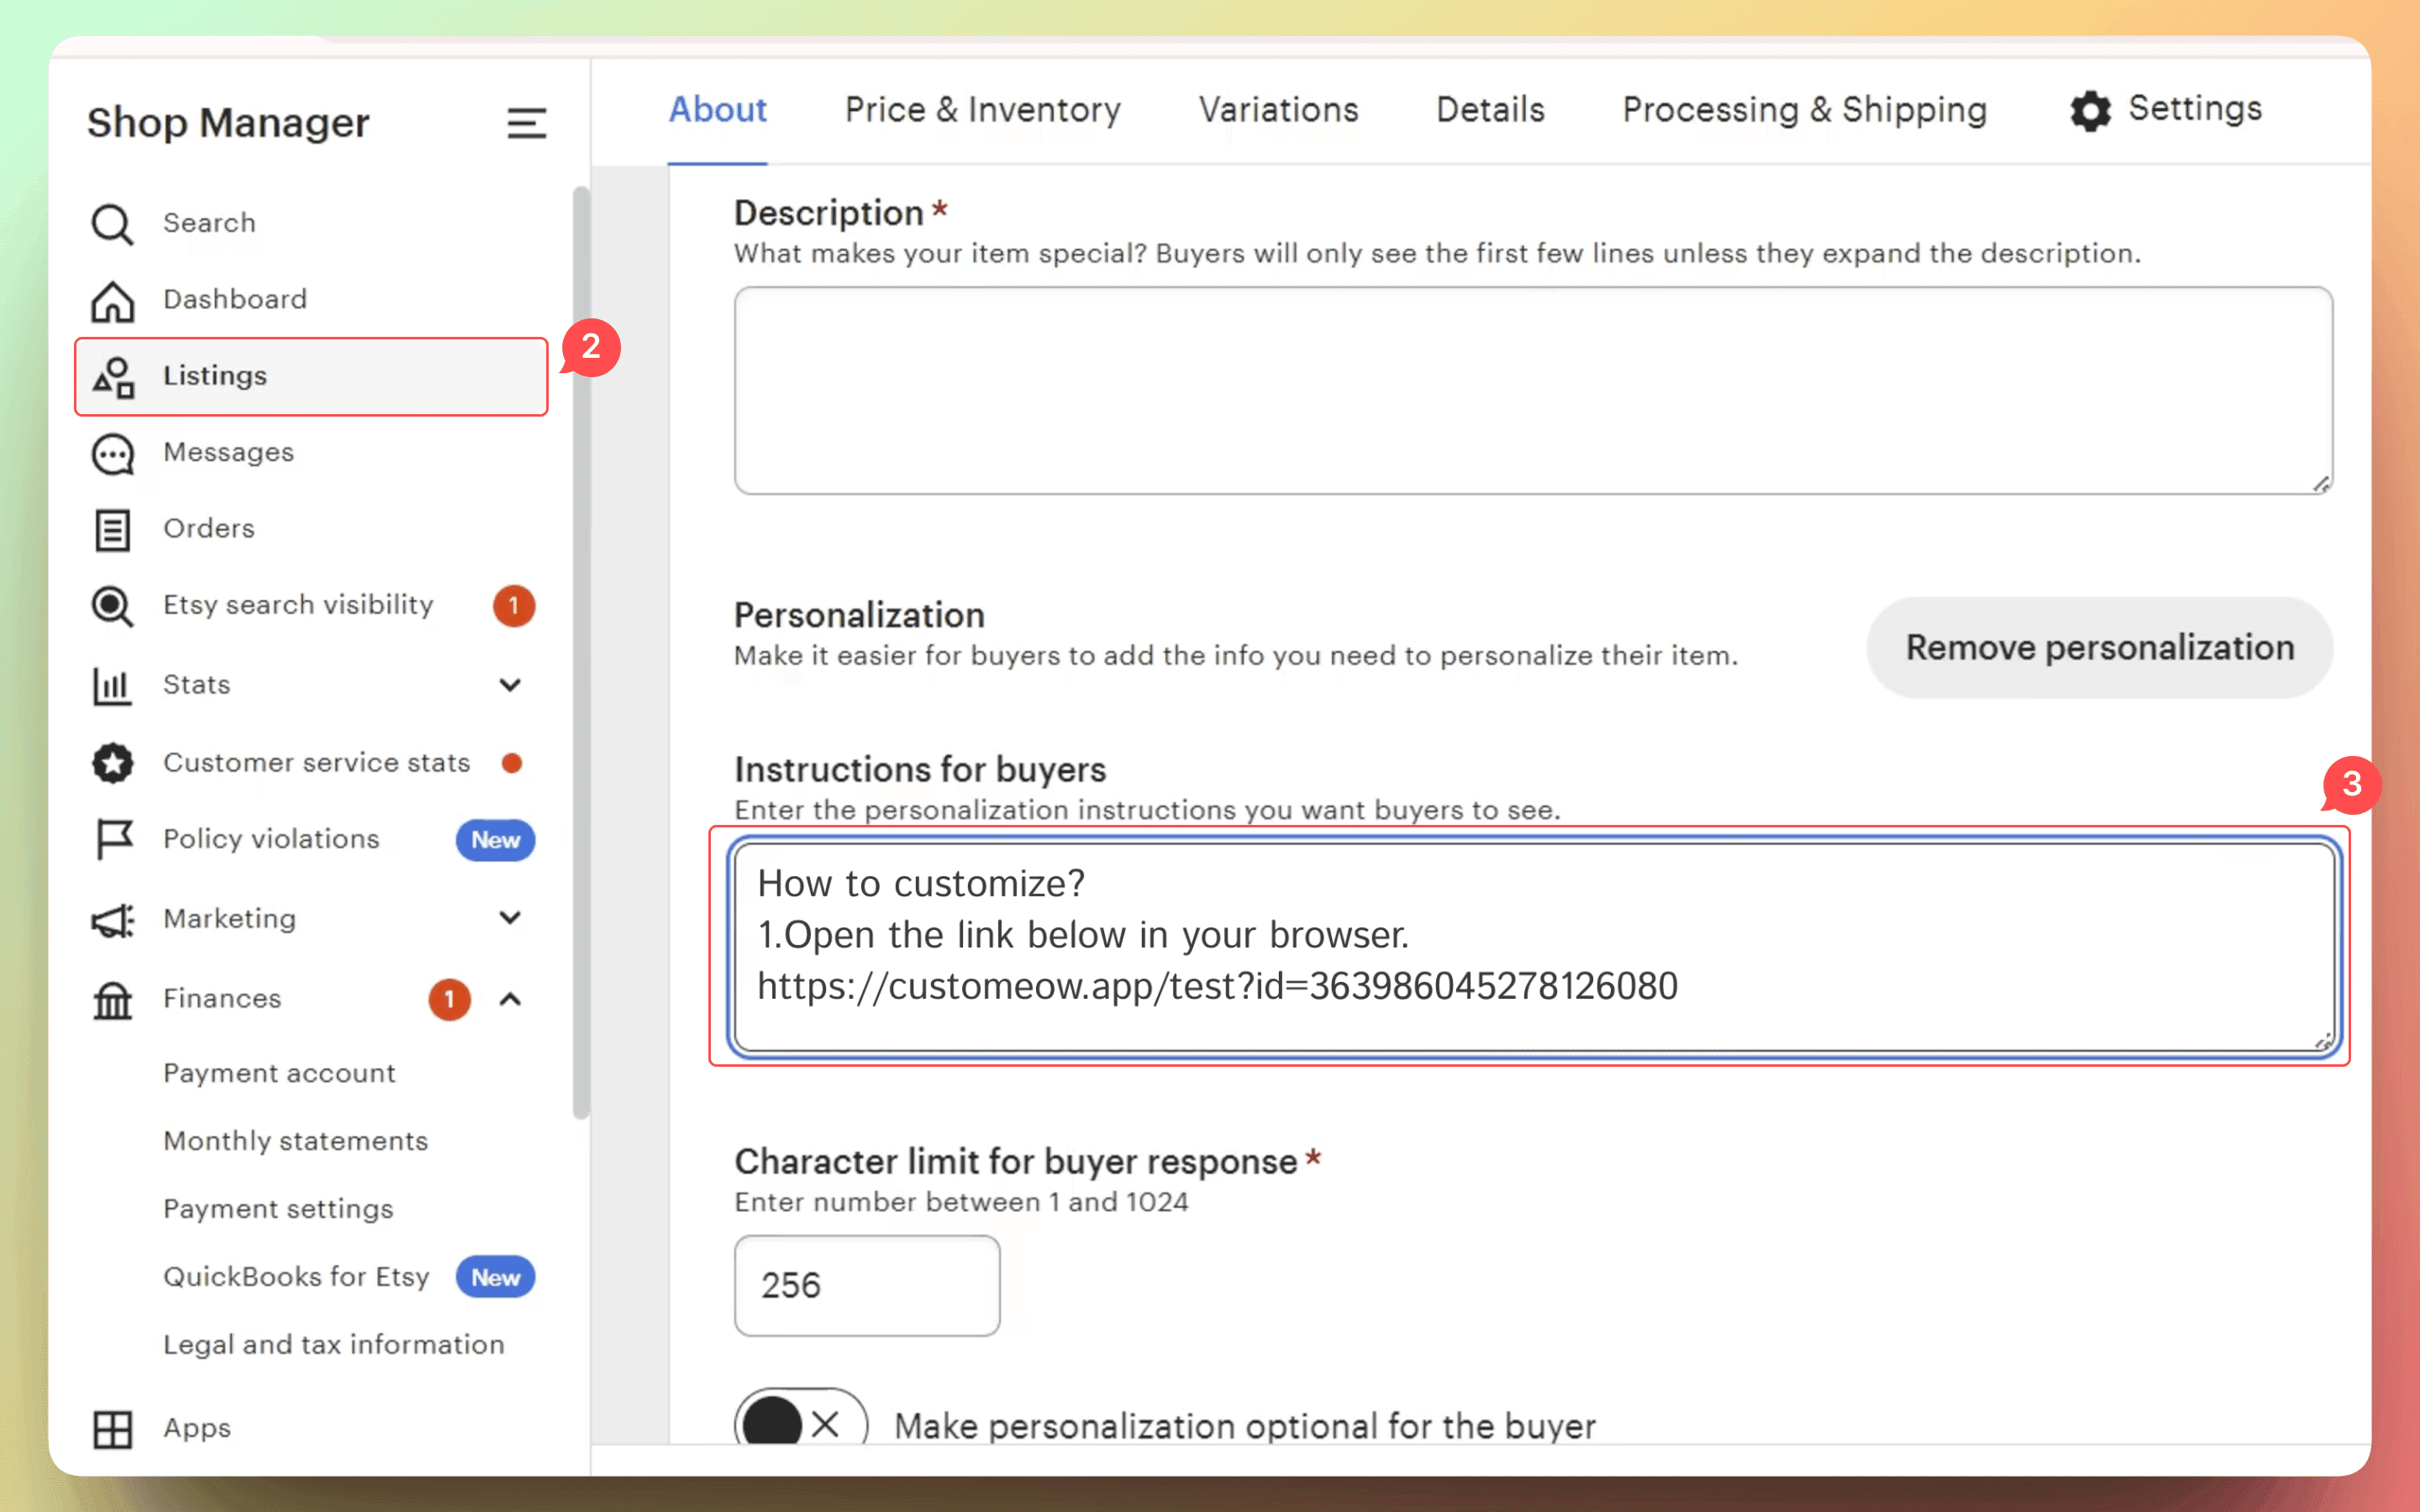
After the product is configured with customization features, CustoMeow will automatically generate a customization link. Merchants can copy this link and paste it into the Personalization field of the Etsy listing to guide buyers into the customization process.
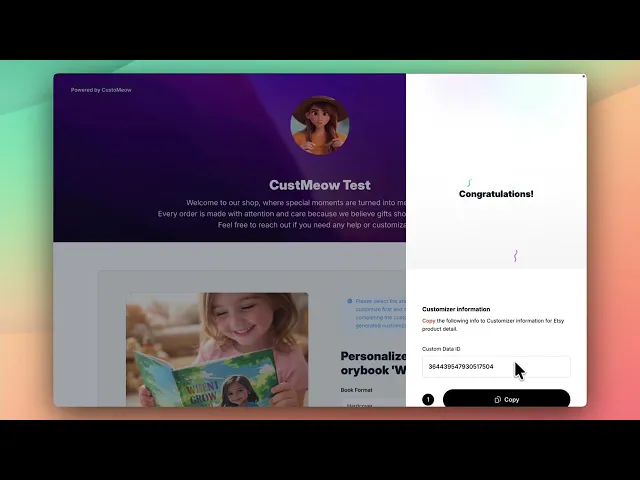
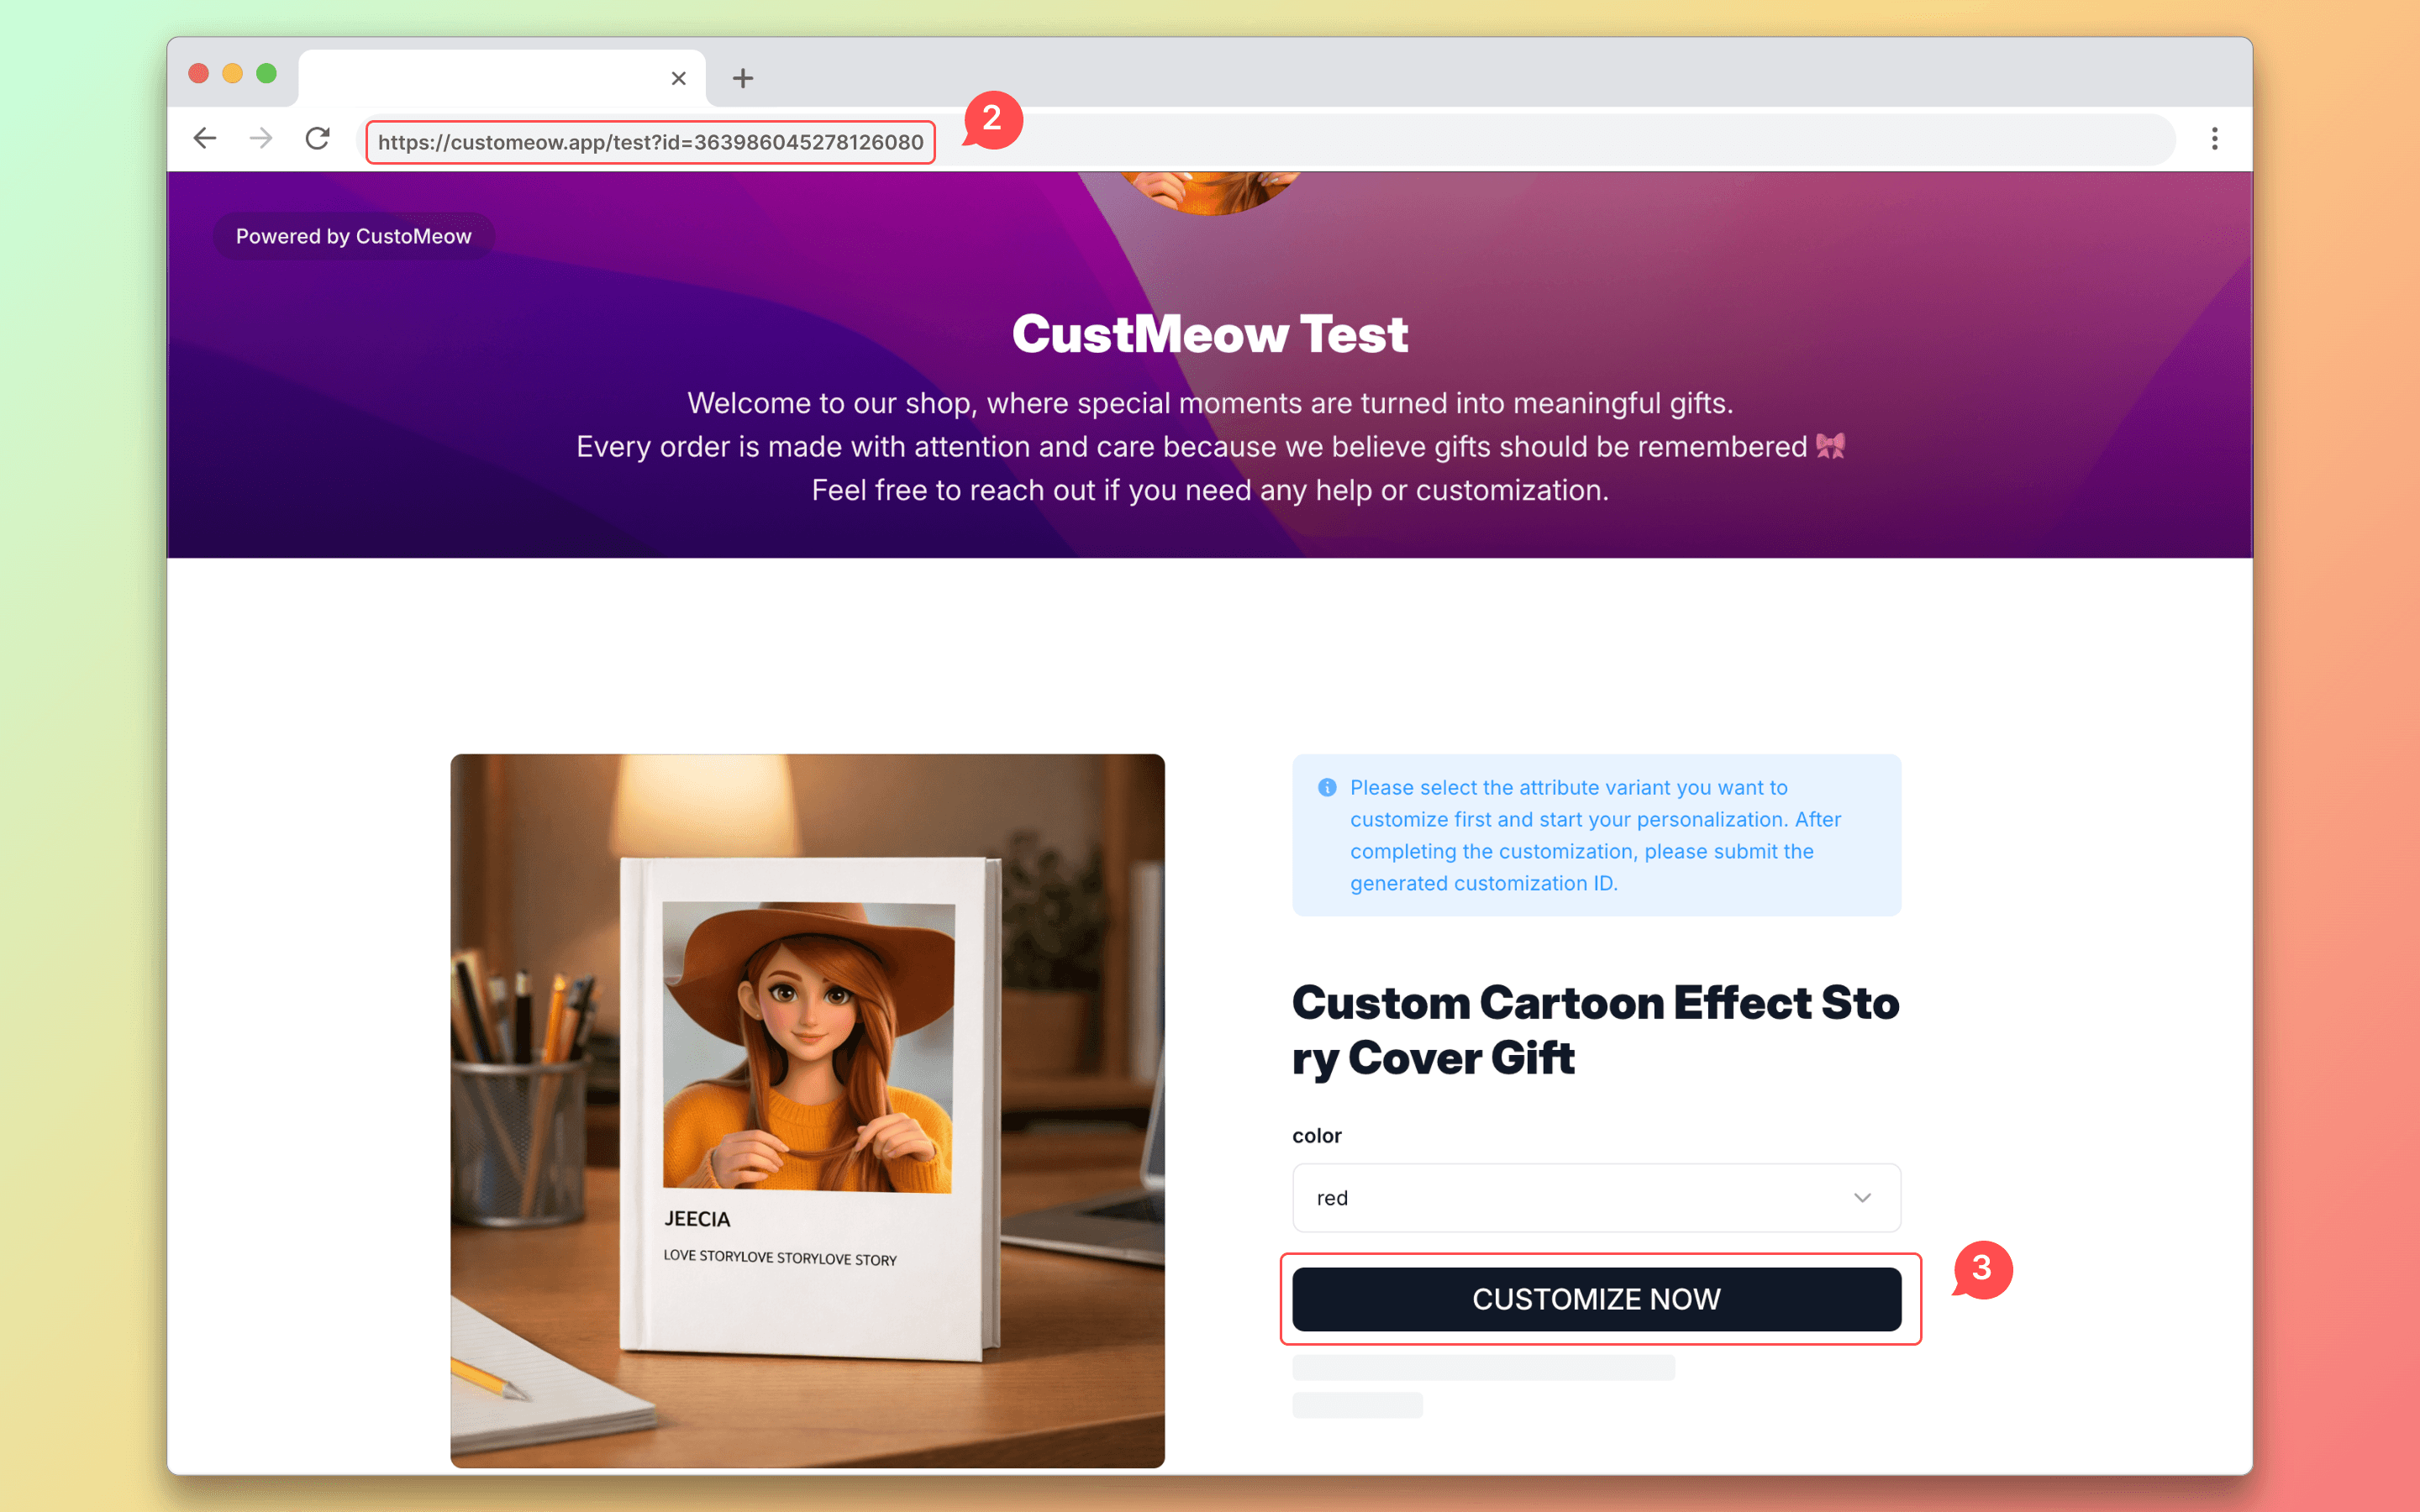
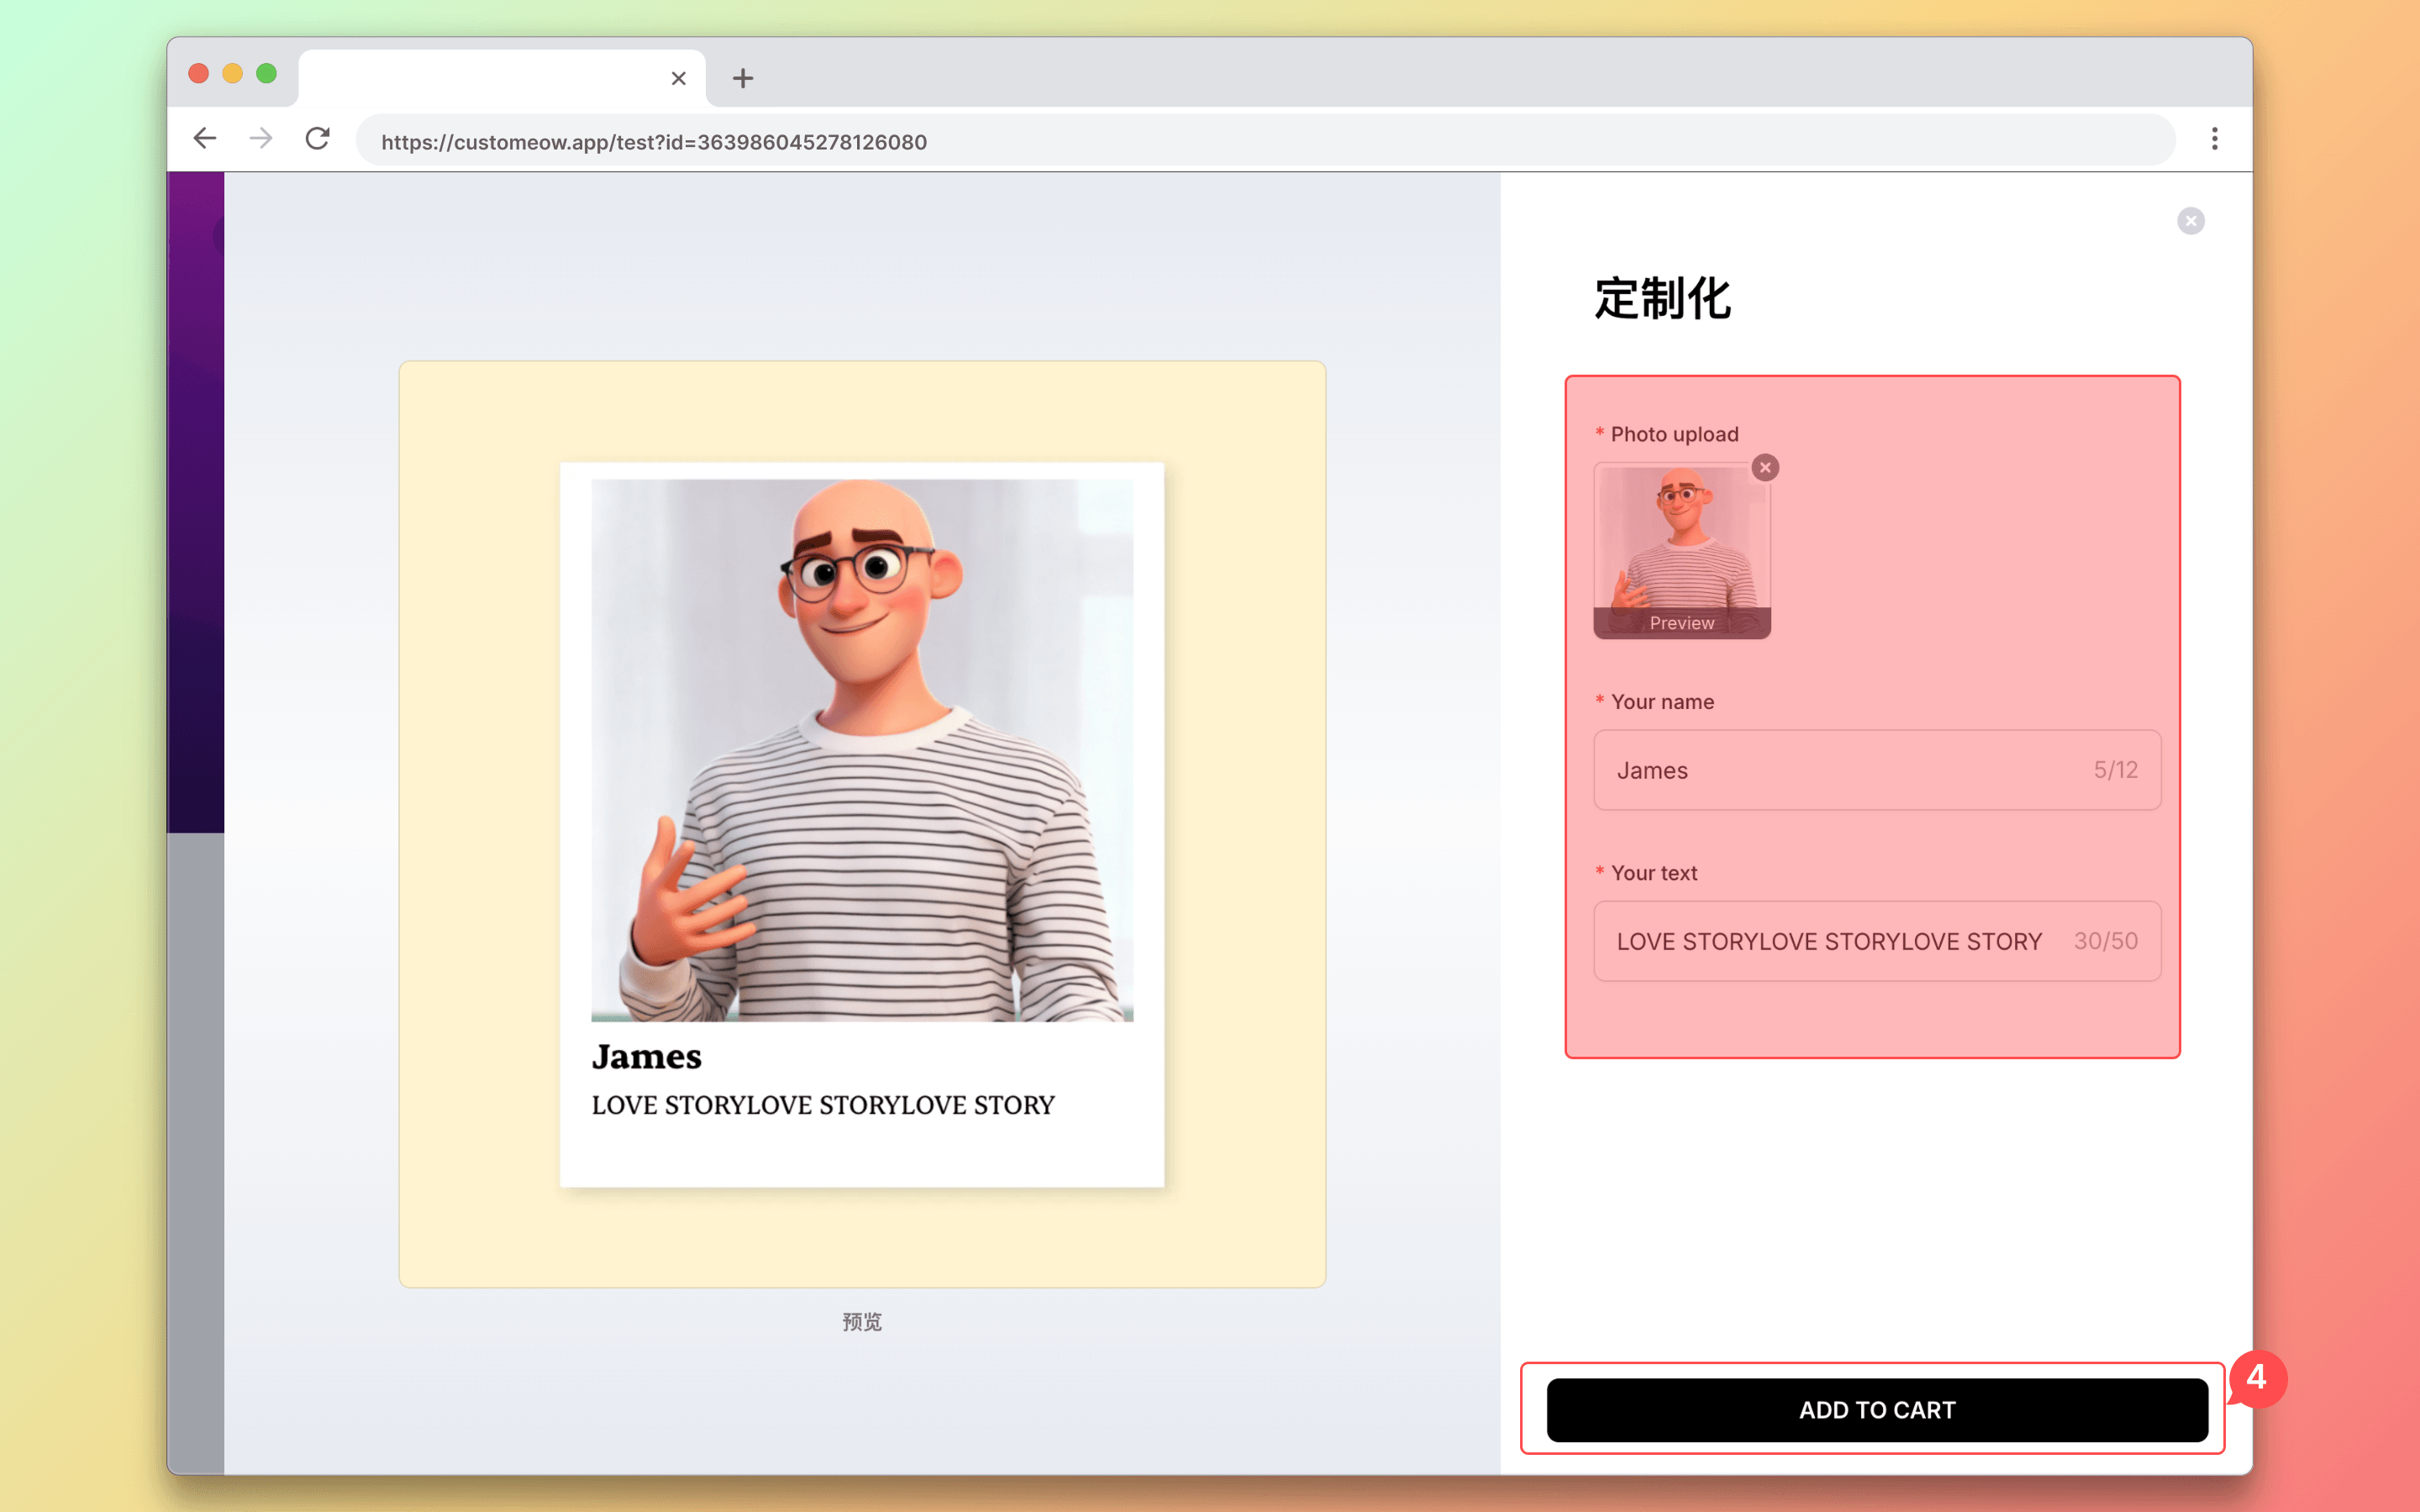
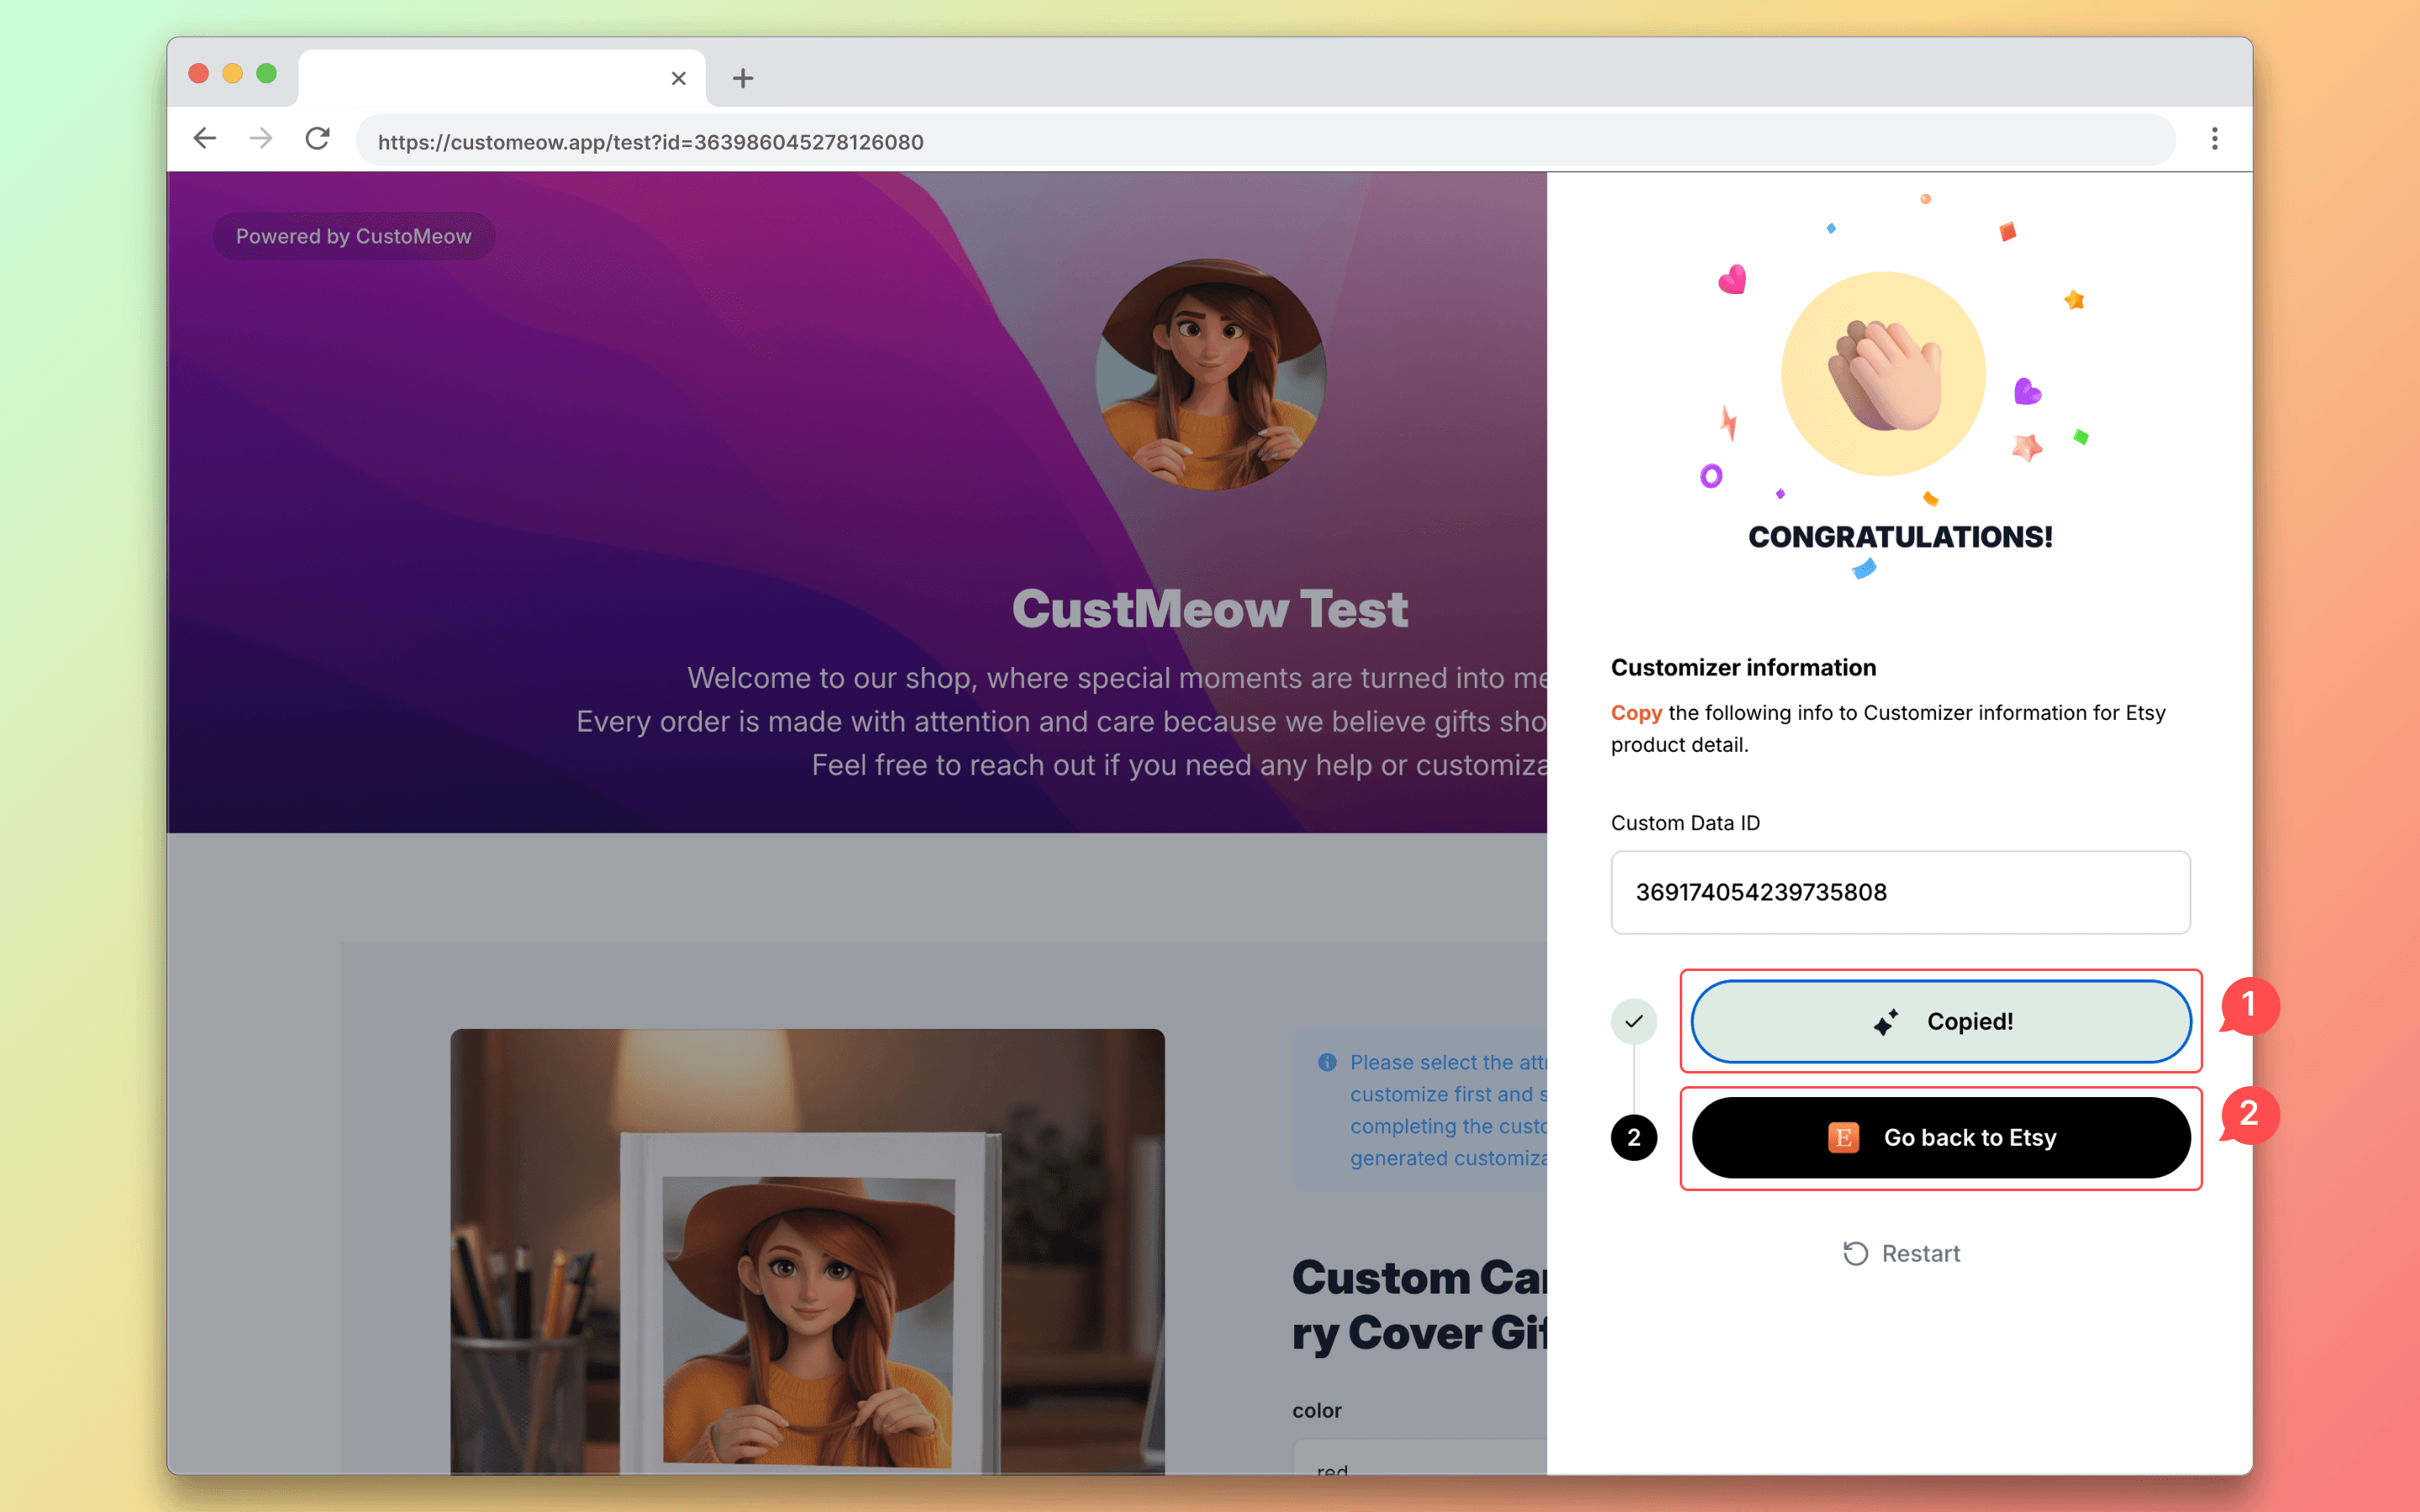
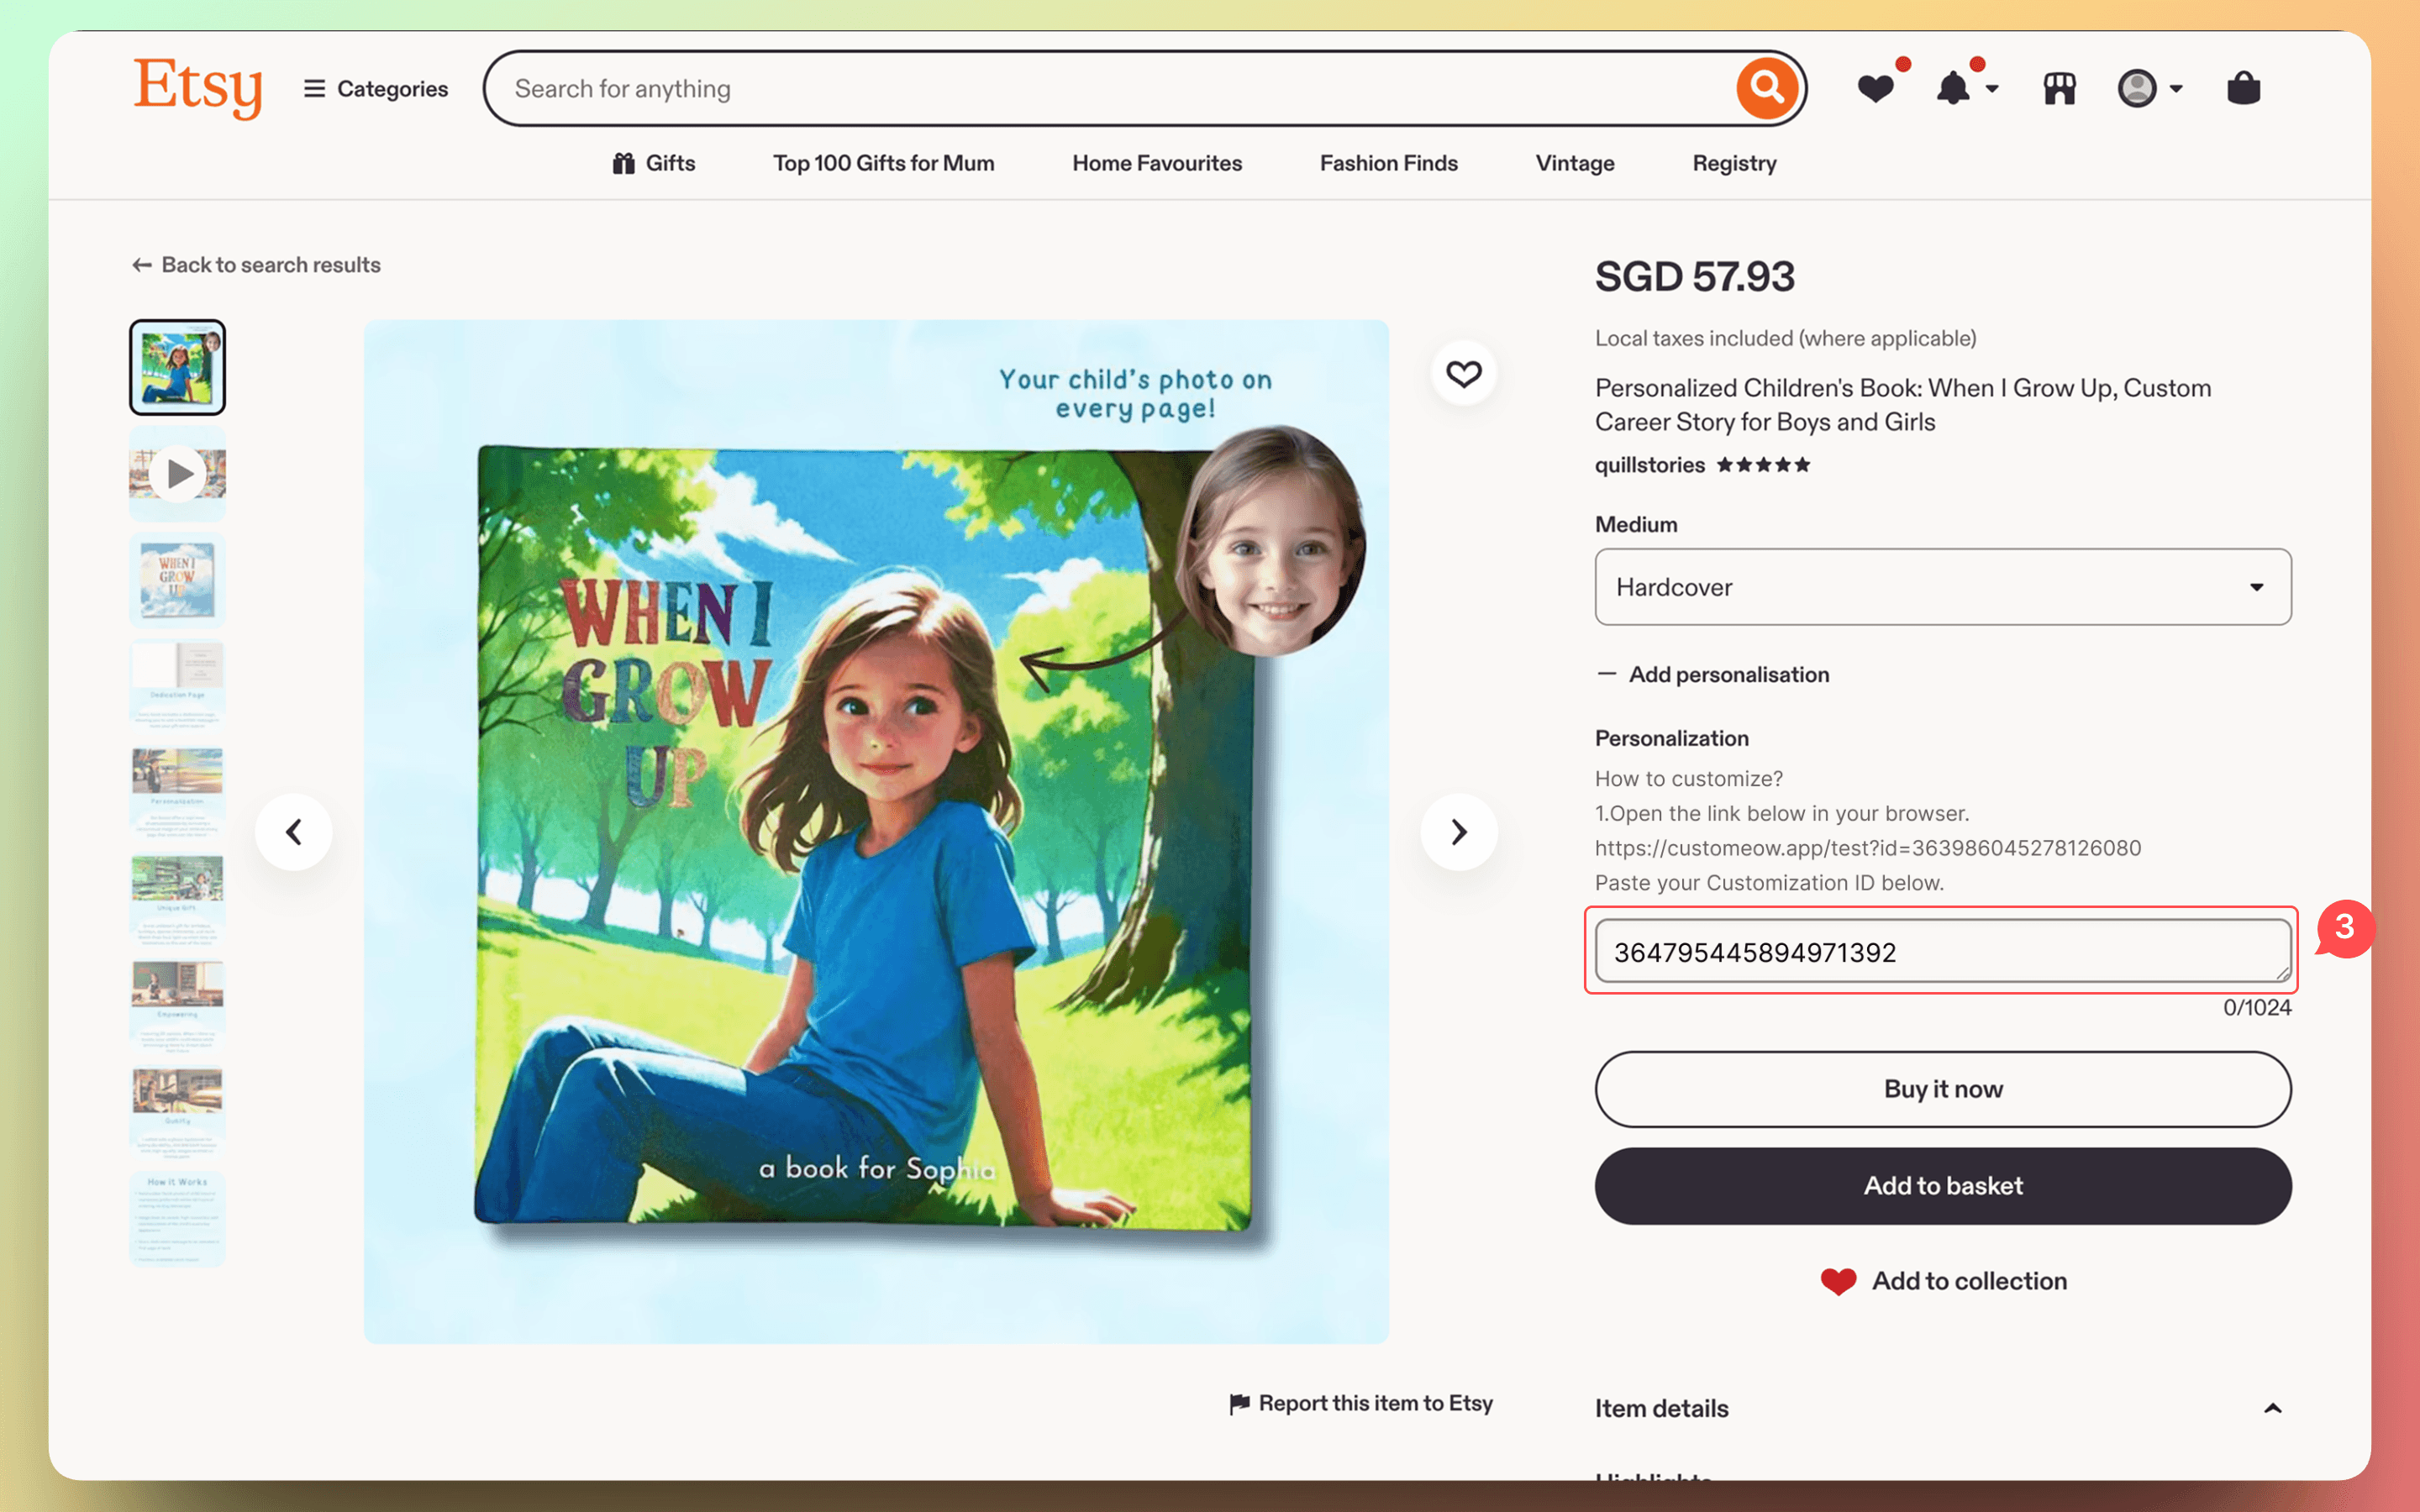
Buyers copy the customization link shown on the product detail page and open it in a browser. After completing personalization, the system will automatically generate a customization ID.
Buyers paste the generated ID back into the Etsy Personalization input field and complete the payment. The order will then be created with the customization details included.
View Etsy order data
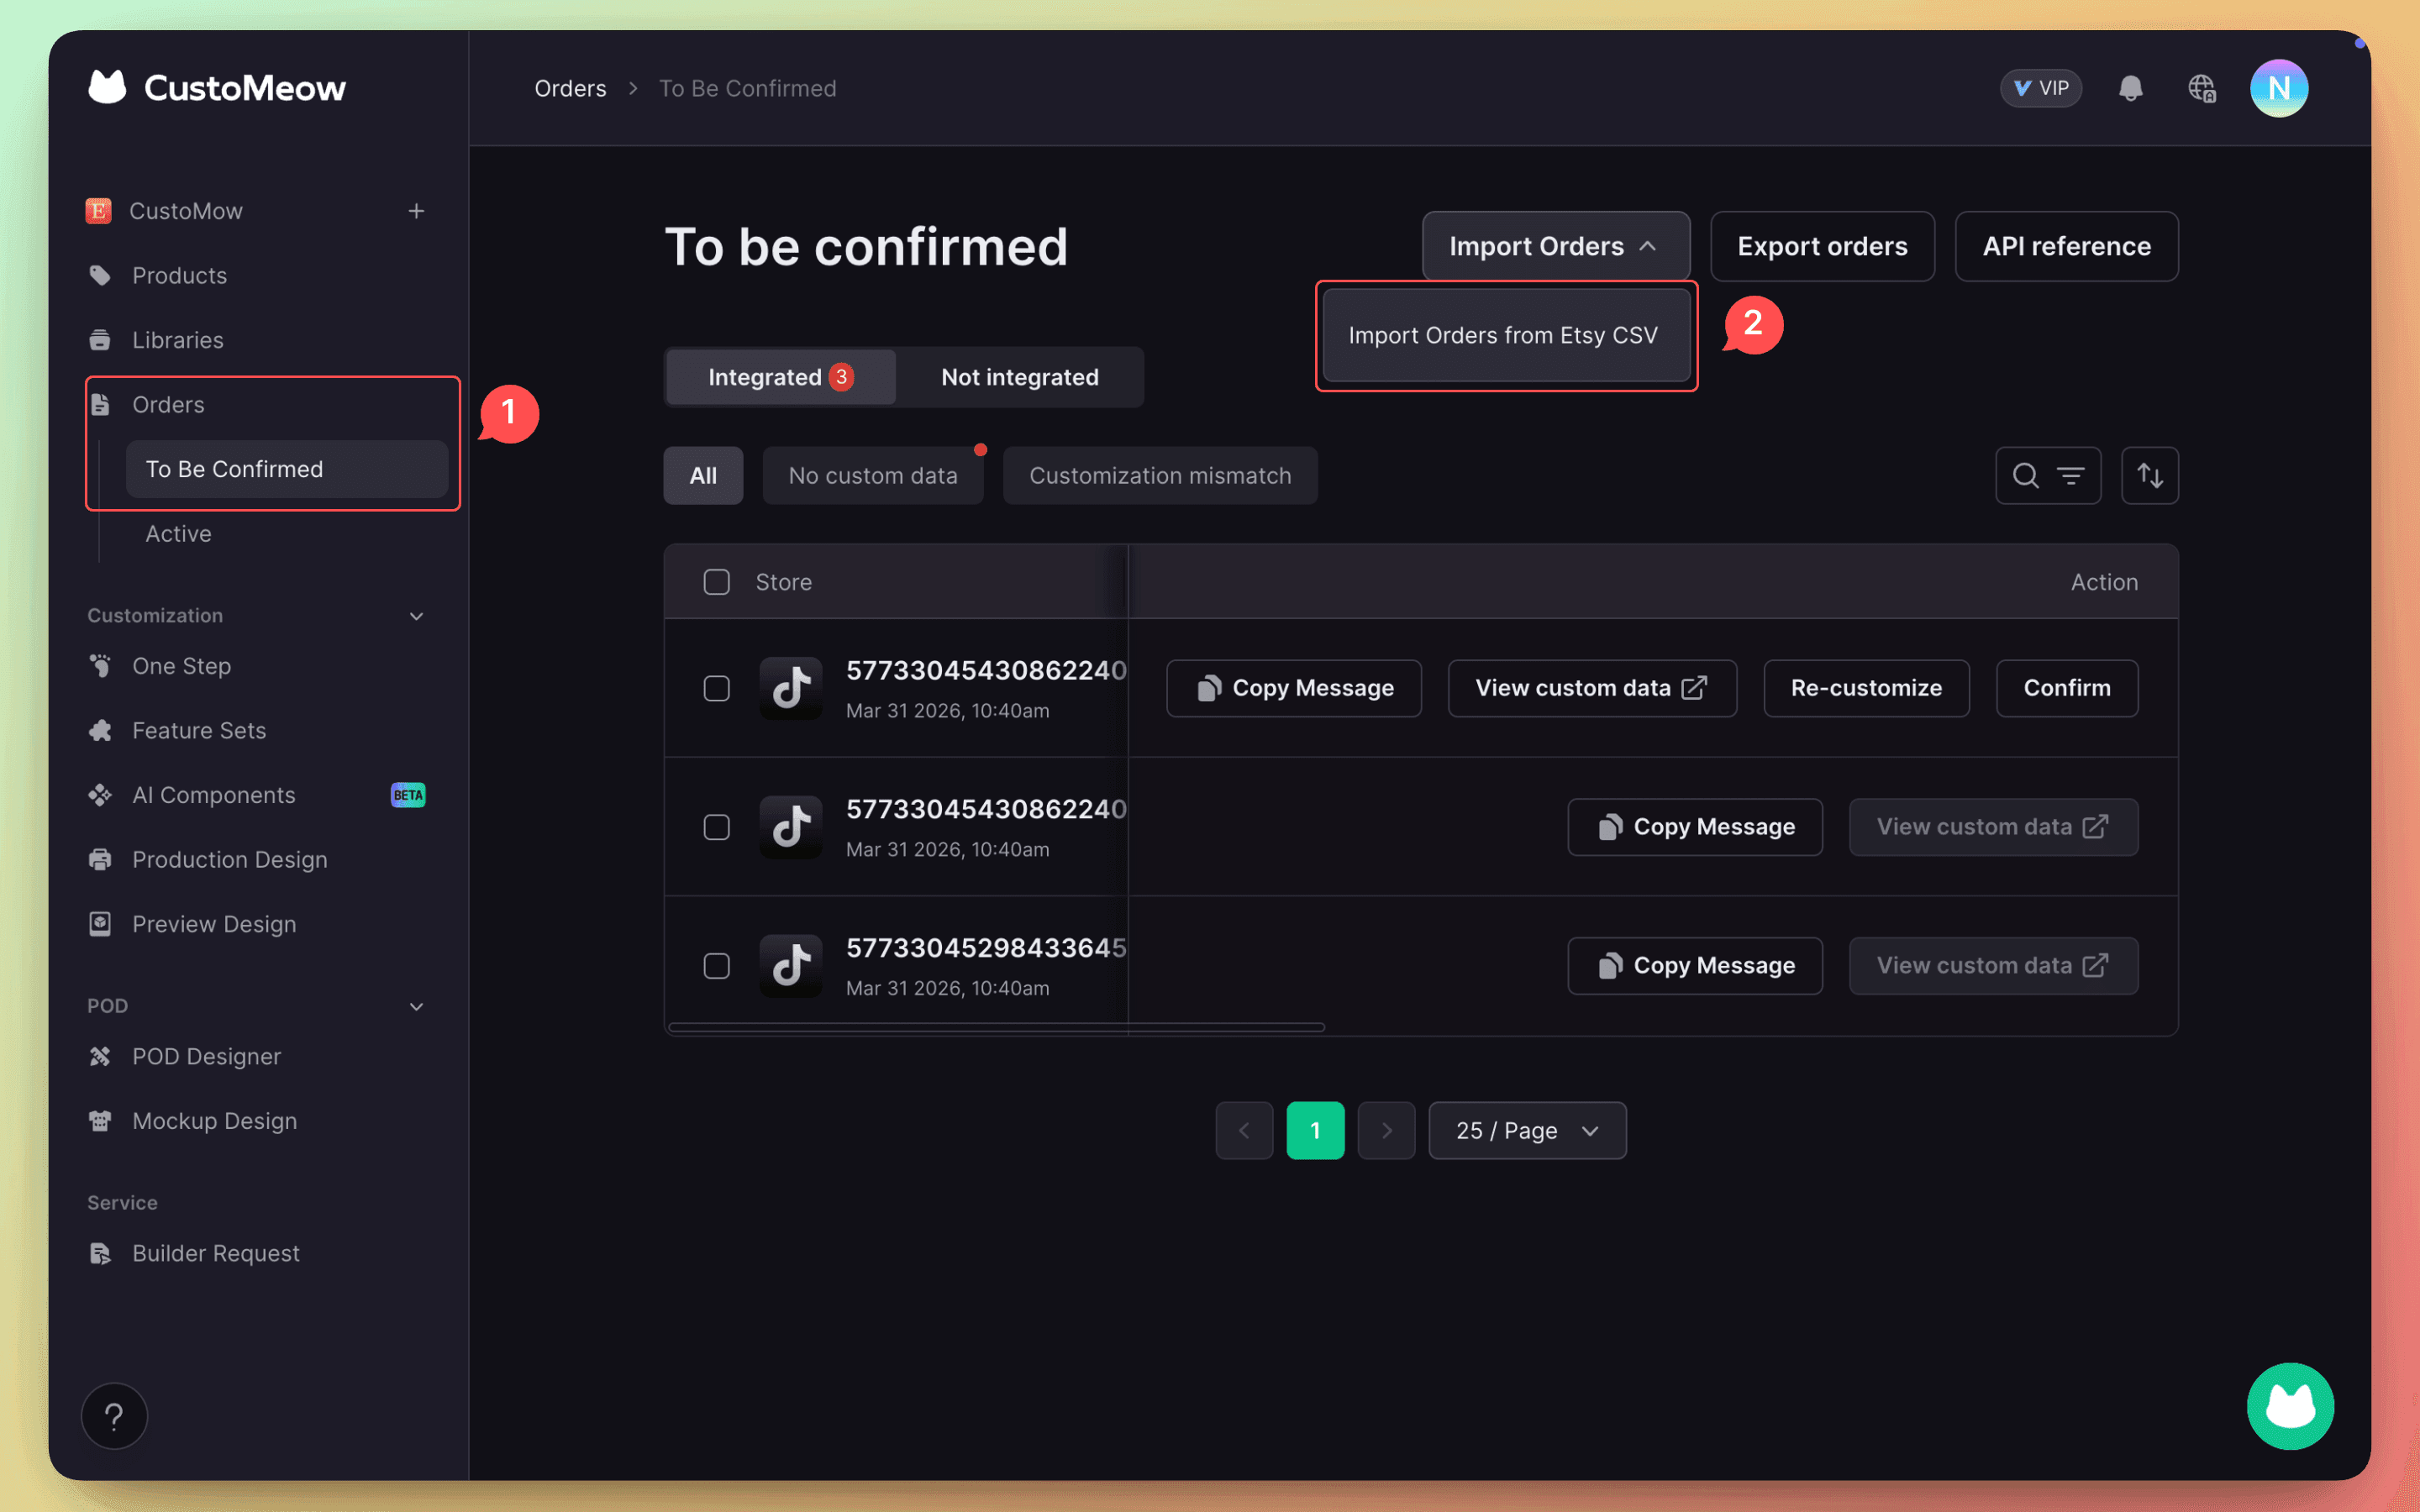
Import orders containing customization IDs into the CustoMeow order system.
After import, you can view buyers’ customized images and text, and preview the generated images.If an imported order does not contain a customization ID, you can manually add the customization information in the backend.
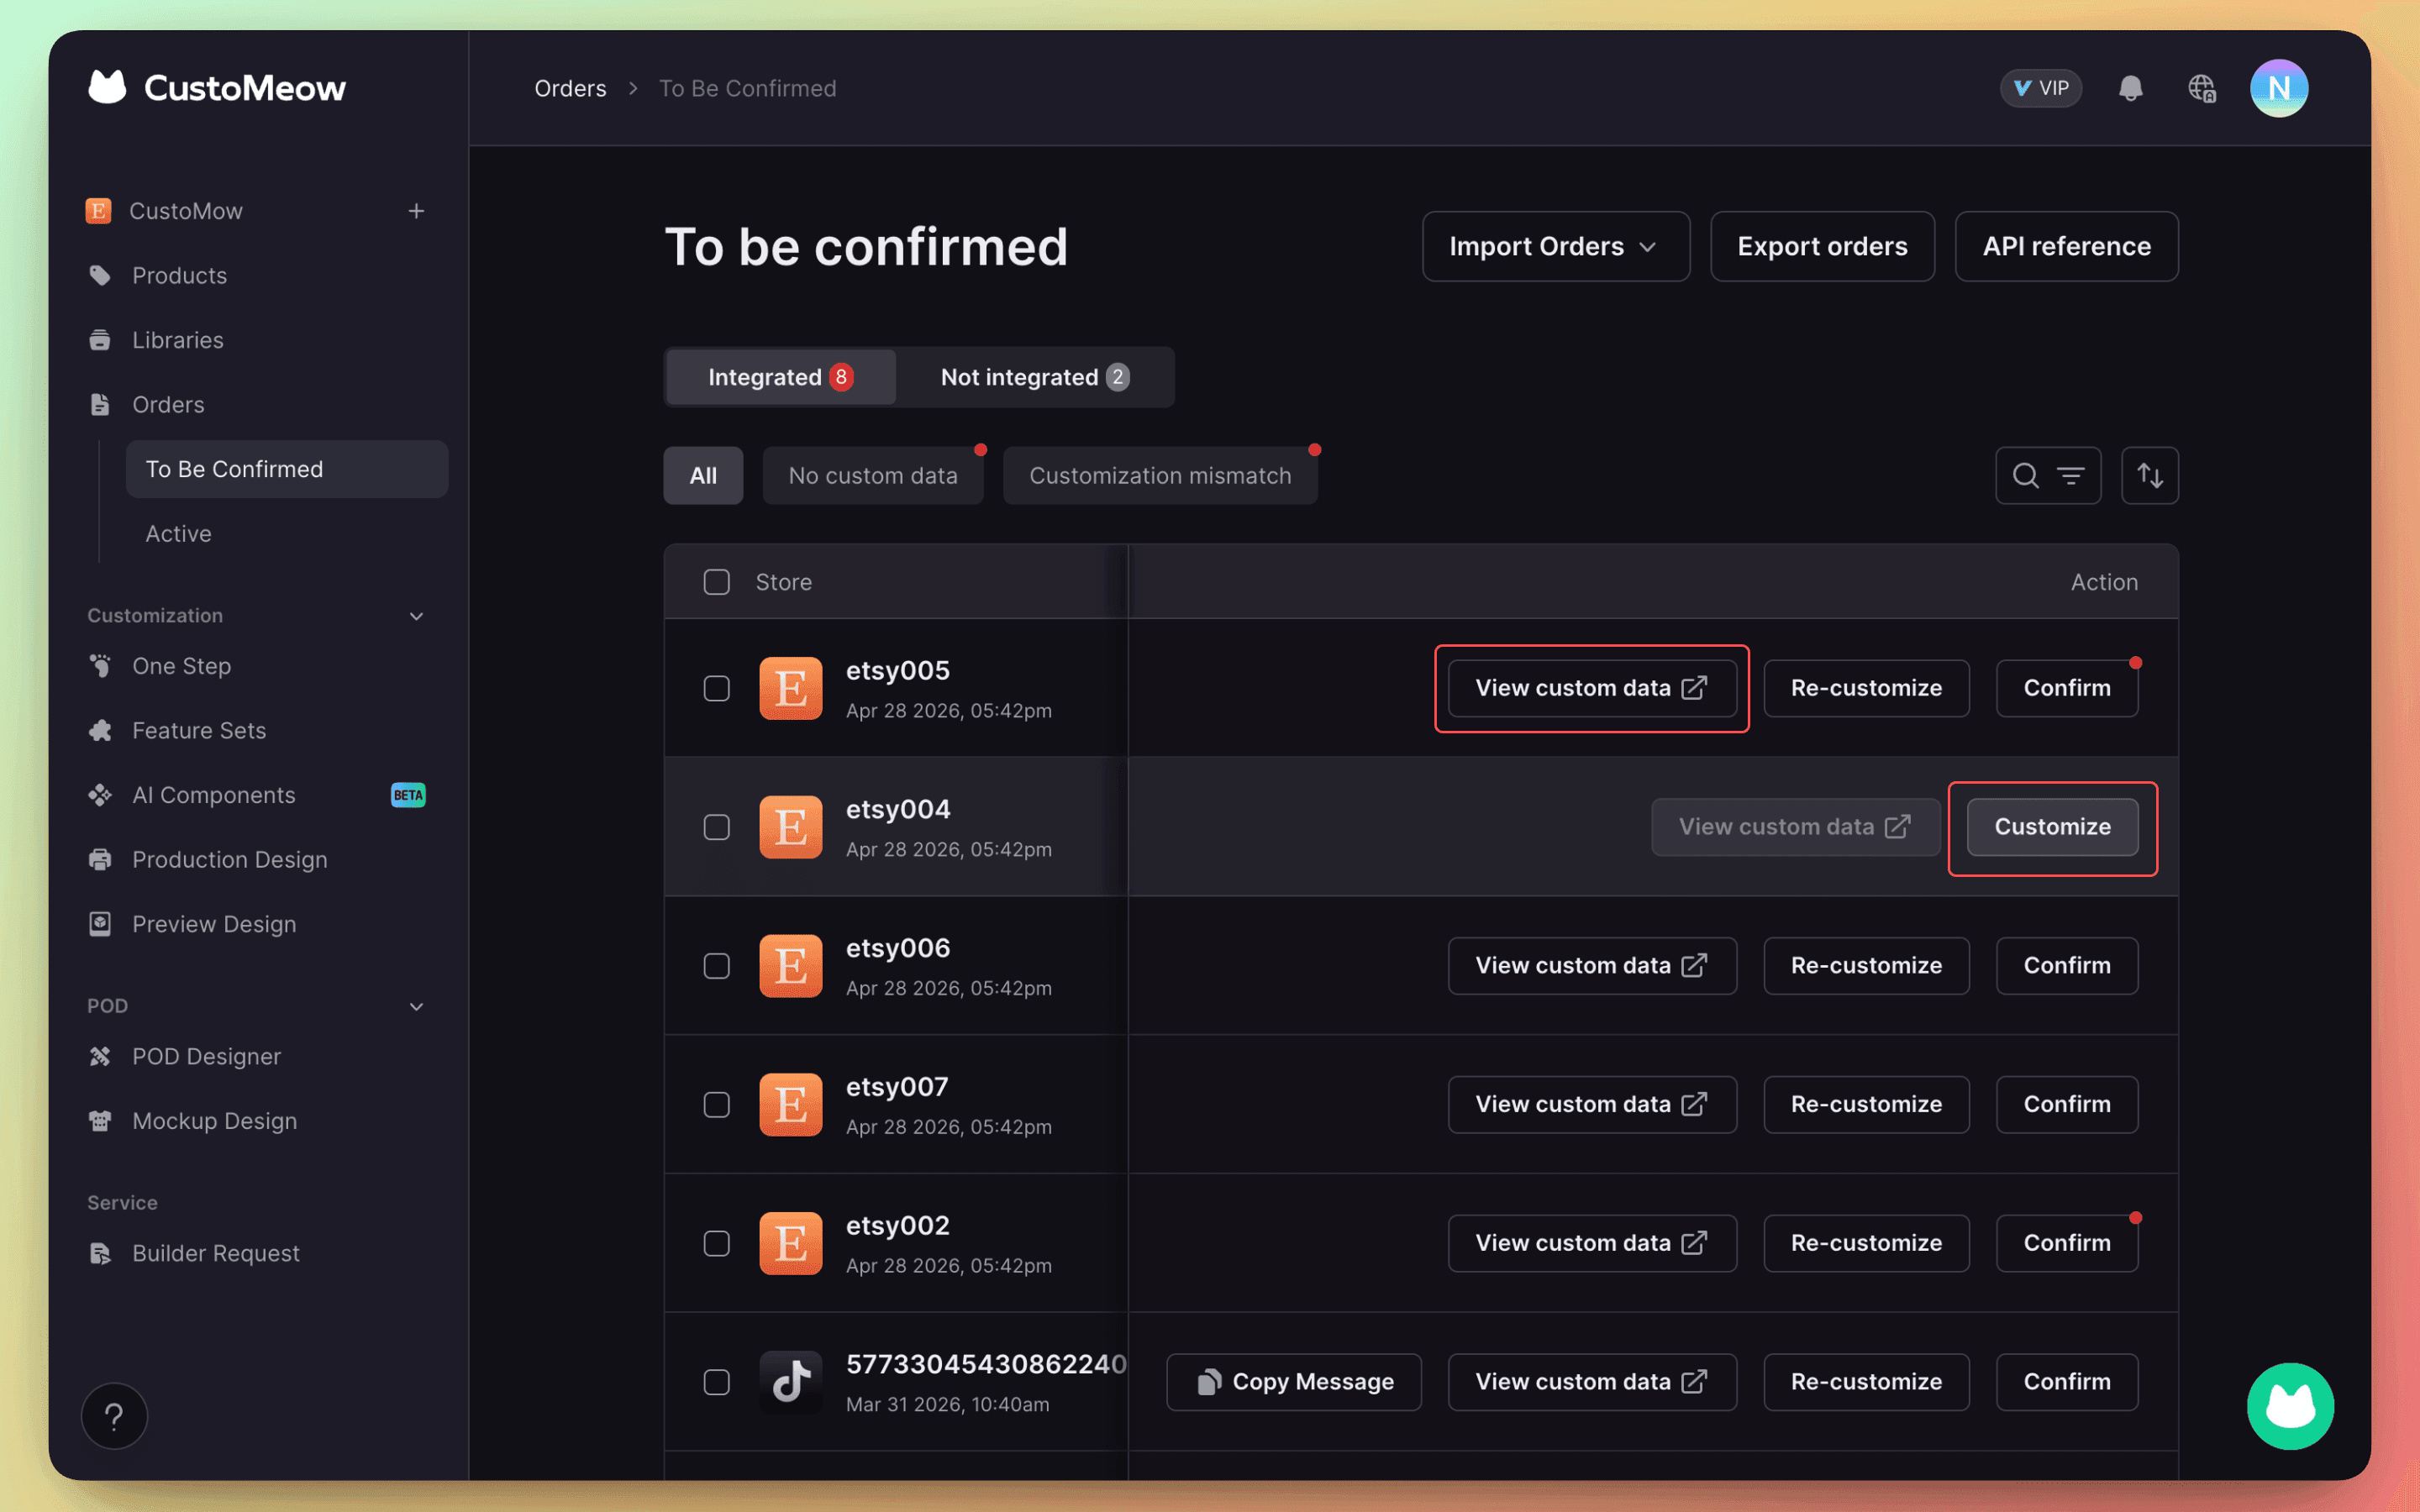
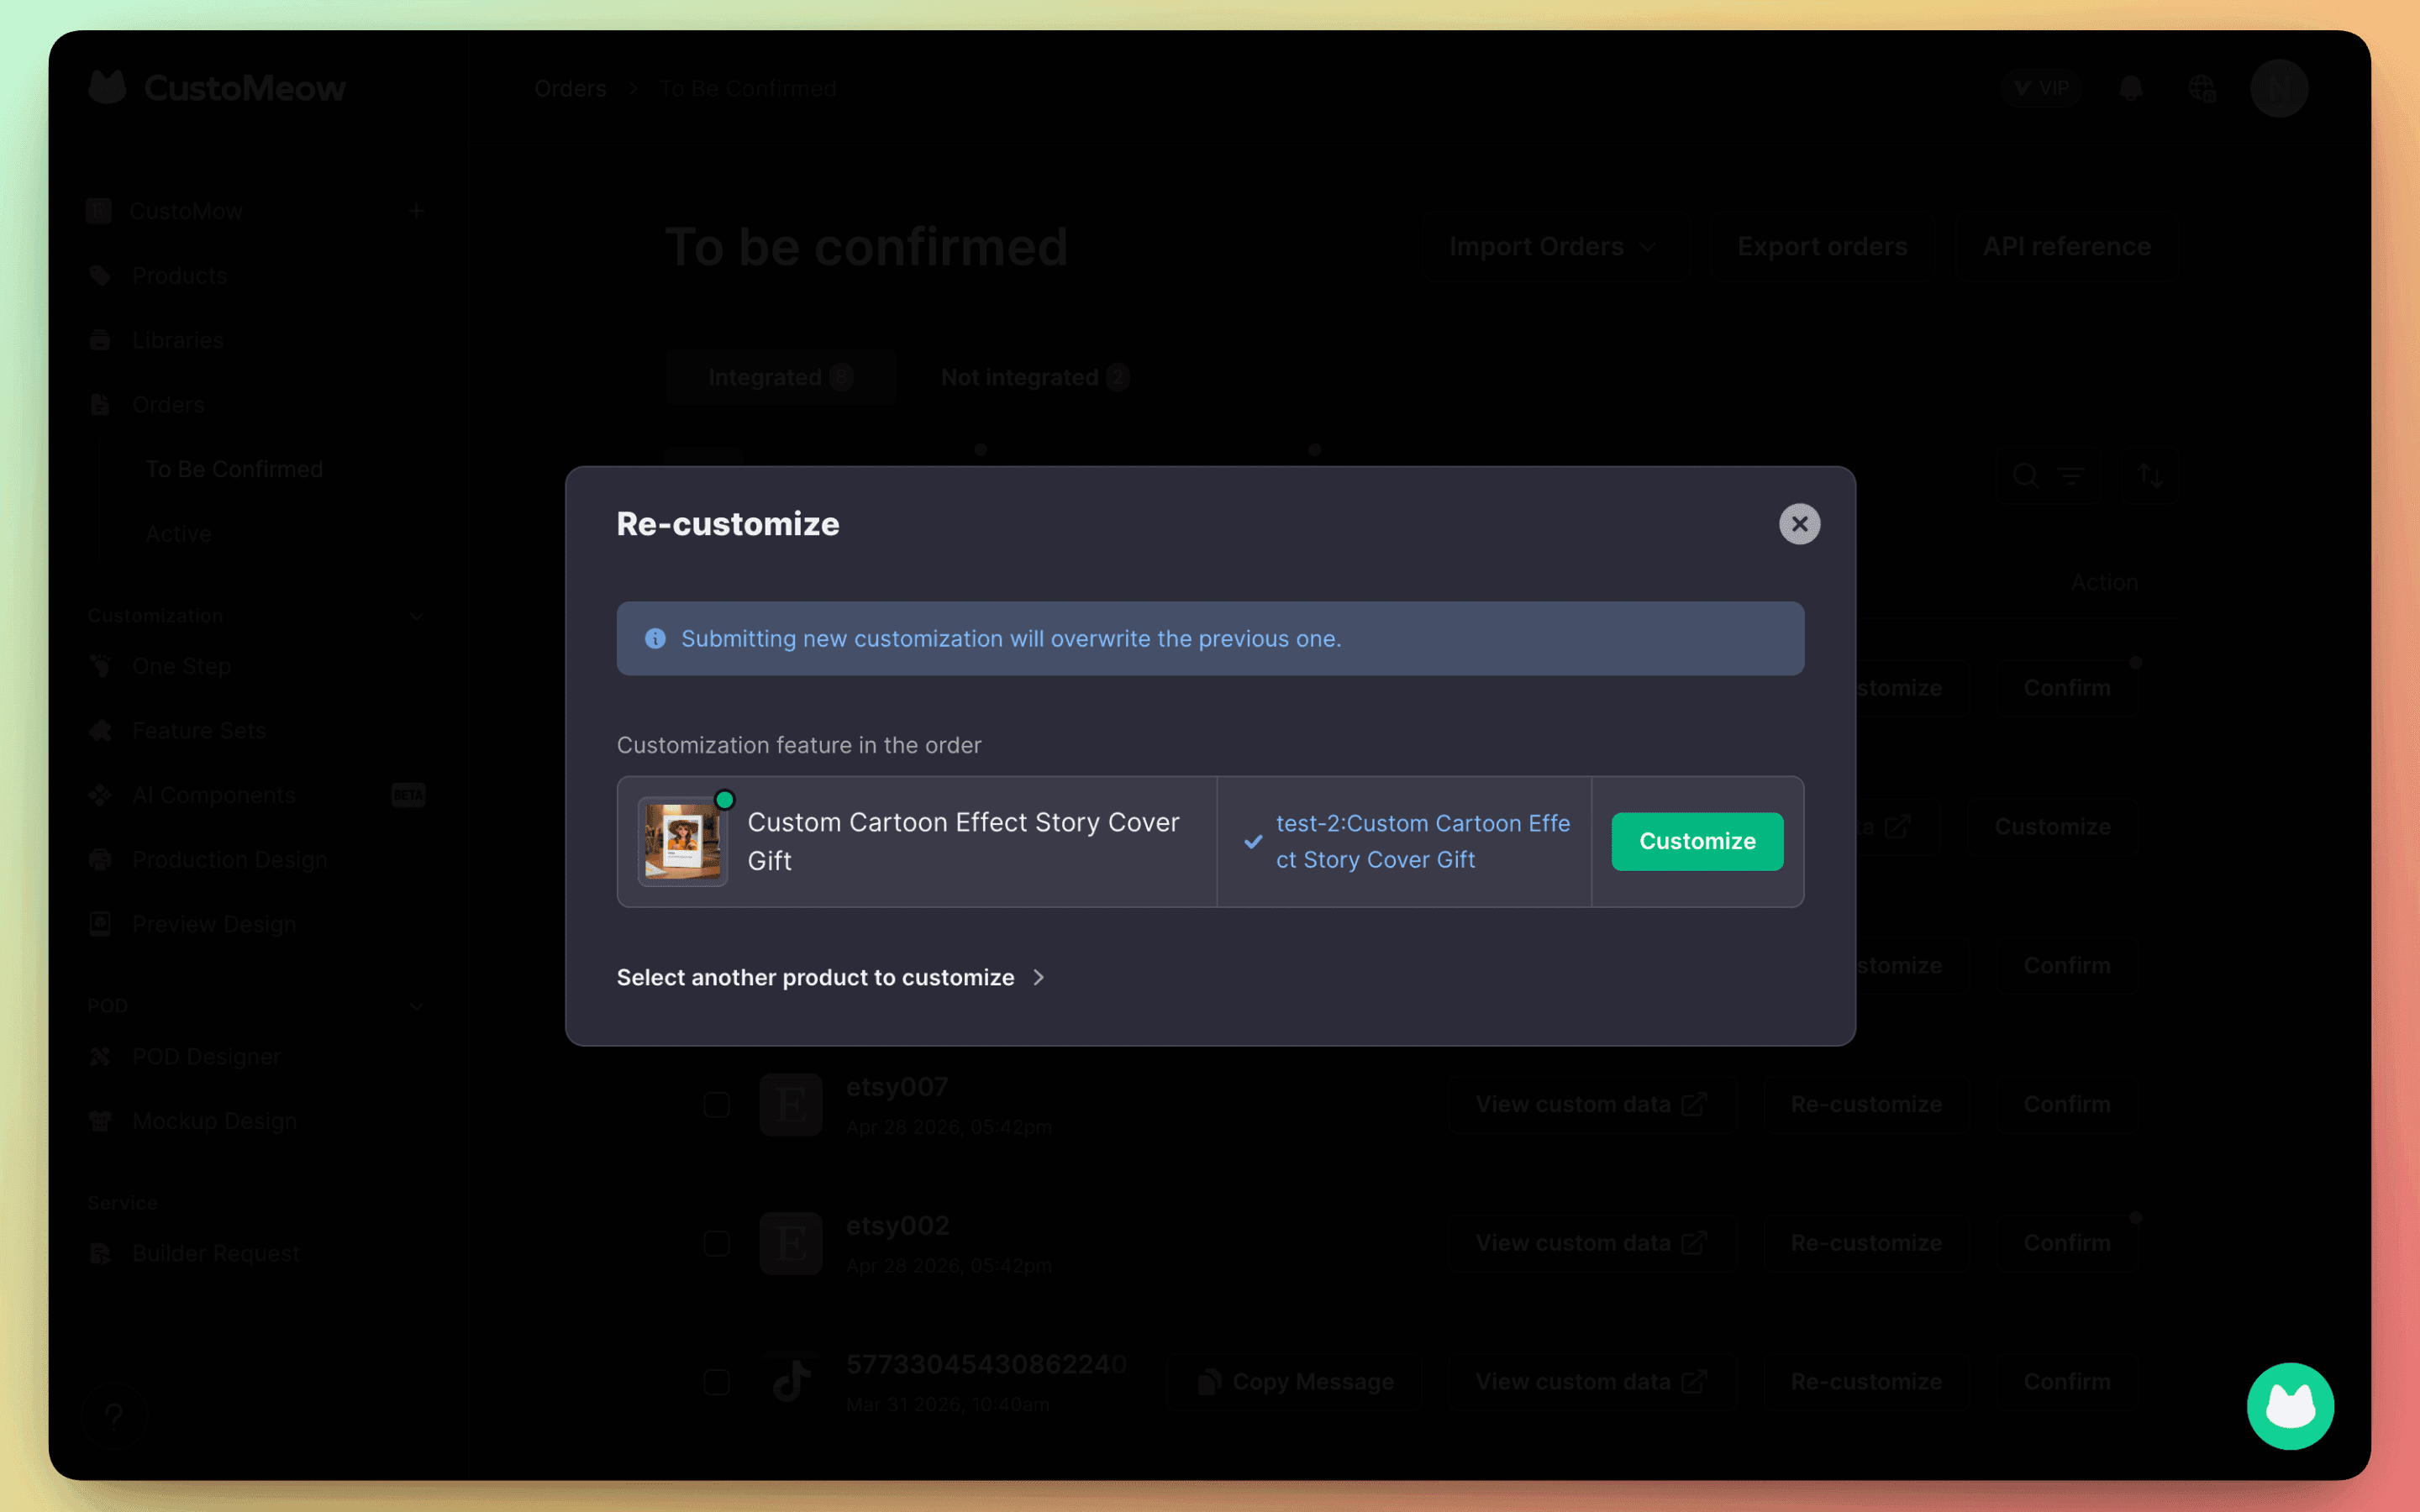
Orders support secondary customization, allowing you to re-customize and replace the original customization content.
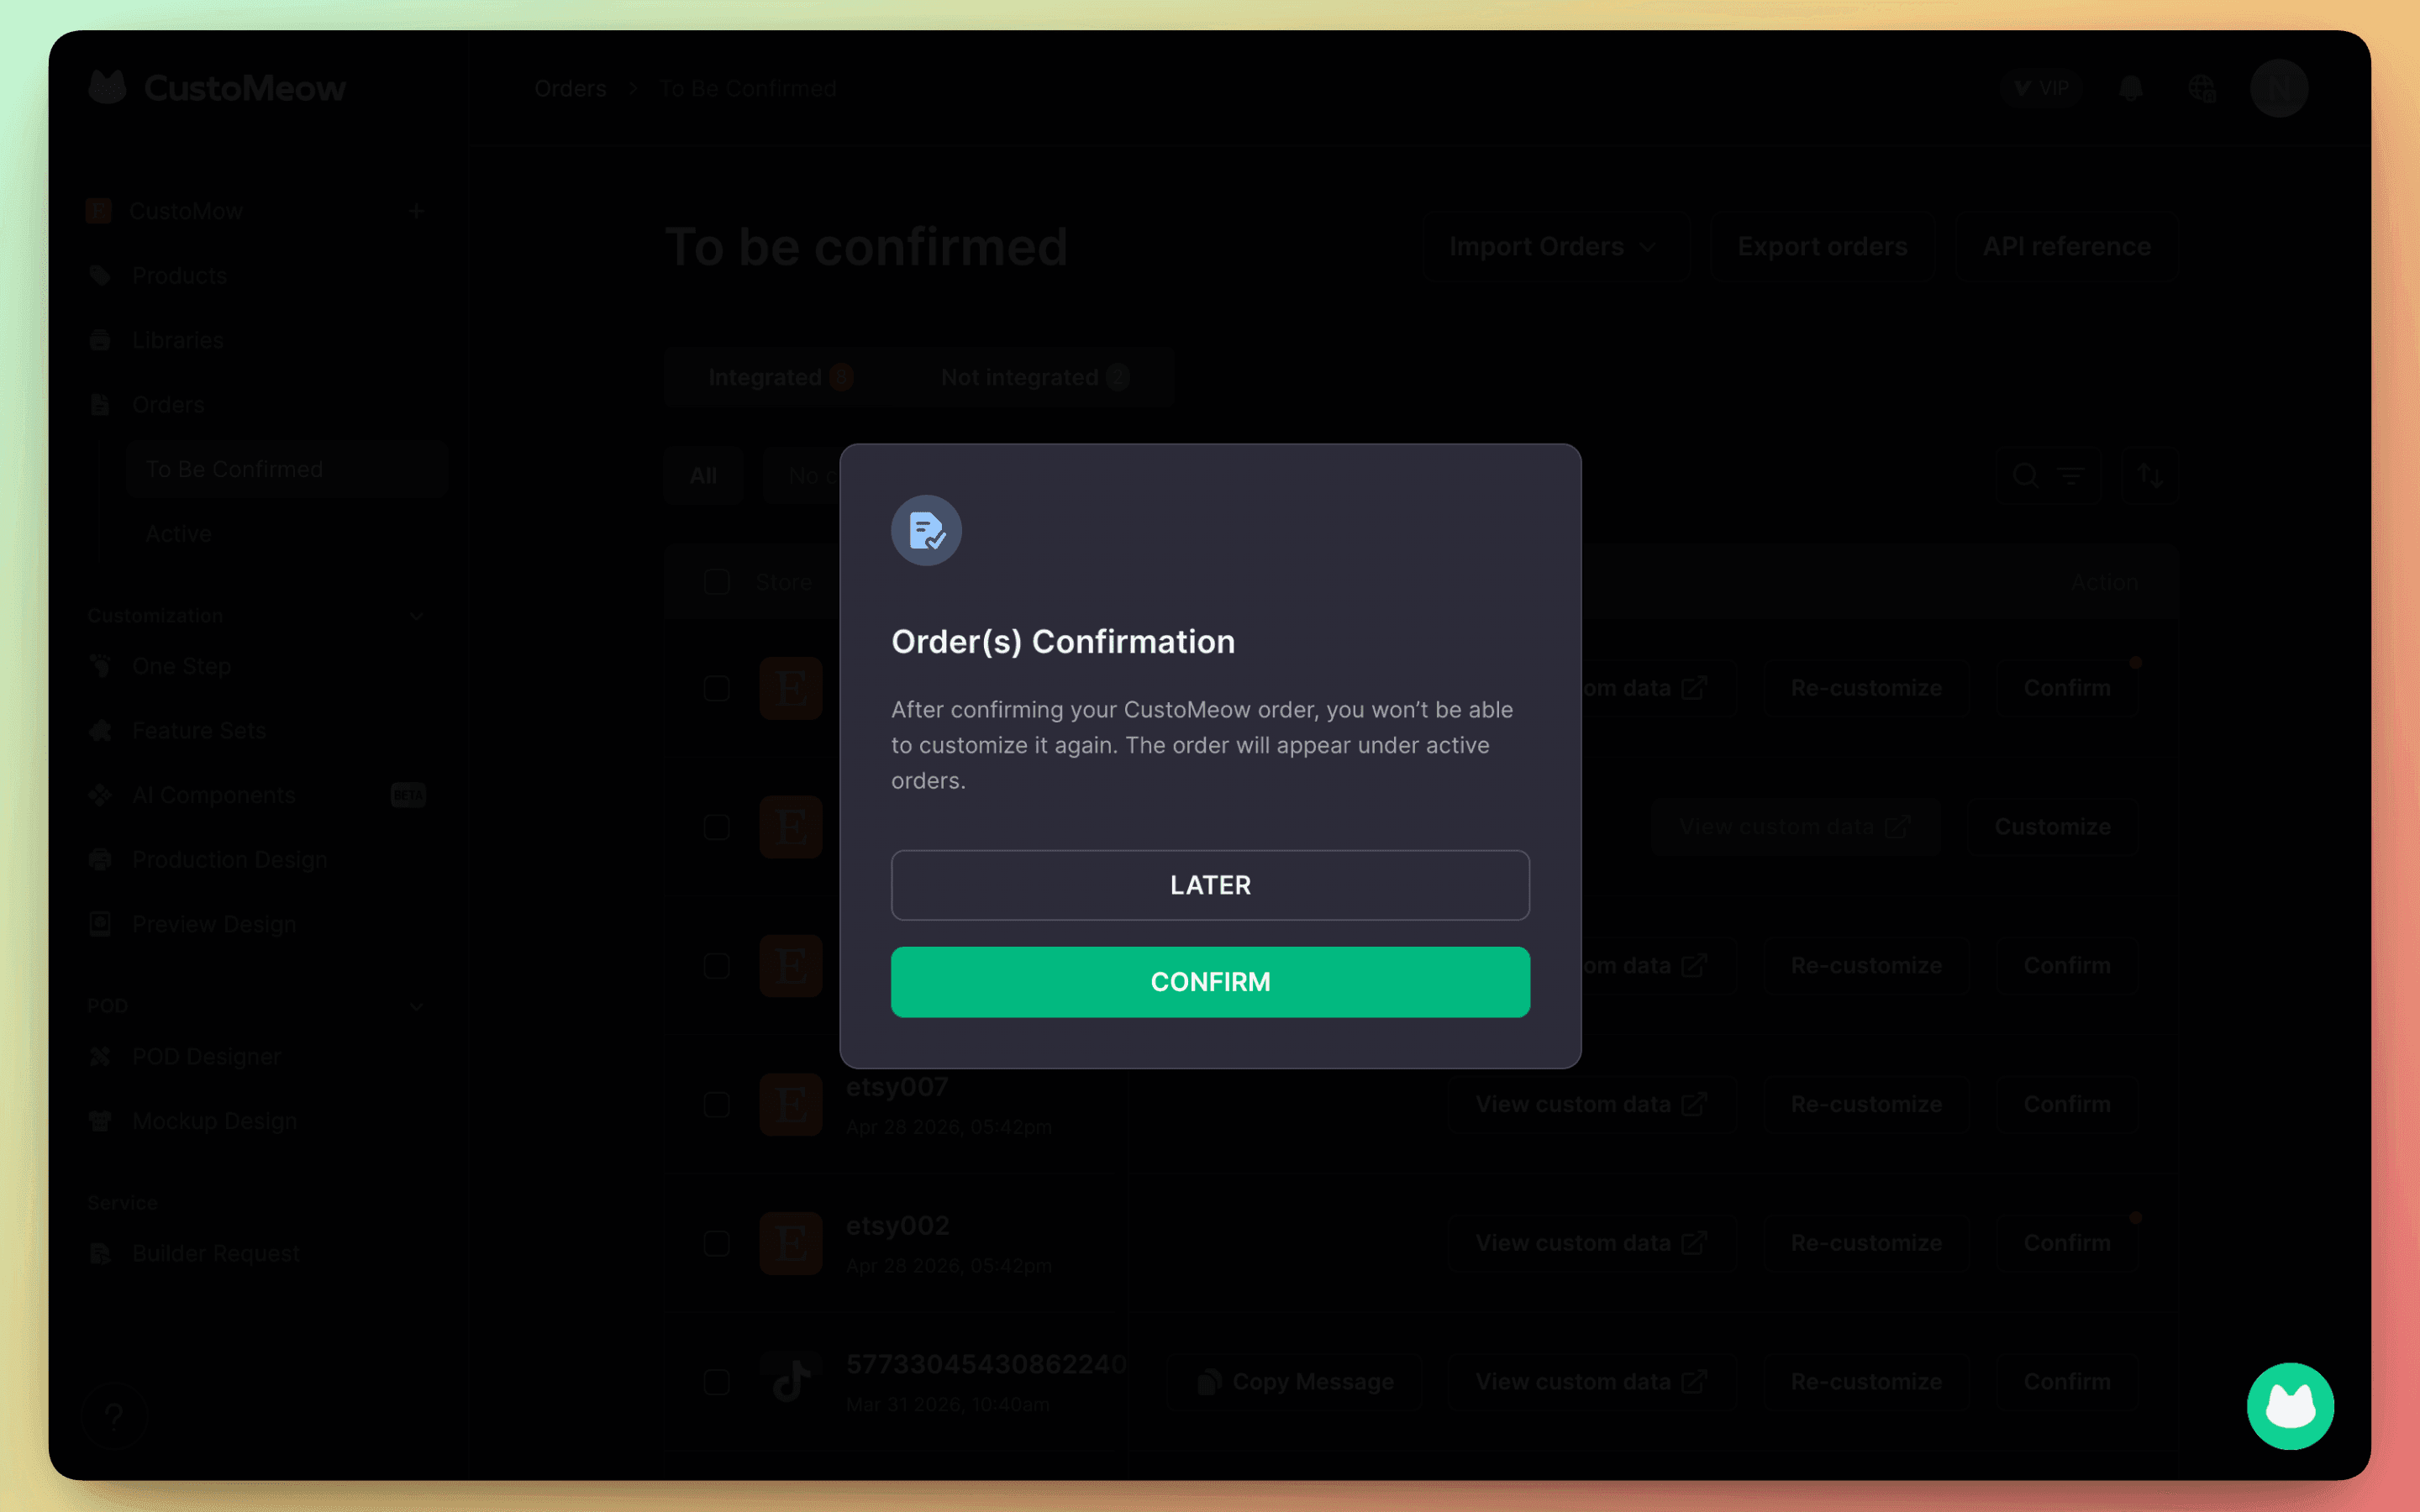
Once the order is confirmed, CustoMeow will automatically generate production-ready image files and support one-click export of all customization data.
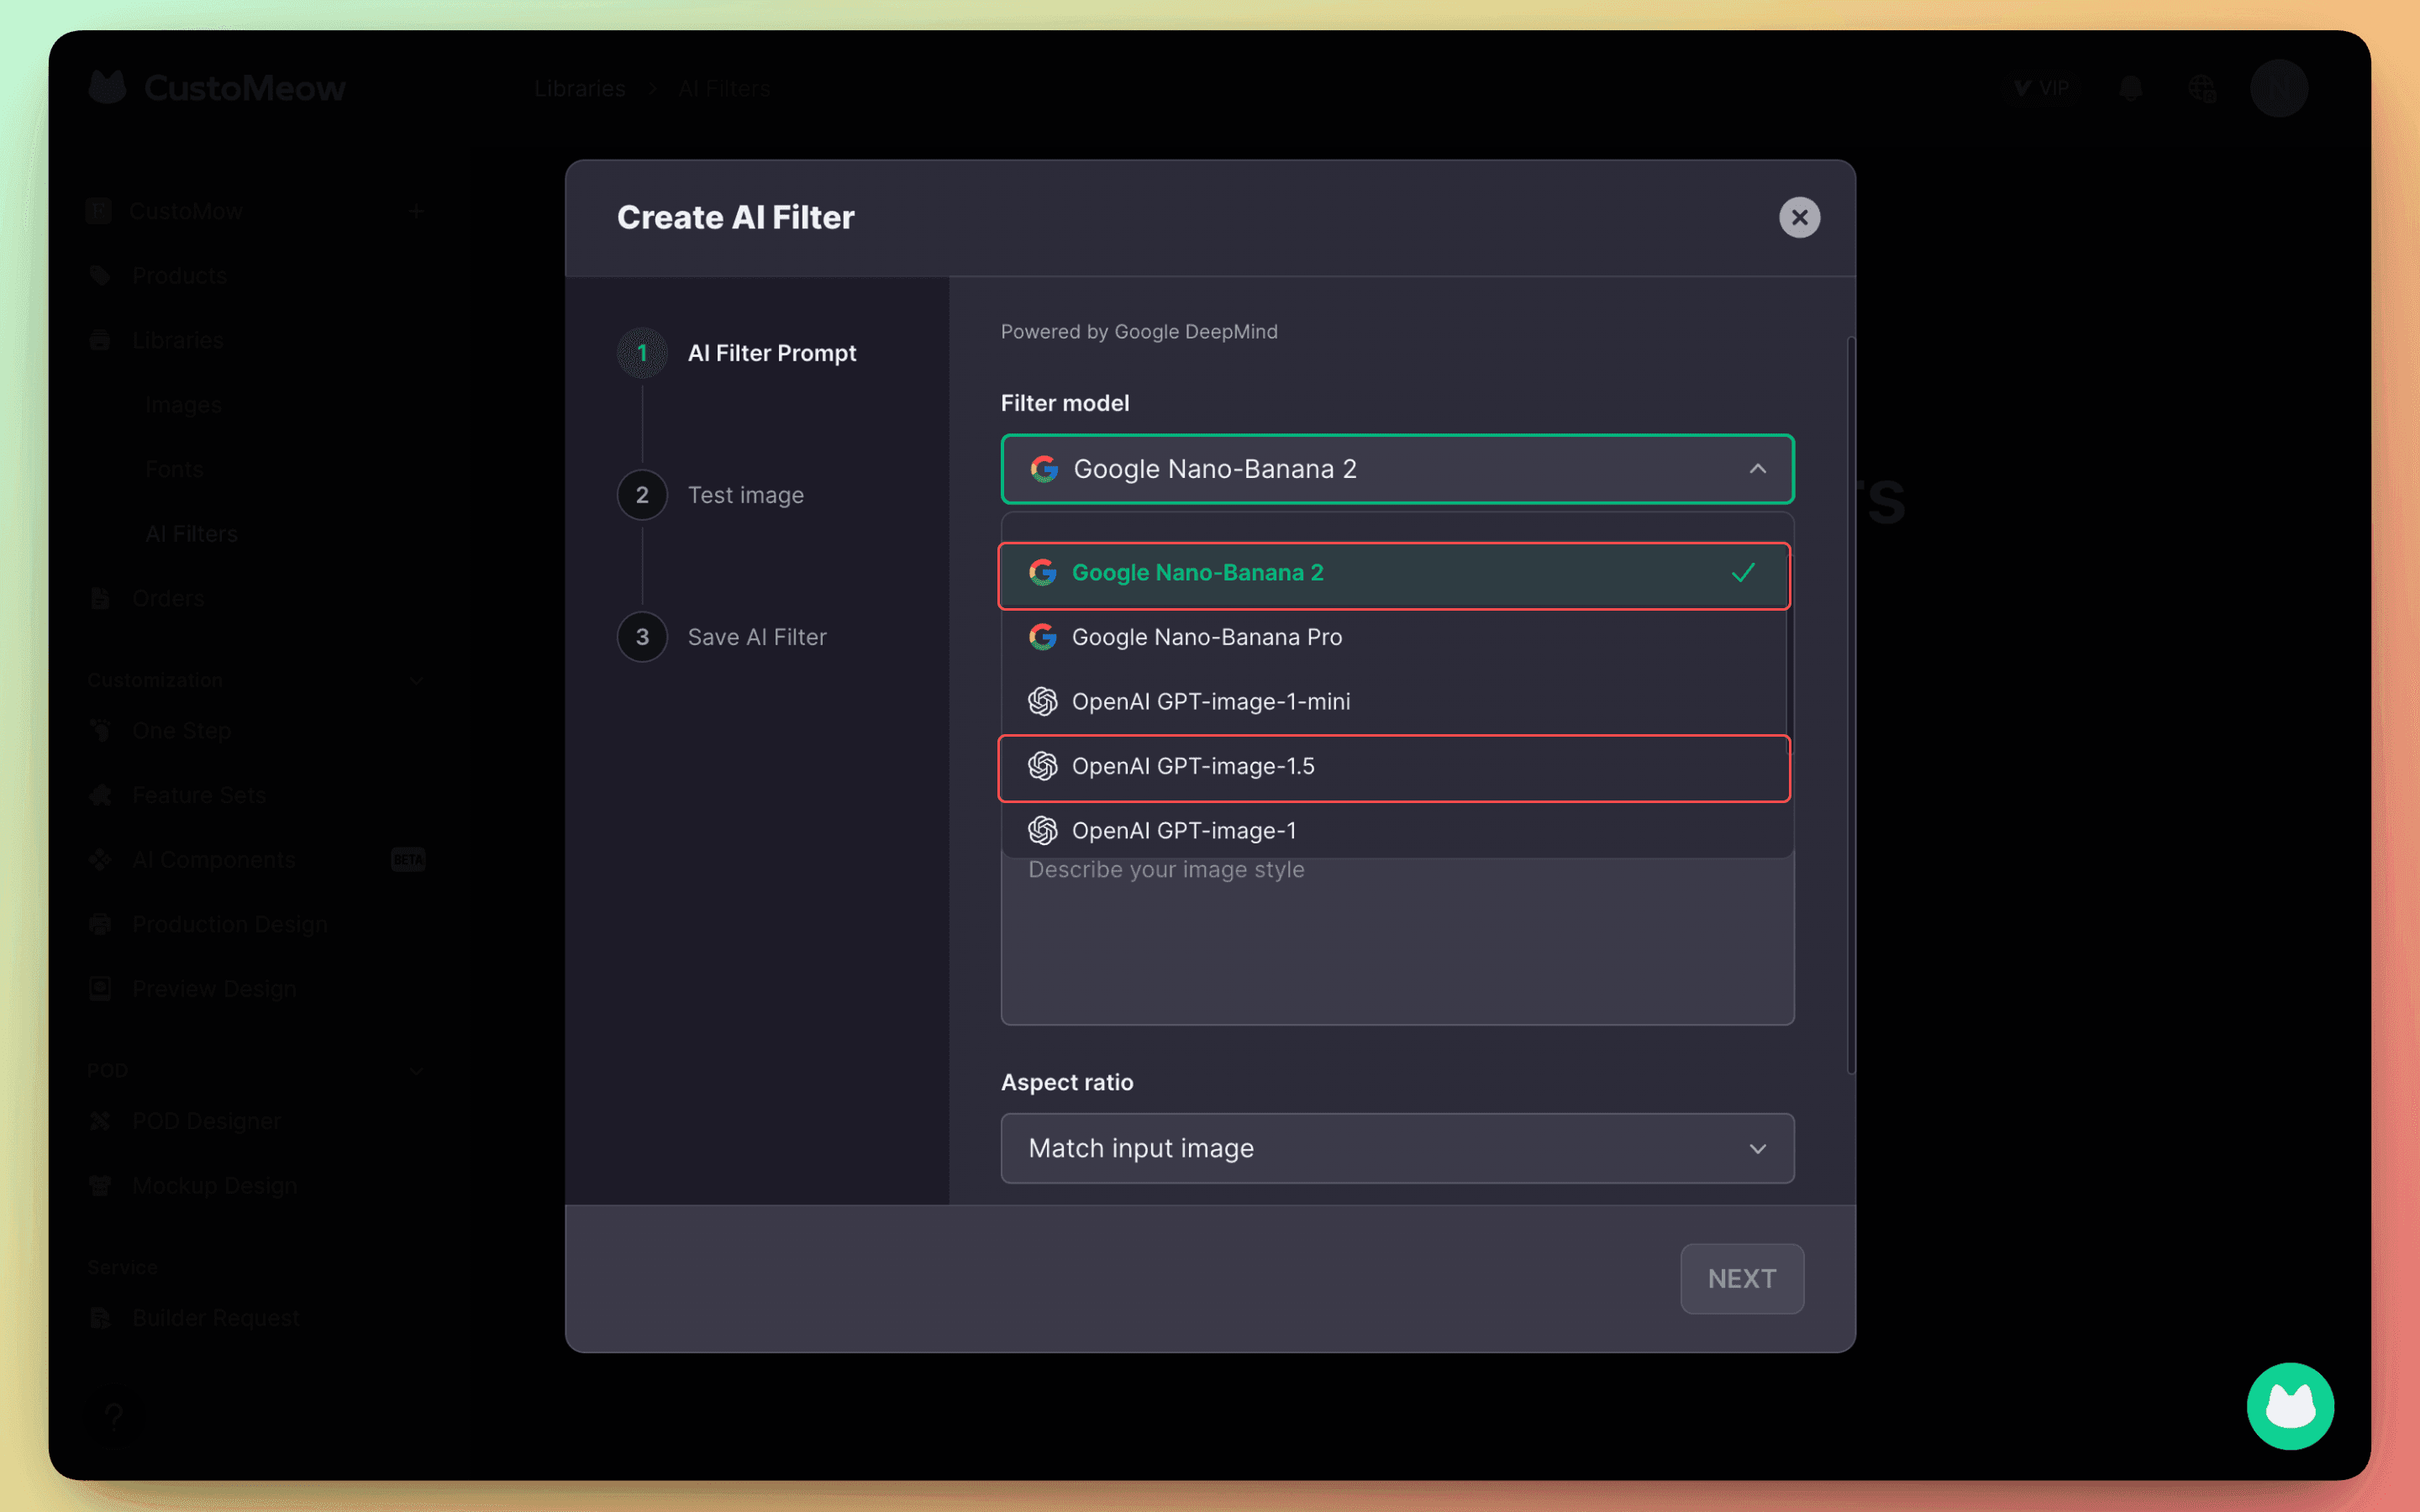
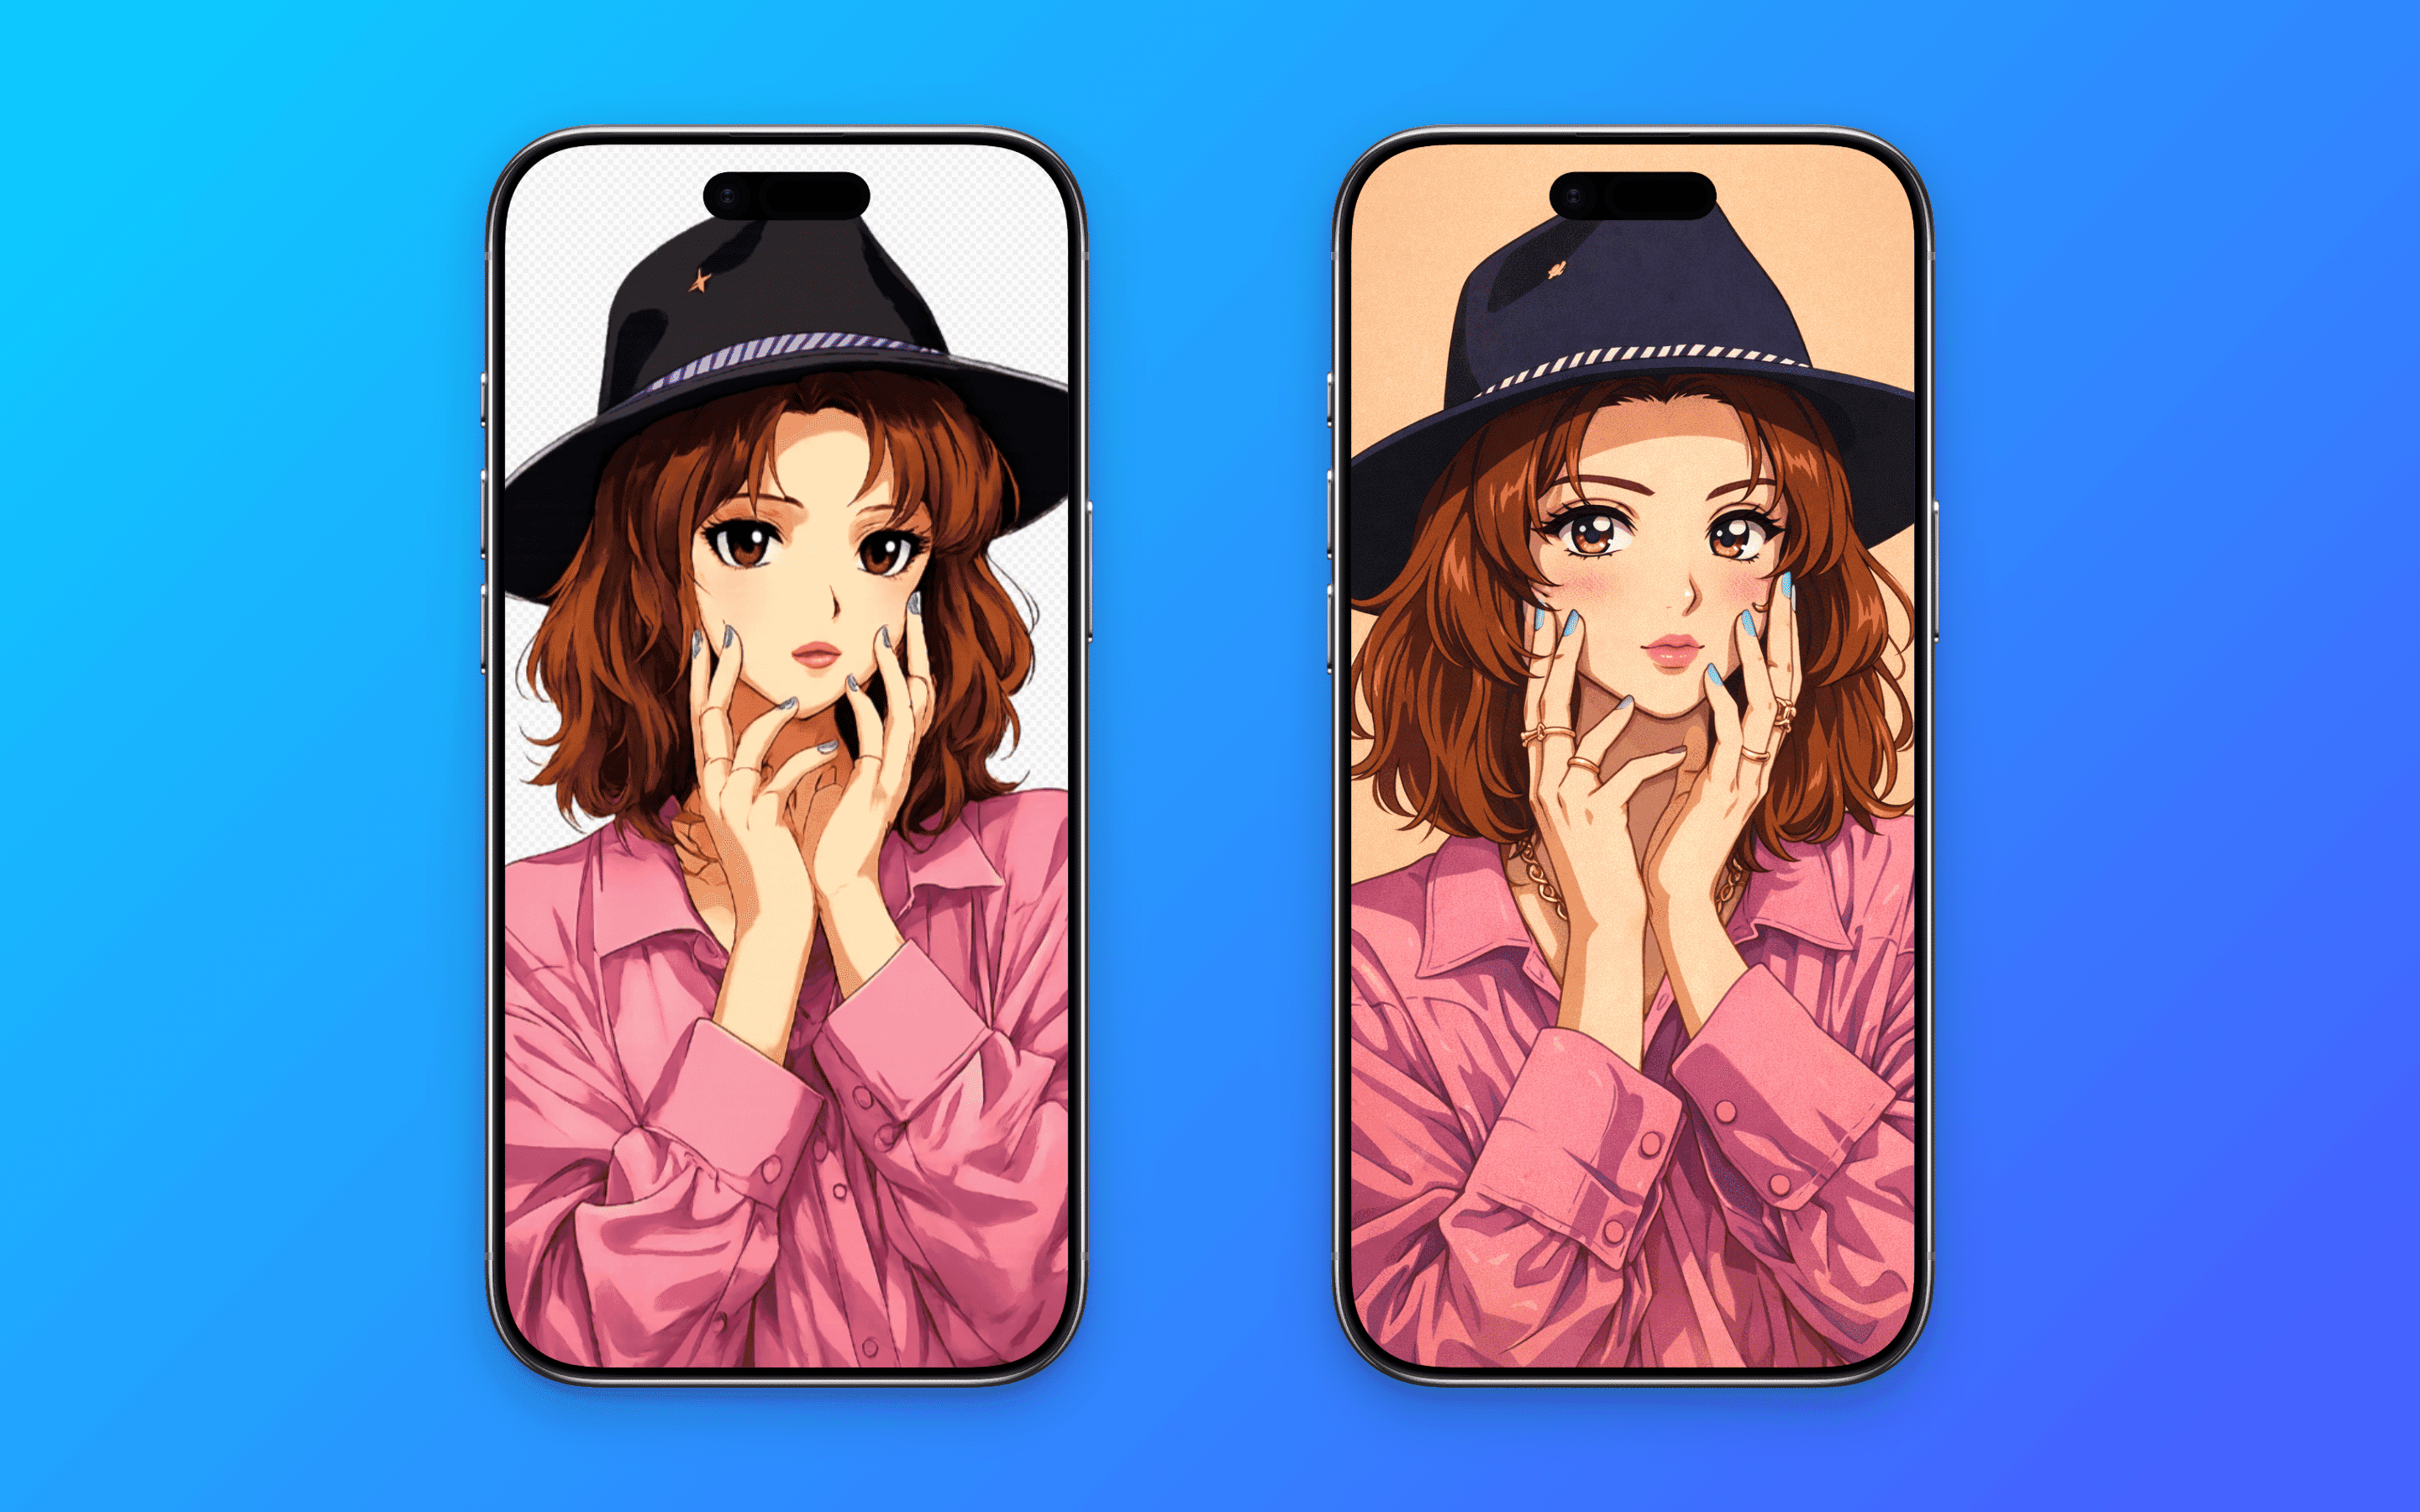
New models added to AI image filters
Nano-Banana 2 and GPT-image-1.5 models added to AI image filters
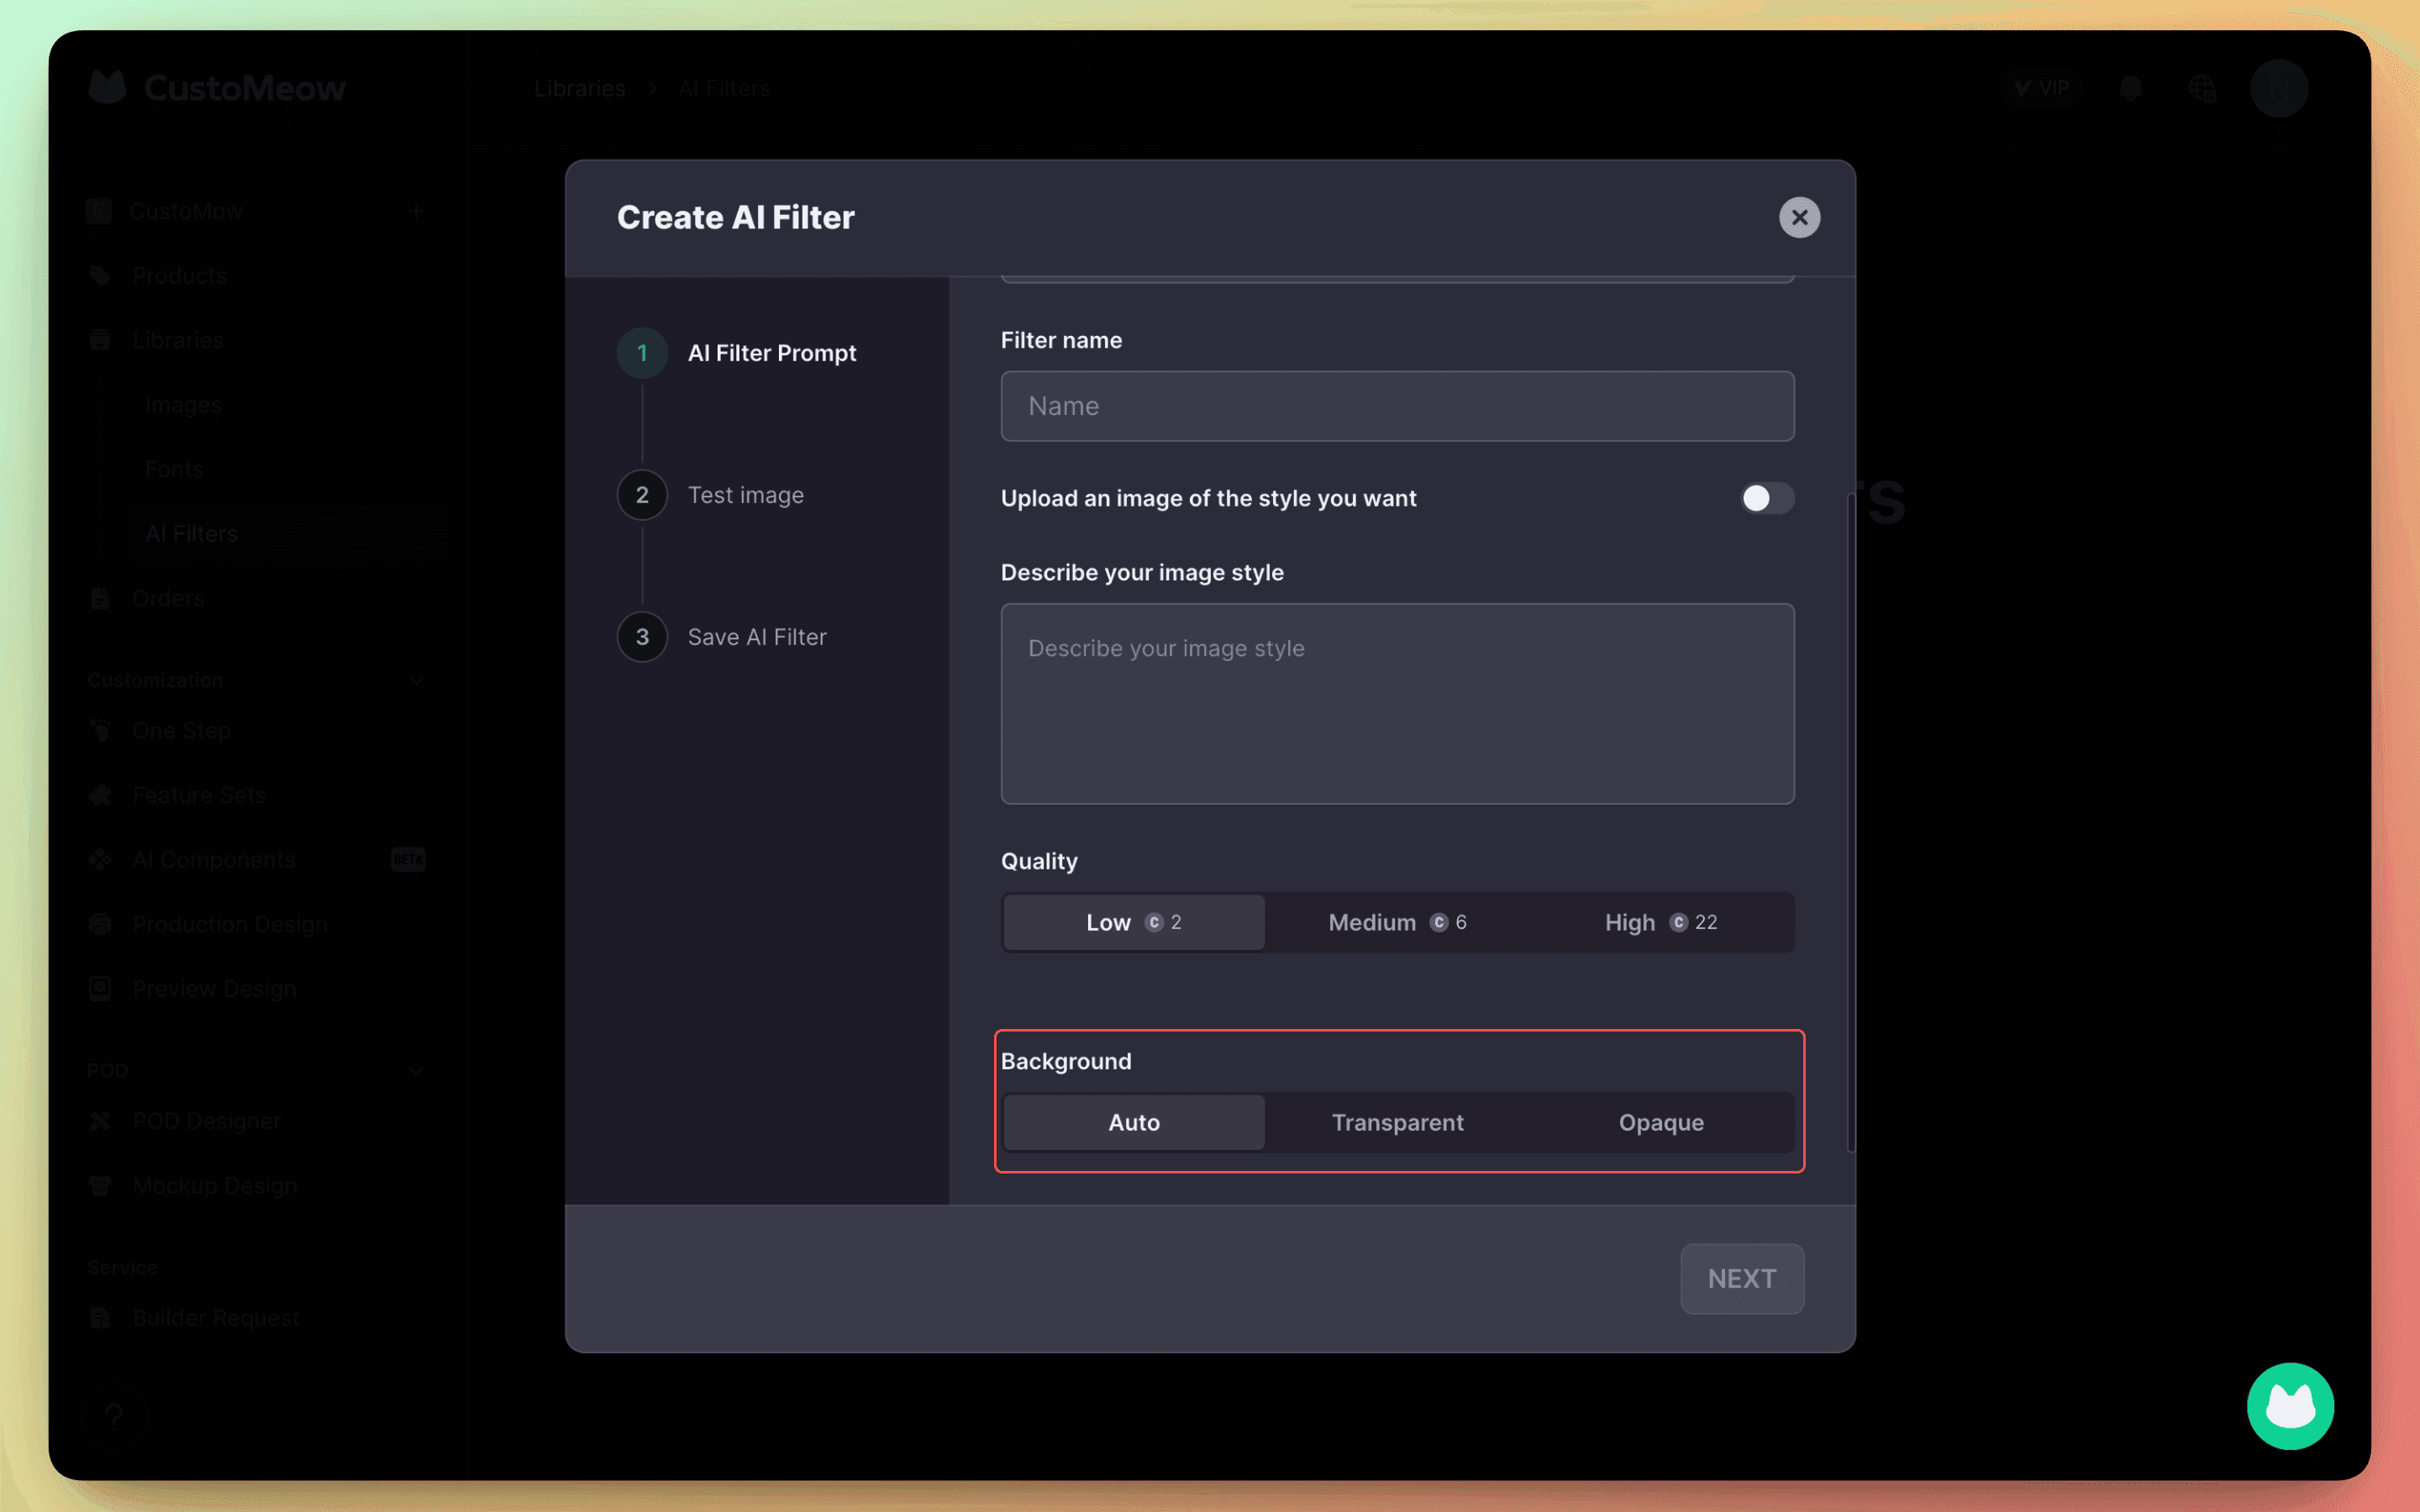
GPT-based filters now support generating images with transparent backgrounds
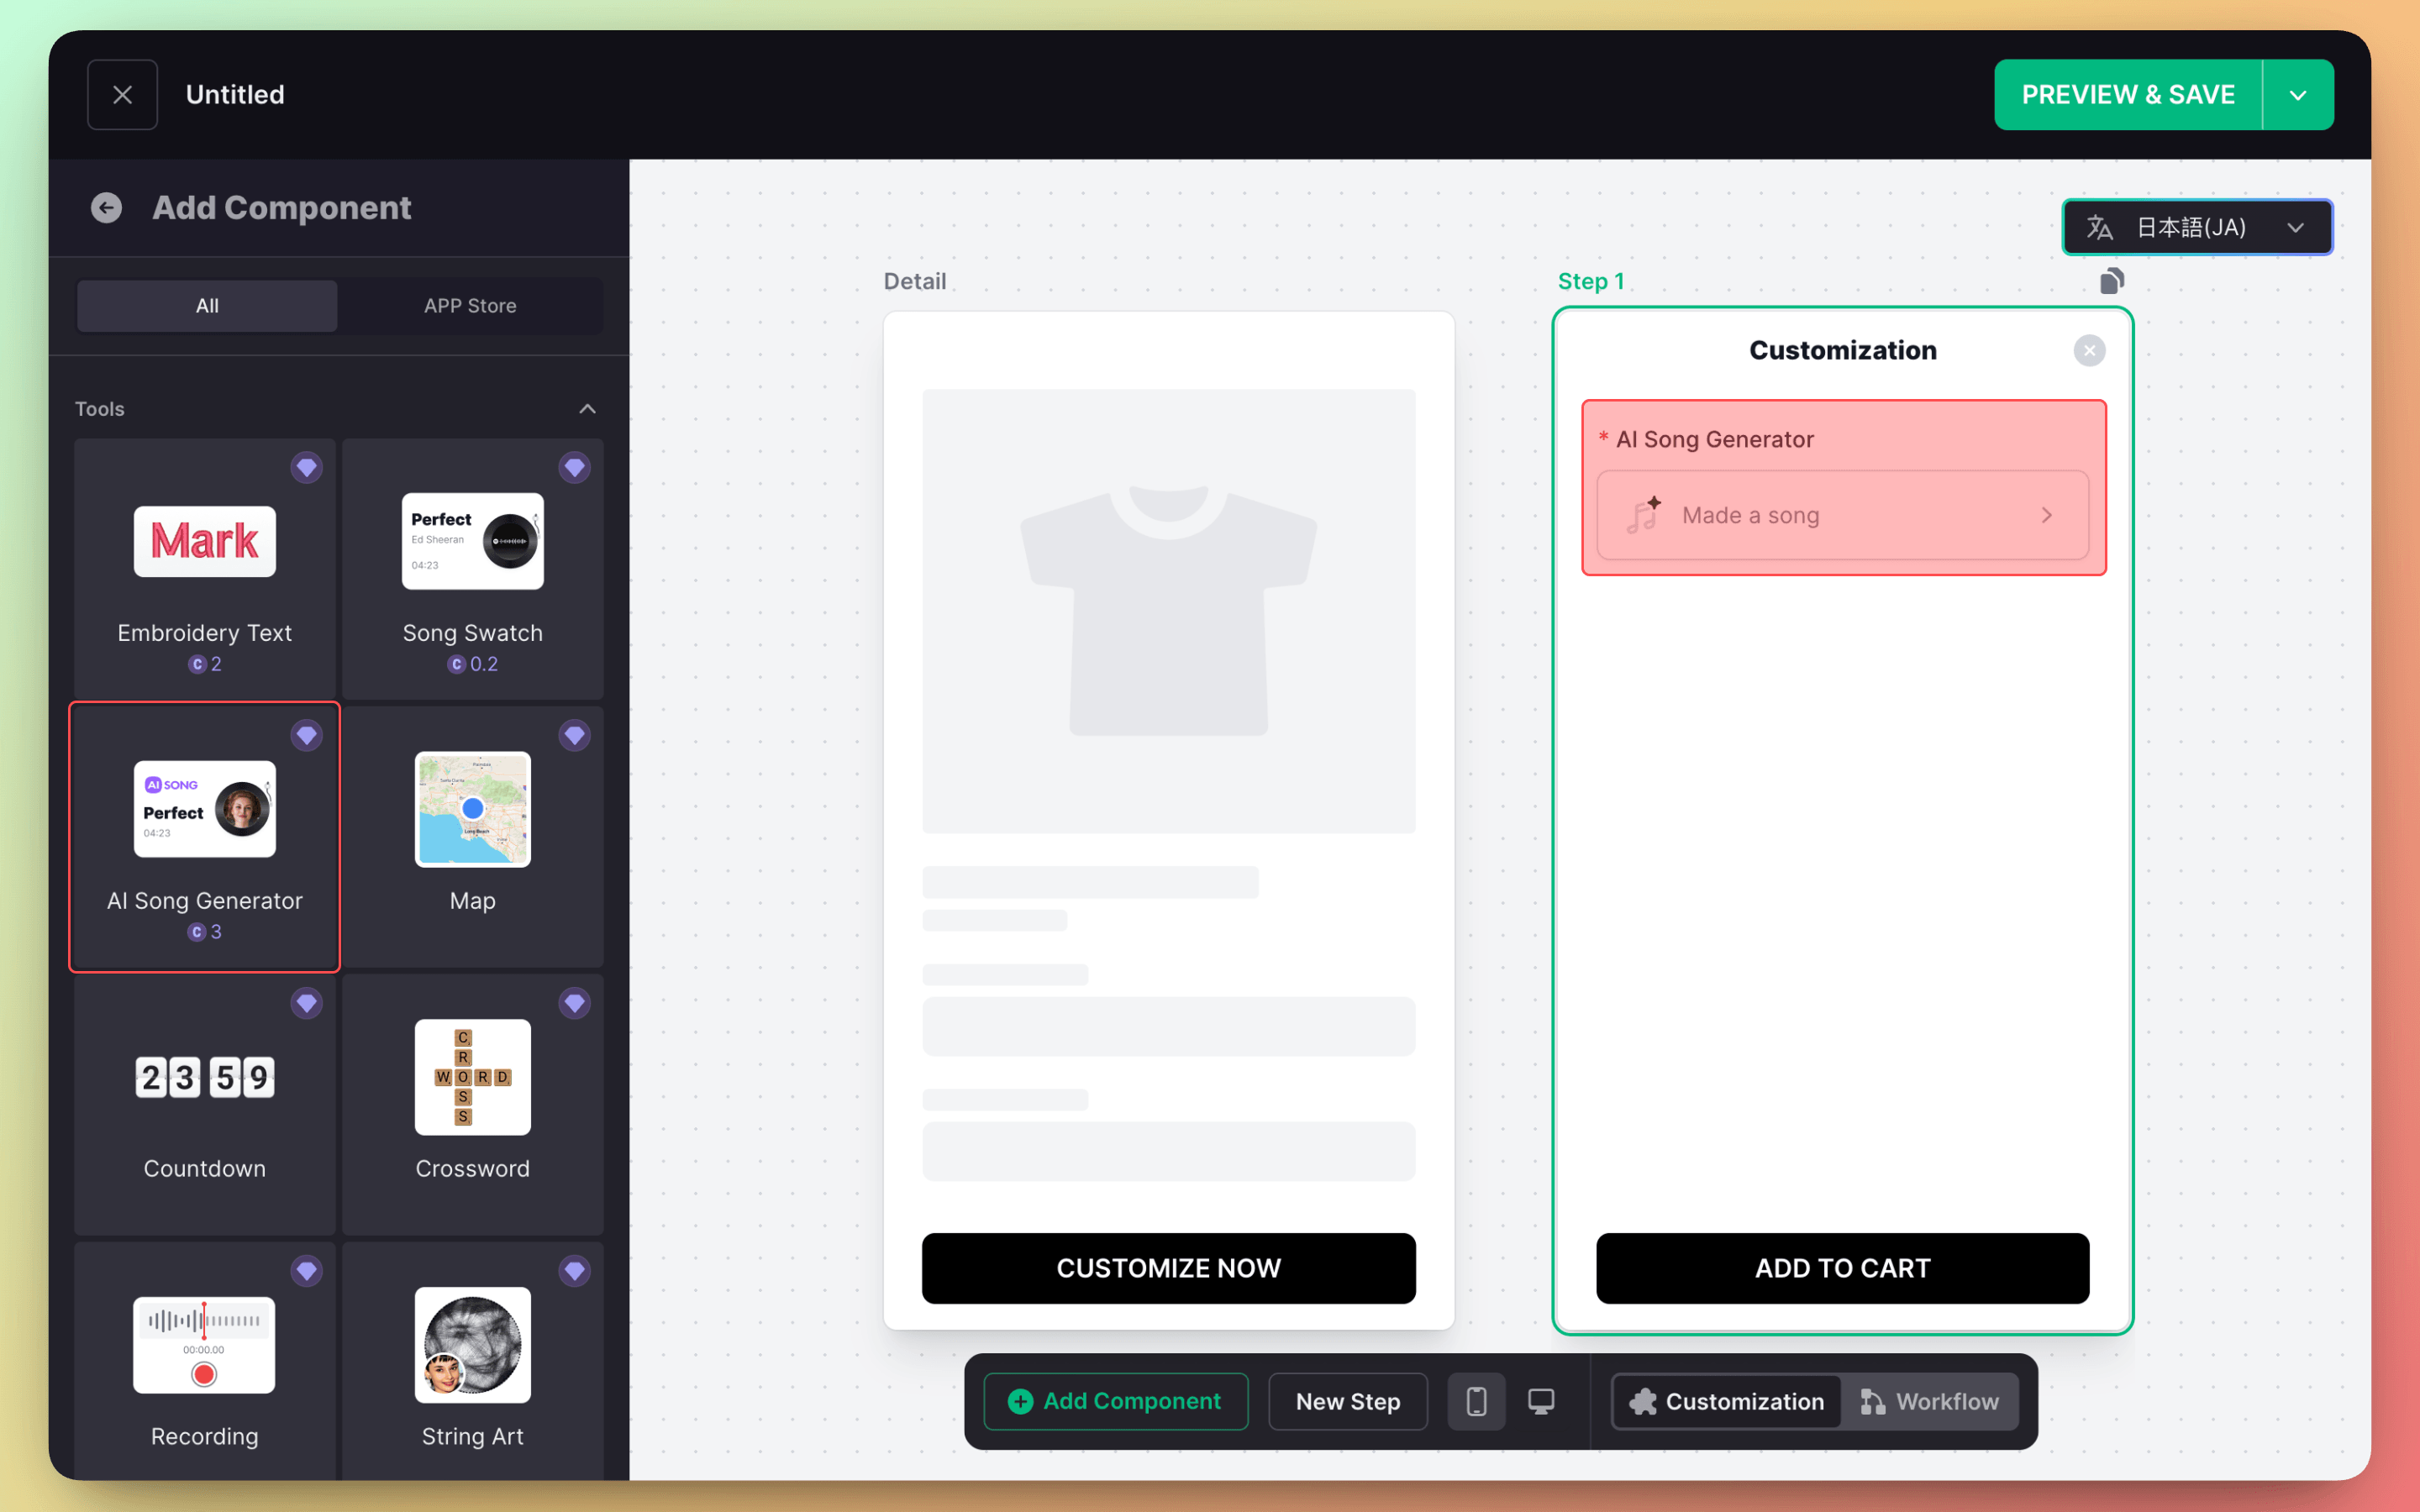
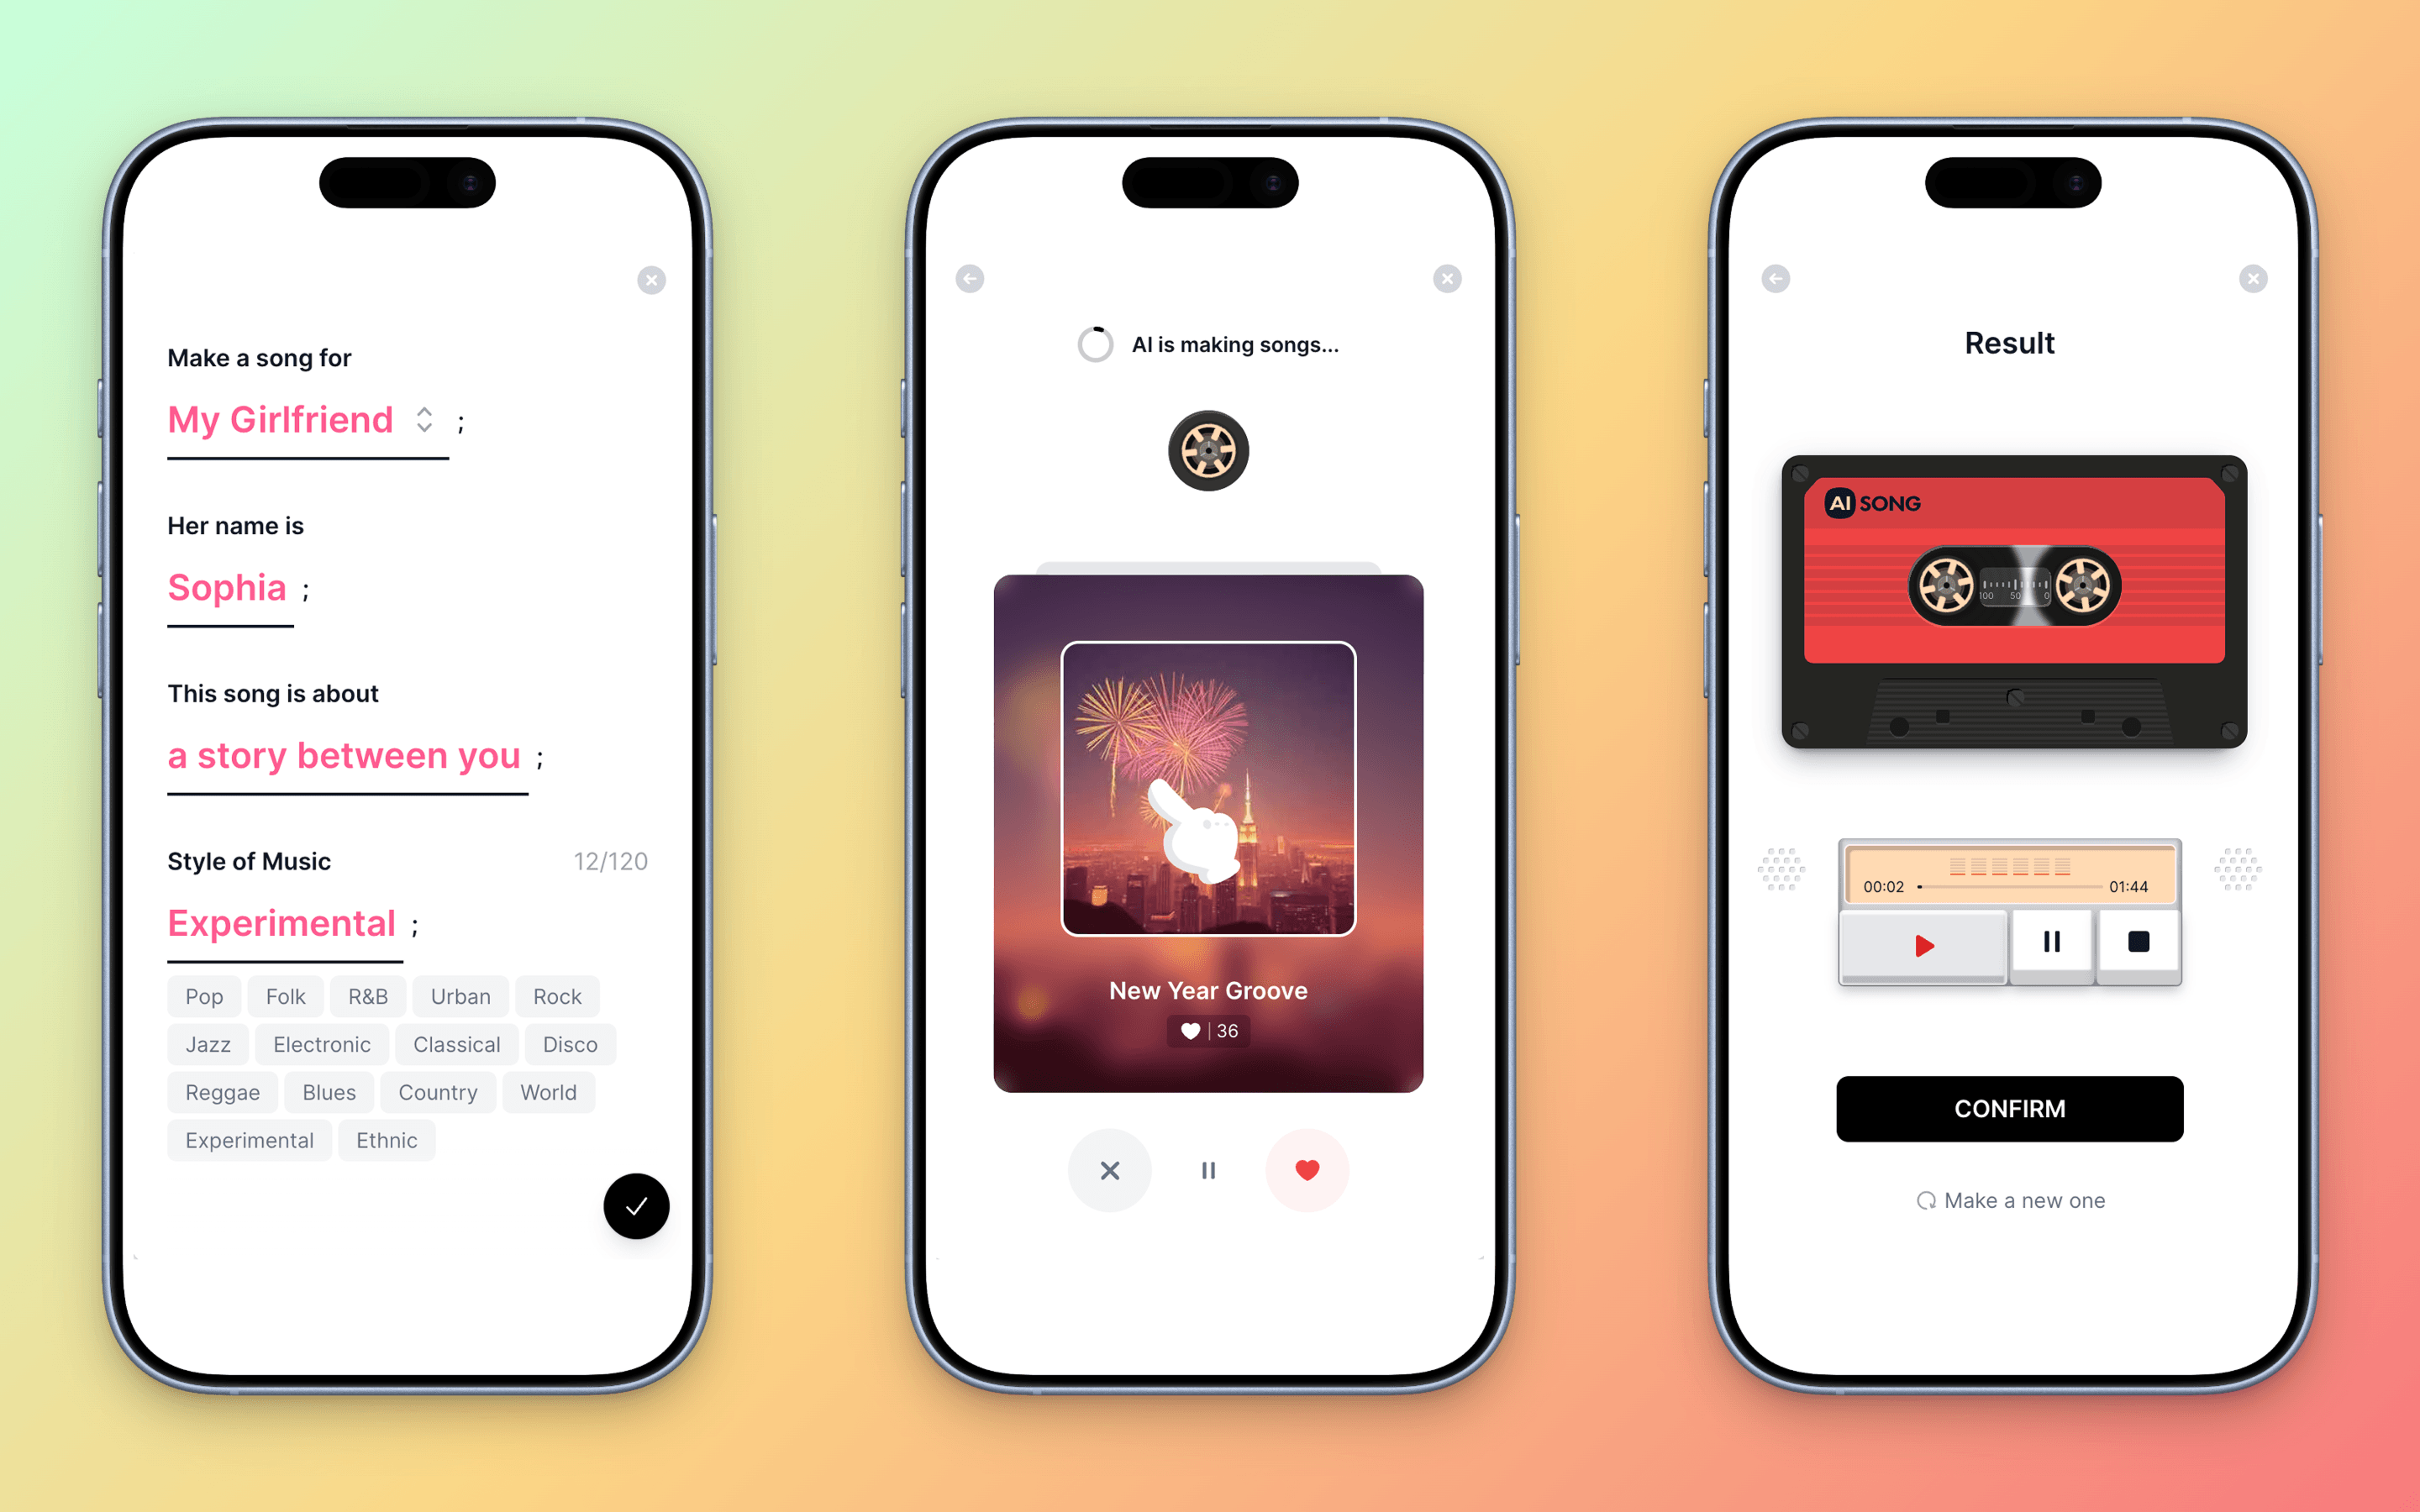
Al Song Generator component is back again
More updates
CustoMeow block now supports Shoplazza 4.0 themes
POD designer now supports PDF file uploads
Due to service provider adjustments, the Song Swatch component is now included in the credit system, with each search costing 0.2 credits